The Galant Center - Powered by vBulletin

Thread: How to Install Aftermarket Radio in 8G with Trim

Page 1 of 2 12 LastLast
Showing results 1 to 20 of 24
  1. #1
    TGC Lifetime Patron oakrdrs187's Avatar
    Join Date
    05-14-2010
    Location
    Coachella, CA
    Posts
    5,954

    How to Install Aftermarket Radio in 8G with Trim

    TGC and I are in no way responsible of any damages that may occur during the modification. You are doing this at your own risk. If you do not feel confident to following the procedure I strongly recommend you don't


    So as most of us have come to find that the radio trim that came with our sweet new radio will just not clip on because the radio bezel and deck position will not allow it.


    One solution that personally I don't like doing is to trim the radio trim ring with a bench grinder or rotary tool to get it to fit. I find this solution to leave the trim ring flimsy and usually one will over-trim the trim ring rendering it useless thus back to square one, it won't stay on. So now you're stuck with an incomplete look and a gap either on the top or bottom that you just can't stand. I feel it isn't fair I can't use my trim ring and other cars can.

    Another solution some came up with was to ditch the stock ISO mounting radio brackets and use the sleeve the new deck came with to mount the radio with the trim ring. While this option will work for you to use your trim ring and all you have to do is sand the edges of the radio bezel to get the cage to fit, you are left with on very small, almost tiny little issue....YOUR RADIO IS NOW SO EASY TO STEAL A 3RD GRADER COULD DO IT! Since you didn't use the stock brackets the radio never got screwed down with the hidden screw in the back so now it takes 10 seconds to yank off the radio bezel with your radio attached to it and leave. Wouldn't it be awesome to ISO mount and have a trim ring that snaps on all 4 of it's clips?!


    My Friends, I have come up with a solution that is easy enough to do by anyone, even if you got your radio installed at a shop and you have no knowledge of wiring radios on your own.

    Tools needed:
    Drill
    Drill bit assortment
    Philips screwdriver
    Radio Trim Ring (Yea go look for it)

    You are gonna want to begin by removing your radio bezel, usually you can just pull on it by gripping the pocket, if you can't you can pry it off.
    Remove the (4) Philips screws holding up your HVAC controls.
    Lower the controls out of the way.


    Remove the single Philips screw securing your radio to your dash, it's beneath the radio, in the back on the left side.


    Gently lift the radio up from where it's wedged to clear the plastic tabs and simply pull it towards you.


    Unplug the radio harness, antenna and any RCA's delivering signal to your amp. (In my neighbors case, he only had the radio harness and antenna. I did his installation today and figured I would document with his since my cars are already done. I hardwired into his stock harness saving him a few bucks on an install harness.)


    Now remove the radio from the car and take it to your bench or work area. (The pliers drawer of my 6ft. tool box)


    Remove the screws holding the bracket to the radio.


    As you can see, these are the holes that line up to mount the radio. They are the threaded holes.


    What were gonna do is space out the radio enough to allow you use the radio trim. We are gonna do this by moving the bracket back a little. Here I have marked where your new mounting points are.


    As you can see, we will be using this hole here that lines up with the first hole of the radio bracket. The threaded hole that we originally used is behind the 2nd dimple on the radio bracket.


    So break out your drill and bit. (All I had available was a step bit or unibit, I went as far as the 1/4" mark.


    Beginning with the 2nd threaded hole on the radio, mount the bracket with a threaded type screw through your newly drilled hole. For the first non-threaded hole, you are gonna want to go with a coarse screw (silver one with round head), as in not threaded so finely. (The gold ones are the stock mitsu screws). You radio, if bought new would have came with a bag of screws that would match the silver ones in the following photos. Only use a fine threaded screw were the the radio has thread openings. (Silver screw with flattened head.)


    Run the screw through the leftover hole. As long as the screw is no longer than the ones I have picture you will be fine. Please do not use screws longer than my examples as you may cause damage to the internal components of your radio. Use common sense when doing this, and inspect your radio to make sure it will clear and not touch anything, Usually it won't.


    Now re-peat for the bracket on the opposite side.

    Now reconnect your radio harness, antenna and any RCA's you may have. and slide the radio back into place, Don't forget to ground the radio and don't forget the security screw way in the back, I usually ground to it so I don't forget it. mount your hvac controls and re-install the radio bezel.


    You will notice the radio sticks out about a centimeter or so more than it once did, this is what will enable you to snap on the trim ring with out modifying it and it will snap on with no problem on all four corners.


    Here's what it looks like with the trim on, The only downside to this is, since the radio sticks out more, you can see some of the radios body on the side. I really don't mind it, and rather have my trim ring than to hide that centimeter of exposed radio if you will.


    View from the drivers seat.


    Admins and Mods, I tried to sticky this into 8G Tech and knowledge base but the link to create a new thread opened only to say I didn't have permission to do so.
    Last edited by oakrdrs187; 02-29-2012 at 04:18 PM

  2. #2
    TGC Lifetime Patron oakrdrs187's Avatar
    Join Date
    05-14-2010
    Location
    Coachella, CA
    Posts
    5,954
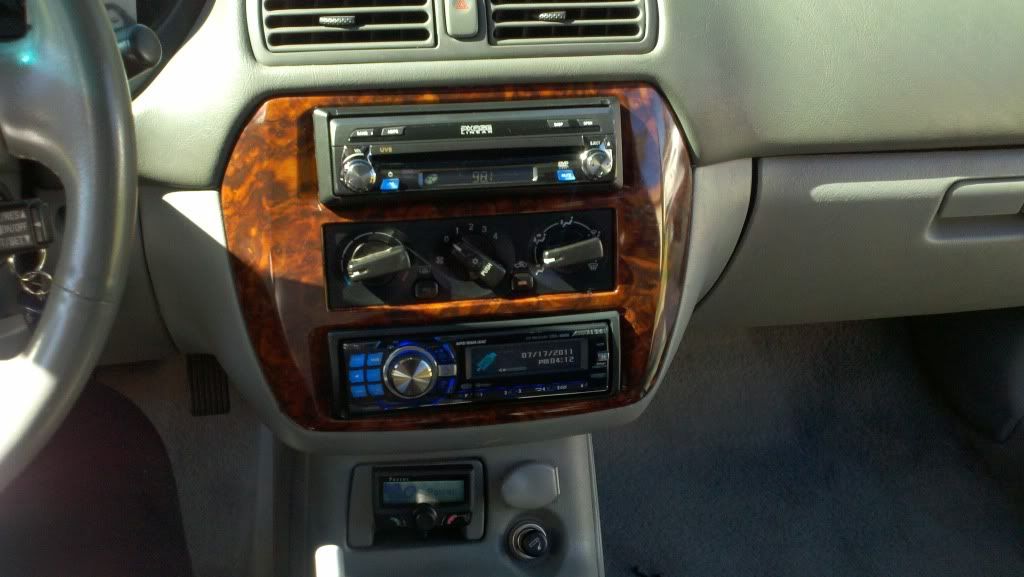
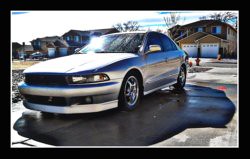
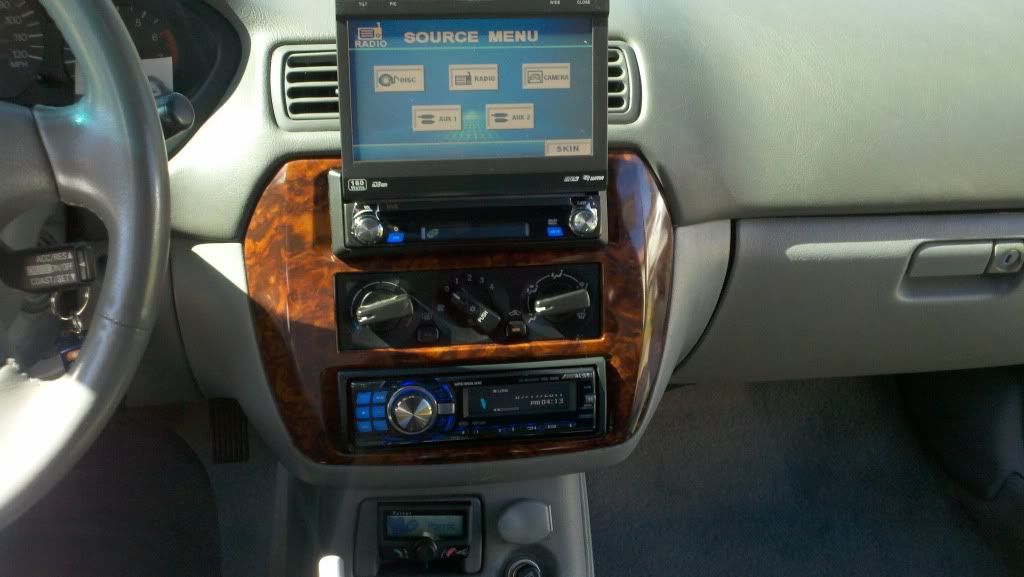
    Here's some pictures of my G's.


    The other G. This works on flip out screens too!
    The Alpine deck on the bottom was mounted with the sleeve so, I worry. But the car has a 2 way alarm, We always removed the faceplate, the car is always with in range of the remote and we have security at our gated apartments. Plus tinted windows, what get tempted to take what you can't see. But still I keep my keys close to me in case it the alarm gets triggered.


    Last edited by oakrdrs187; 03-02-2012 at 03:17 AM

  3. #3
    interesting. i decided to live with the small gaps on mine.
    but theoretically this could be done by moving the radio in a little bit and having the bezel inside the trim right? or will it not go in anymore? i remember mine was pretty tight with rca's coming out the back.

  4. #4
    Experienced TGC Member
    Join Date
    05-25-2006
    Location
    New York City
    Posts
    1,028
    you could actually get it flush by moving the radio back some more on the bracket and trimming the inside of the factory radio bezzle to add clearance for the face plate frame. I used a angle grinder with a 2 inch scotch brite disk to trim the back till it fit flush on the radio.
    ASE Certified Master Automotive Tech
    2000 Galant ES = Daily Driver
    1996 Galant Turbo + 5 speed & lsd = fun ****SOLD****
    1992 Galant VR-4 #372/1000 Kensington Grey ***SOLD***

  5. #5
    I just elongated the holes in the brackets with a dremel to be able to slide the radio out the perfect amount, then tightening the screws. It allows for future adjustment as well if you ever change HU's.
    '99 5-Speed GTZ: Forged 3.6L 6G74T 6764 E85
    2017: 552whp/562wtq SBE on 19psi
    '02 Eclipse GT: 6G72 M/T-swapped Daily Driver
    '10 Endeavor: 6G75 AWD Family-mobile

  6. #6
    Senior TGC Member mrg7243's Avatar
    Join Date
    11-29-2009
    Location
    Chadds Ford, PA
    Posts
    2,768
    I messed up my trim ring since I have my ipod usb port in the front so mine does a loop and goes back into the dash. I dont use a trim ring and it is not hugely noticeable on my car

  7. #7
    1: This is exactly how I did my 7G
    2: I love the way this was written
    3: If your deck is just screwed into the bezel
    PLEASE TAKE THIS TUTORIAL AND REINSTALL
    YOUR UNIT IT'S BETTER LOOKING AND FAR
    MORE SECURE

    BIG UPS ON THE WRITING
    Shout out to anyone that still uses hand tools for their work
    With elbow grease for power and determination for a battery

    Maybe your broke maybe your old school

    Me I'm a lil of both

  8. #8
    TGC Lifetime Patron oakrdrs187's Avatar
    Join Date
    05-14-2010
    Location
    Coachella, CA
    Posts
    5,954
    Quote Originally Posted by dknight3 View Post
    but theoretically this could be done by moving the radio in a little bit and having the bezel inside the trim right? or will it not go in anymore? i remember mine was pretty tight with rca's coming out the back.
    Quote Originally Posted by Sleepervr-4 View Post
    you could actually get it flush by moving the radio back some more on the bracket and trimming the inside of the factory radio bezzle to add clearance for the face plate frame. I used a angle grinder with a 2 inch scotch brite disk to trim the back till it fit flush on the radio.

    Clearance, which is why I would rather not go inwards. This method allows for no trimming, We are trying to avoid that so the trim rings don't get flimsy.

    Quote Originally Posted by M-Rod View Post
    I just elongated the holes in the brackets with a dremel to be able to slide the radio out the perfect amount, then tightening the screws. It allows for future adjustment as well if you ever change HU's.
    That works too.

    Quote Originally Posted by mrg7243 View Post
    I messed up my trim ring since I have my ipod usb port in the front so mine does a loop and goes back into the dash. I dont use a trim ring and it is not hugely noticeable on my car
    When I was looking for a new radio for my car I specifically wanted the USB to be in that back of the head-unit, I know just about all the newer pioneer models have them in the front and I hate that. The model I bought on eBay was about 2 yrs old but it had the 2 main things I was looking for Rear USB and Hi-volt RCA's.

    Quote Originally Posted by master_visionary View Post
    1: This is exactly how I did my 7G
    2: I love the way this was written
    3: If your deck is just screwed into the bezel
    PLEASE TAKE THIS TUTORIAL AND REINSTALL
    YOUR UNIT IT'S BETTER LOOKING AND FAR
    MORE SECURE

    BIG UPS ON THE WRITING
    Thank you sir!

    P.S: Holy big sig!!!

  9. #9
    TGC Regular Guzm4n's Avatar
    Join Date
    02-02-2011
    Location
    Des Moines, IA
    Posts
    736
    Great, now I have to find my ring, lol. I plan on doing this whenever I find it.

  10. #10
    TGC Lifetime Patron oakrdrs187's Avatar
    Join Date
    05-14-2010
    Location
    Coachella, CA
    Posts
    5,954
    Quote Originally Posted by guzm4n View Post
    great, now i have to find my ring, lol. I plan on doing this whenever i find it.
    From the write-up:
    Quote Originally Posted by oakrdrs187 View Post
    tools needed:
    Drill
    drill bit assortment
    philips screwdriver
    radio trim ring (yea go look for it)
    LOL!!
    Last edited by oakrdrs187; 02-29-2012 at 04:00 PM

  11. #11
    Experienced TGC Member OMEGA PHX's Avatar
    Join Date
    05-03-2009
    Location
    Aguadilla, Puerto Rico
    Posts
    1,465

    Perfect timing my HU is installed with the sleeve the hu came with and it is so easy to ake it out will do this tomorrow. Thank You

    4g64T 5spd

  12. #12
    Mine fit rite in and it came out pretty good IMO. I didnt really have to do all that but this is def a good write up. I applaud you taking your time out to do this. Me im to lazy lmao!
    These are current pics but it has been the same ever since about 2yrs ago. Sorry Iphone takes crappy pics


  13. #13
    You are here entirely tooo much!! IVORY_G's Avatar
    Join Date
    07-12-2007
    Location
    SoCal
    Posts
    4,632
    Nice write-up! What I did was just use a file and a Dremel to modify the inside opening of the woodgrain radio bezel to so that it allowed the aftermarket radio trim ring to fit inside the woodgrain radio bezel.
    JDM Zenki Conversion

    Lazy hands make for poverty, but diligent hands bring wealth. (Proverbs 10:4 NIV)

  14. #14
    Senior TGC Member mrg7243's Avatar
    Join Date
    11-29-2009
    Location
    Chadds Ford, PA
    Posts
    2,768
    Quote Originally Posted by oakrdrs187 View Post
    When I was looking for a new radio for my car I specifically wanted the USB to be in that back of the head-unit, I know just about all the newer pioneer models have them in the front and I hate that. The model I bought on eBay was about 2 yrs old but it had the 2 main things I was looking for Rear USB and Hi-volt RCA's.
    Yeah I really would prefer it in the back as it is wayyy cleaner but its whatever I have my ipod in my glovebox still

  15. #15
    TGC Lifetime Patron oakrdrs187's Avatar
    Join Date
    05-14-2010
    Location
    Coachella, CA
    Posts
    5,954
    Quote Originally Posted by mrg7243 View Post
    Yeah I really would prefer it in the back as it is wayyy cleaner but its whatever I have my ipod in my glovebox still
    I mainly did it because I don't like the idea of a USB Drive sticking out of the faceplate, I'm afraid of hitting it with something and it breaks damaging my radio. Not only that, some have a LED light that would absolutely be the most annoying thing flashing in your face at night as the radio reads from it.

  16. #16
    Experienced TGC Member OMEGA PHX's Avatar
    Join Date
    05-03-2009
    Location
    Aguadilla, Puerto Rico
    Posts
    1,465

    Just did mine today, finally no 3rd grader can take my HU, I wanted to add that I took a black sharpie and painted the part of the radio that can be seen from the side so now it's less noticeable

    4g64T 5spd

  17. #17
    TGC Lifetime Patron oakrdrs187's Avatar
    Join Date
    05-14-2010
    Location
    Coachella, CA
    Posts
    5,954
    2nd post update with pics.

  18. #18
    nice how to.. +rep

  19. #19
    TGC Lifetime Patron oakrdrs187's Avatar
    Join Date
    05-14-2010
    Location
    Coachella, CA
    Posts
    5,954
    ^^ Haha, thank you bro! I did this with the fellow TGC members in mind, maintaining the clean look while keep the radio's they spend their hard earned cash secure.

  20. #20
    Experienced TGC Member JDyal's Avatar
    Join Date
    02-08-2012
    Location
    Hackensack NJ
    Posts
    1,146
    Quote Originally Posted by oakrdrs187 View Post
    Here's some pictures of my G's.


    The other G. This works on flip out screens too!
    The Alpine deck on the bottom was mounted with the sleeve so, I worry. But the car has a 2 way alarm, We always removed the faceplate, the car is always with in range of the remote and we have security at our gated apartments. Plus tinted windows, what get tempted to take what you can't see. But still I keep my keys close to me in case it the alarm gets triggered.


    Hey bro, how did you wire up the led that's in your glove box? And does it turn on when you open it?
    Bought from crzygtz,deeznutz, dominicano, finald8ta, Galantman03, G-Spot, Isaurio, jonk8123, M-Rod, and specter6633


    Dont' keep it stock, turn heads on the block

    2003 Mitsubishi Galant ES 2.4L 4 cyl "Storm"

Page 1 of 2 12 LastLast

Posting Rules

  • You may not post new threads
  • You may not post replies
  • You may not post attachments
  • You may not edit your posts
  •