 Log in
 Register
 Reply With Quote
Post it in 7g problems section, this is tutorials only and obviously no one has one


apparently my previous post about waterpump replacement was deleted. After struggling to remove a bunch of tiny screws in a very tight space and thinking I'm never going to be able to put them back in, then discovering I still have to remove the crank pulley just to get the rest of them out, while at the same time requiring the crank pulley to center the timing sprockets before removing the timing belt, all in a very tight space. Oh and discovering the timing cover has been cut up by the last crank pulley that failed. I fucking hate this piece of shit and I hate even more the fact that my only other alternative option is to pay someone else over $500 dollars to do it for me with superior tools and the option of removing the engine from the bay and making it 150 times easier. fuck
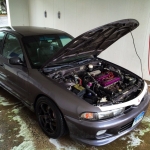
141,000 miles.
6 dents.
Yellowed, cloudy headlights.
spraypaint on the door panels.


Post it in 7g problems section, this is tutorials only and obviously no one has one


jus drop the motor if you can't get to it.
remove the engine mount, and the forward and rear tranny mount. just theave the passenger side mount on. put car on jackstands. put jack under the engine (before you remove mounts) remove the tranny crossmember and lower the jack. the engine should drop enough to let you work on it better.
"DSM's, making people mechanics since 1985"
Originally Posted by polishmafia
I actually managed to get through all of it and install the new water pump, and then realized I neglected to research the proper timing belt installation procedure which requires two special tools. So I ordered those this morning and don't get to drive my car for another week or so. :(
141,000 miles.
6 dents.
Yellowed, cloudy headlights.
spraypaint on the door panels.

You dont need any special tools. The two Mitsu tools:
http://i18.ebayimg.com/01/i/000/fc/ed/ef27_1.JPG
The long rod is only used to compress the auto tensioner. If you are installing a new one, you dont need it. If you are re-using the old one for some reason, just put it in a vice or c-clamp and compress the rod until you can fit the grenade pin(or 10-penny nail) in the hole.
The second is to tension the tensioner pulley. The tool slies into the two holes on the auto tensinoer, then attaches to a socket wrench to tighten the pulley, after that you tighten the bolt on te pulley down and it holds its tension. Again not needed. This is what I have come up with and works just as well:
http://i44.photobucket.com/albums/f3...ingtool4vt.jpg
Basically if you get a 'L' shapped allen key that fits in one of the holes on the tensioner pulley, clamp vice grips onto the end so you can pull down on it, and put a socket wrench on the bolt on the auto tensioner to use as leverage for the allen key, you can tighten the tensioner pulley just as good as if you had the tool. You might have to tighten it a bit, take the key out of the tensioner and put it into the second hole to get the desired tension, but I have done it this way ever since I broke my Mitsu tool.
Now to know whether or not if you have correct tension, once you have tensioned the belt and tightened the tensioner pulley down, leave the grenade pin in the auto tensioner, turn the belt 7 or 8 times til all the timing marks line up, let it sit for 10 min, pull the pin(the rod on the tensioner should not move!), turn the belt 7 or 8 times again until all the marks line up again, wait 10 or so minutes, and if you can put the grenade pin back into the auto tensioner, you have the correct tension. If the rod on the auto tensioner has moved up, then you dont have enough tension on the belt and you need to compress the auto tensioner to put the pin back in and start he process over.
Last edited by seth98esT; 09-13-2008 at 11:10 AM
7g for life!

moved thread
______________________________

1994 Galant GS-Turbo

This what the Haynes repair manual says to do, condensed in plain english :
Compress the auto tensioner rod in a vice and insert a drillbit or allen key through the holes
install it on the engine
intall the tensioner arm bracket onto the tensioner arm spindle
install the timing belt, starting at the crankshaft sprocket, around the oil pump sprocket, around the guide pully, around the camshaft pulley(s) and then around the tensioner pulley
using special tool and inch pound torque wrench, set the torque wrench to 30 inch pounds and turn the tensioner into the belt until you click, keep holding it and tighten the tensioner pulley bolt
remove the allen key from the auto tensioner, rotate the crankshaft clockwise two revolutions
after 15 minutes, measure the distance between the auto tensioner body and the arm. it should be between 5/32'' and 3/16''. If it is over that, repeat the belt adjustment procedure.
Okay so I had to take my auto tensioner to work becuase I don't have a vise available here, and I put the largest allen key that I could fit through the hole in the plunger (which ridiculously is smaller than the holes in the body- WTF!?)
I got an allen key and a visegrip to pull the tensioner pulley with-
BUT, I just measured the distance between the auto tensioner body lip and the top of the plunger, and I swear it is exactly 3/16''. So if I can't fit the allen key back in afterwards then its obviously moved beyond 3/16'', and I'm guessing you already knew this which is why you said if I can't fit in back in then have to do it over again, if you were using the same size allen key.
That wouldn't be annoying to me except for the fact that I don't have a vise here, and without a vise its impossible to compress the plunger, its just too strong. I mean, I have it compressed now, so I only get one shot at this
141,000 miles.
6 dents.
Yellowed, cloudy headlights.
spraypaint on the door panels.
oh, and if you happen to see the engineer that designed this, please punch him in the face for me. thx
141,000 miles.
6 dents.
Yellowed, cloudy headlights.
spraypaint on the door panels.

Hate to break it to you, but you're gonna say that about something on pretty much every car you can run across...
There's always something poorly designed on a car, whether it be engine and drivetrain or not....
http://i44.photobucket.com/albums/f3...ingtool4vt.jpg
in your picture it shows to move to pulley clockwise but with the pulley installed at rest the holes are on the bottom, and after installing the timing belt theres no way to move it clockwise because the water pump blocks it. I crawled under the car and used a allen key and visegrip in one hand to shove it counter clockwise and used my left hand to tighten the bolt with my 60 tooth ratchet and a short socket. I did this once and then tried to push the arm away from the tensioner rod with my fingers/ratchet handle and I got a tiny amount of play so I did it again and pushed up as hard as I could and held it and tightened it up and then checked again but I couldn't get the arm to move away from the tensioner rod at all, then I kind of poked at the timing belt on both sides wondering if it was tensioned enough, then I said screw it and pulled the allen key out of the rod holes and becuase the allen key fit in the rod hole but had slack in the outside holes the rod was pushing up on the key, so when I removed it while watching I heard a click but I didn't see movement, I rotated the crank sprocket with a breaker bar 2 rotations and went back inside and came back like 15 mins later and I could get the allen key through the outside hole and into the rod hole but not through the hole on the opposite side, I assumed this was of the way it had pressure on the key when I stuck it in and it was actually bent a little bit so it was still in the same place. I also think that I pushed up on that allen key with more than 2.5 foot pounds of torque, the specification for using the special tool is a torque rating of 30 inch pounds, which is basically 2.5 foot pounds, not very much but difficult to achieve without the "special tool" (Mitsubishi counting their $$$ and laughing)
After installing the timing cover and the crank pulley/harmonic balancer (which had a locating pin already installed so it could not be installed incorrectly) I noticed that the timing mark on it was pretty much correct to where TDC is becuase it had the pressure build up when rotating it with the breaker bar and after it let off the balancer timing mark was a little ways past TDC so it made sense that it should be in the correct position, however the timing mark on the camshaft pulley was at the rest position when the crank pulley timing mark was already past TDC, I am completely retarded and I do not know if this is normal, is it?
141,000 miles.
6 dents.
Yellowed, cloudy headlights.
spraypaint on the door panels.
I have only doneone SOHC tbelt, and cant remember if I did this or not, but when you put tension on the belt, it will throw off your marks. The way around this is to take an open end wrench and turn the cam gear 1/2 tooth clockwise, then put the belt on. If you dont do this, usually there will be one mark that doesnt line up with the rest.
7g for life!
 Posting Rules

 1997 Mitsubishi Galant DE

Bookmarks