 Log in
 Register
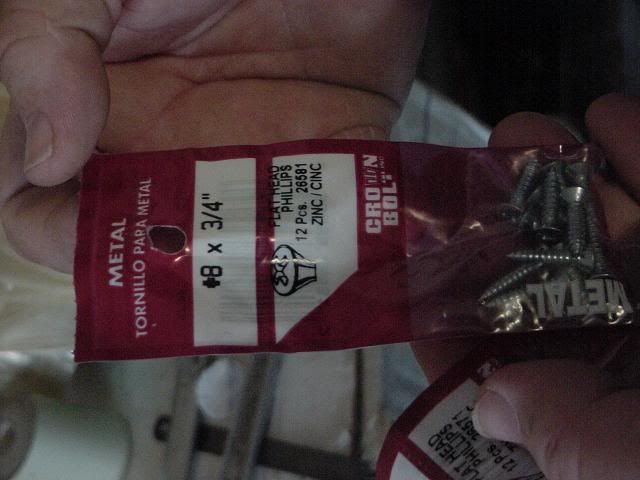


 Reply With Quote
awesome, i needed those detailed pics! thanks!


sorry pictures are so big. There was a trunk mod before this one, but couldnt see pics. so i moddified it.
This tutorial is for those who would like to know how to do the flip flop trunk
Items needed:
Power Drill w/bits
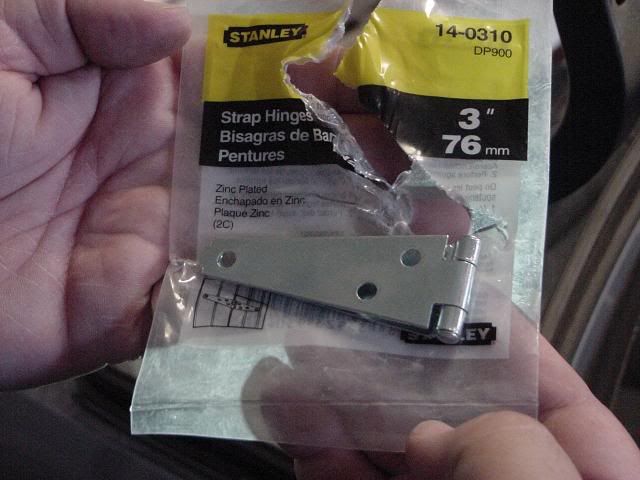
(2) 3” Door Hinges
6-9 Heavy Duty Screws (preferably flathead)
BEFORE YOU START, PLEASE NOTE THAT IF YOU MESS UP YOUR TRUNK, YOU HAVE NO ONE TO BLAME BUT YOURSELF!! I AM NOT RESPONSIBLE!!
DO AT YOUR OWN RISK!
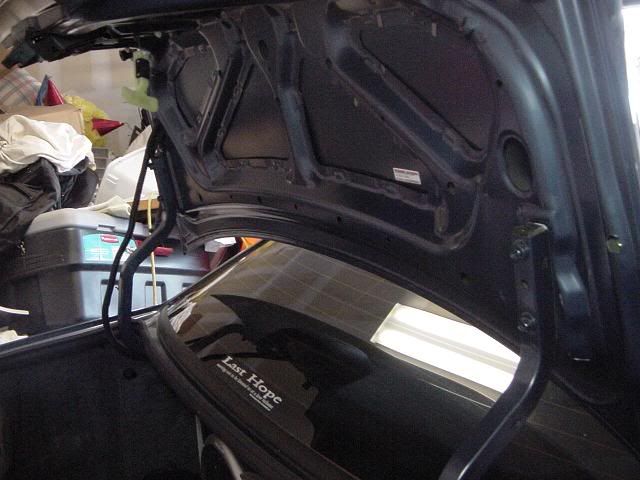
First thing you want to do is remove the trunk lid. Do this by removing all (4) bolts (5MM) that hold it in place.
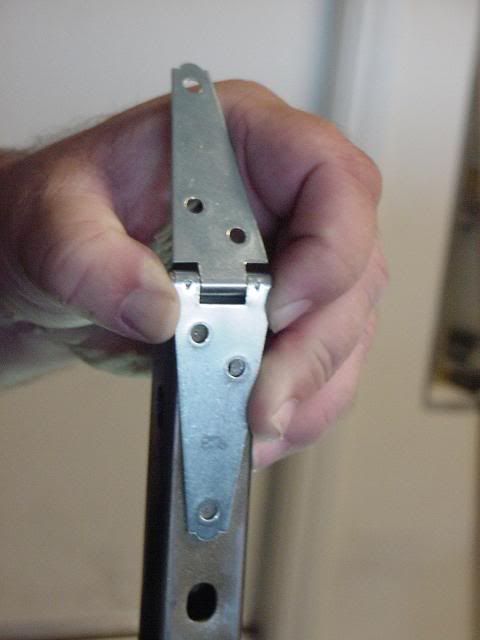
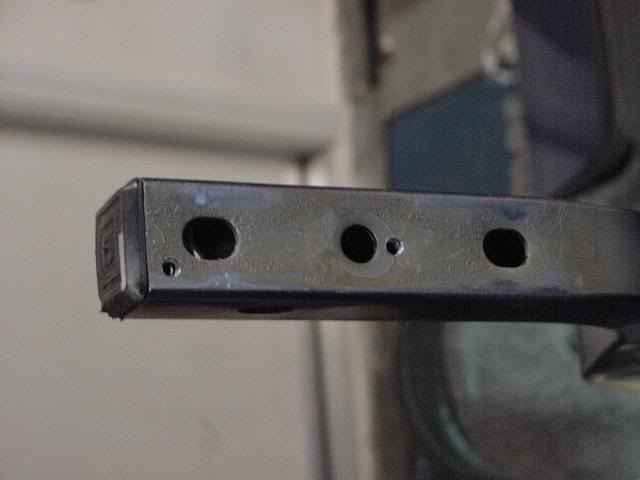
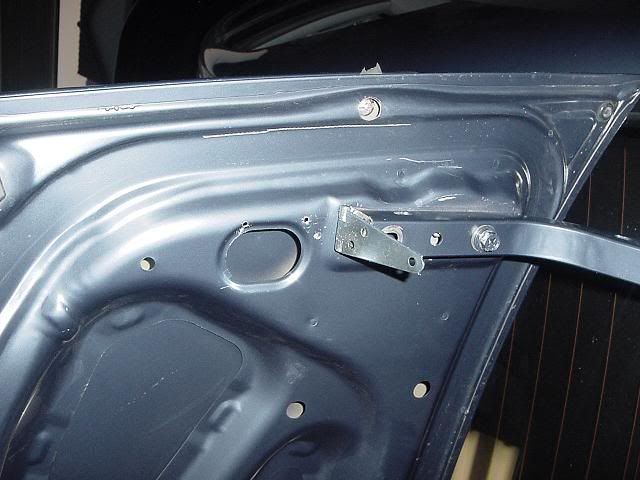
After the lid has been removed, mark the holes that will be drilled into the braces. Grab one of your door hinges, and place it so the knuckle is facing you, and so that it rests on top of the back side of the trunk brace. Of course, make sure that it’s centered. Take your marker or hole punch, and mark where the spot to be drilled. Do the same for the second brace.
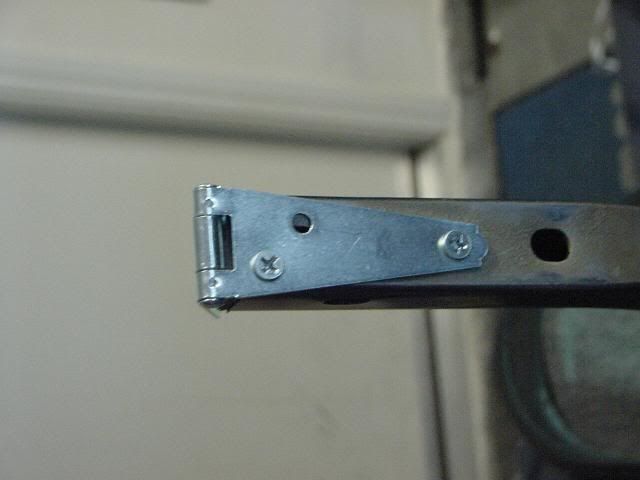
With both braces marked, you are now ready to drill the holes. At this point you want to grab that friend to help hold the brace. Grab that heavy duty drill and get to work. Take your time with this, because when you first start, the drill will want to slide around, which can cause your holes to be off. Keep the pressure on once you get a good hole going. Although the metal looks thin, it does take a few minutes to get the holes drilled. After you have the holes in both braces, go ahead and screw the bottom portion of the brace in, making sure that the knot faces outward. You will notice that the hinge is covering the top bolt hole on the brace. IF you want to make use of that hole again, you will have to drill into the hole to drill out that piece of the hinge. It won’t hurt anything if you decide not to use the top hole anymore. The bottom bolt is more than strong enough.
You are now ready to mark the spots on the trunk lid. Have your friend’s help you put the trunk back on completely by replacing the bottom bolts. With the trunk lid back in place, flip the top portion of the hinge up so it is against the trunk lid. Again, take your marker or hole punch and mark the area to be drilled.
*Note that when you mark the spots on the trunk, you may only be able to drill one good sturdy hole. This is fine! One heavy duty screw WILL hold the trunk in place.
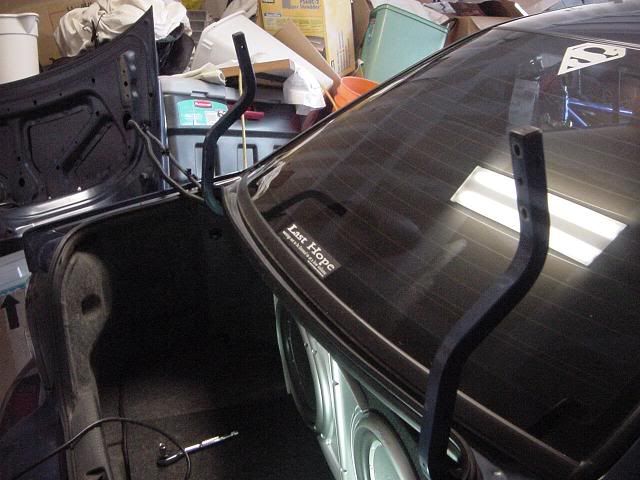
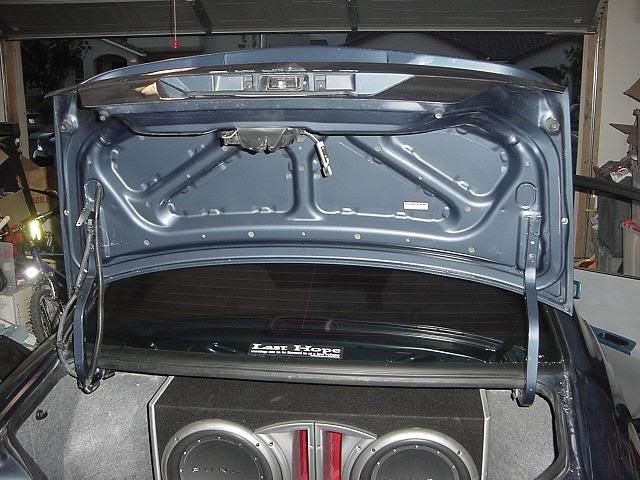
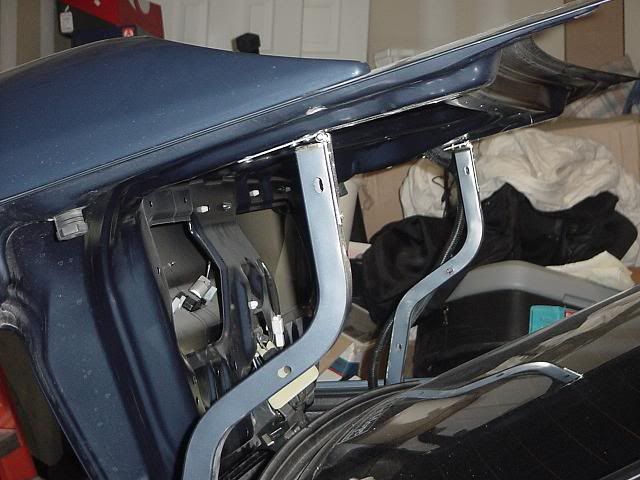
Go ahead and drill your hole(s) into the lid. Once you’re finished, place the screws in tightly. Job Done! You can test your trunk by removing the stock bolts from the braces, and tilt the trunk, which will sit on the rubber seal on the back of the trunk. When you are done, tilt it back, and replace the bolts
I am also working on two things. 1 making the trunk level. 2 working out door hindges so you no longer need the bottom bolts. the mod is great. For those needing more help, feel free to pm me. Those in the las vegas area can even get me to help.it will probely take about an hour to do.


awesome, i needed those detailed pics! thanks!


Great job krispy, tnx for the tutorial :idea:
wow i got that same muffler i didnt think anyone else had it i guess its time to change it btw i looks good (trunk)
(lil jon) "WWWHAT??" i pointed that out a long ass time ago on cardomain.Originally Posted by sho-tyme
my member name is ffsquad.
oh ok didnt know it was you
great tutorial, bought sometime someone did this, looks really simple.
2002 Galant ES - I4, Viynl Interior by P
Pioneer AVH-P5700 DVD, RF P4004, RF P8002, 2-Infinity 12" Perfect 12.1DV Subs
Lightning Audio Digital Capacitor
Infinity Speakers,GTZ Spoiler, Ractive E-brake, Chrome Door Handles, CF Armrest
Freedom Design Strut Bar, Cleared Corners
KUMHO 711 Tires, CF Interior Trim
loooks real nice. i bet you could just use some type of little rubber dealy grommet or whateverthehell, so make it more level.
BTW, Who is that huge dewd in the background with the stripe ED shirt?!?! Hes like a foot and a half taller than the dewds around him!!!!! :shock: :shock:
...U N D E A D...
oo thanks for the tutorial, i would put some of those little "feet" that go on the bottom of speakers next to the hinge is so it sits level. maybe they have those at radio shack or officemax. Also you might want to look at home depot for a door stop or something that you can use.
dunn know, but he's really 5'3 and standing on a footstool and closer than everybody else.....i think he is standing on zero's hood in this picture.this picture was taken after i corrected myself too :oops:
hey krispy, did u ever figure out a way to make it not soo wobbly? i think thats the only thing keeping me from doing this mod.
talk to chris(krazyinluv) he made a steel bar holding the two arms together. looks real nice


I remeber seeing this done
with a different type of hinges
locking hinges or something like that..latches maybe
the hidge was screwed into both the trunk and the arm, and a pin was pulled and it would release the hinge (let it flip instead of just staying up)
if I come across pics of what I am speaking of I will post up
found this while searching net
http://www.diynetwork.com/diy/ab_auto_body...3529386,00.html
if you look they put latches on the trunk next to the arm and they can pull the latch and release the trunk and let if flip
Jason - - cofounder of TGCNY
click banner to enter the NY Chapter
2001 Galant ES
2004 Jeep Grand Cherokee Special Edition
better link and pics of that I was talking about
http://decouvir.tripod.com/life/id15.html
same method different pics
different method
Jason - - cofounder of TGCNY
click banner to enter the NY Chapter
2001 Galant ES
2004 Jeep Grand Cherokee Special Edition
nice
yo krispy.. im doin this tomorrow.. wish me luck..
www.anti-rice.com
lasthopeskrispy: so i was fucking this guy in the ass over the weekend and you know what he decides to do....he reaches around and cups my balls. I was like hey what a fag!
good luck, ill be on aim just in case you need help hit me up.

hey krispy! does th trunk pop up a little cause you know, you put the hinges on top of the bracket. I know the hinges are really thin but didn't it make the trunk a little higher or was it level with the body? just want to know cause it might look like somethings wrong with my trunk. can you post picture of you G with the trunk closed. I wanna see if it's sealed like nothing was done with it. thanks
no, it doesnt sit flush but i have an idea to make it do so with a butterfly nut.
has anyone done this on a 7g? if not i will in the next couple of months .. ill have pics of a finished product for sure.. and im going to have those locking hinges so that if i aint at show i dont have to have it hinged i can have it normal
1997 Mitsubishi Galant 4G64 *R*I*P*
soon to come, 97 Copper GST 5spd, Bone Stock, for now...


Bookmarks