 Log in
 Register

 Reply With Quote
Diagrams from Mitsubishi Service Manual
This is the removal of the front spring/strut assembly:
This is the disassembly of the front suspension:
This is the removal of the rear suspension:
This is the disassembly of the rear suspension:


WARNING: I will not be held responsible for what happens when you follow this tutorial. This work should be done by a trained professional. If you insist on doing it yourself, and you do get hurt, or break something, don't say I didn't warn you.
This project took Peano, and I the whole day to complete. It wasn't that it was hard so much as there is quite a bit of labor involved. Though its really straight foward. It's much easier with a friend helping (props to Matt for helping me out). So get a few beers (or buds), stretch a little and start crackin...
You willl absolutetly need these tools, don't try to work without these because you just end up wasting several hours.
TOOLS
1) Ratchet and socket set (metric)
2) A MASSIVE Torque wrench (aka a breaker bar with a 1/2" socket)
*and a 24mm socket to go with the breaker bar
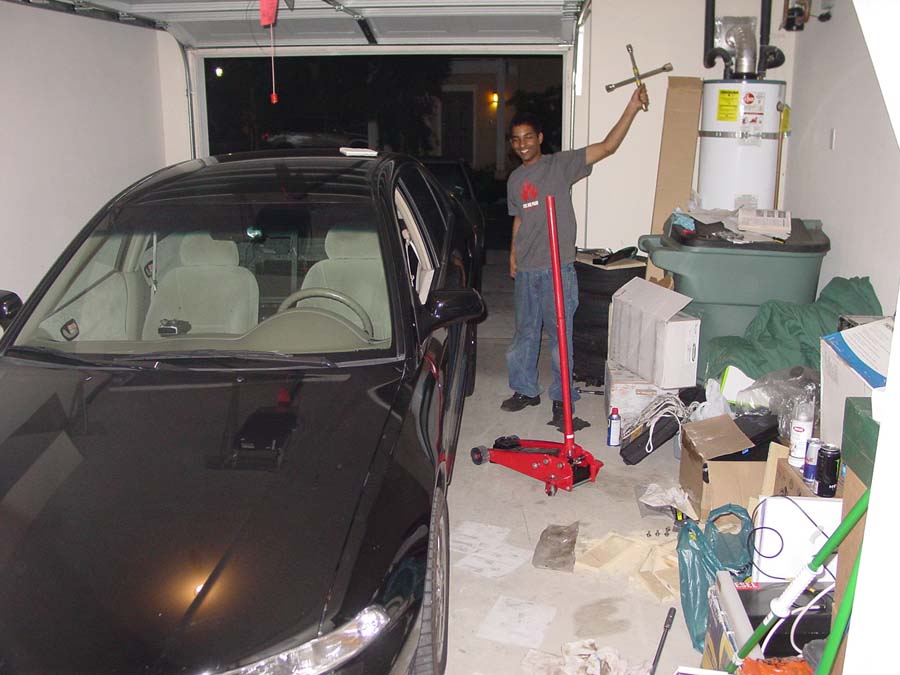
Pics -
http://socallifestyle.com/JB_suspension/13.jpg
http://socallifestyle.com/JB_suspension/14.jpg
3) 2 adjustable wrenches (aka normal wrenches)
4) Spring Compressors (this is the absolutely required, you can rent one from Autozone or Pepboys for about 40$, and they give you a total refund when you return them).
5) 2 Jack Stands
6) A car lift (you can use the one in your trunk, but it will take a while ~ hydrolic lifts are reallly cheap)
7) WD40
EDIT (Nov. 29, 2009 & 5 beers in): For the sake of posterity, when reattaching the single bolt in center of the suspension (#2 in the second diagram), it may become necessary to use vice grips to prevent the center column (i.e. the shinny metal rod that the springs wrap around) from turning within the strut cylinder. When you begin to torque the center nut, keep a close eye on the center column (or ideally, use you hand) to check for any angular displacement.
If you find yourself endlessly torquing the center nut, then it probably means that the whole center column is turning in place along with your torque wrench. Grab a vice grip and chomp down on the center column. Use as little force is necessary on the vice grips to keep the center column still while your torquing it to the required 44-51 ft-lbs.
Last edited by Jet Black; 11-29-2009 at 09:38 PM
Diagrams from Mitsubishi Service Manual
This is the removal of the front spring/strut assembly:
This is the disassembly of the front suspension:
This is the removal of the rear suspension:
This is the disassembly of the rear suspension:
Last edited by Jet Black; 11-29-2009 at 09:43 PM
FRONT SUSPENSION
Alright first jack the front of the car up, and put jack stands
under the cross member.
Next take off the bolts that holds the brake line, the speed sensor,
and the stabalizer link (contrary to what any manual says, YOU DO NOT
HAVE TO REMOVE THE SPEED SENSOR OR BRAKE LINE COMPLETLY FROM THE
CAR).
Now you got those 3 bolts off, the cables should be able to
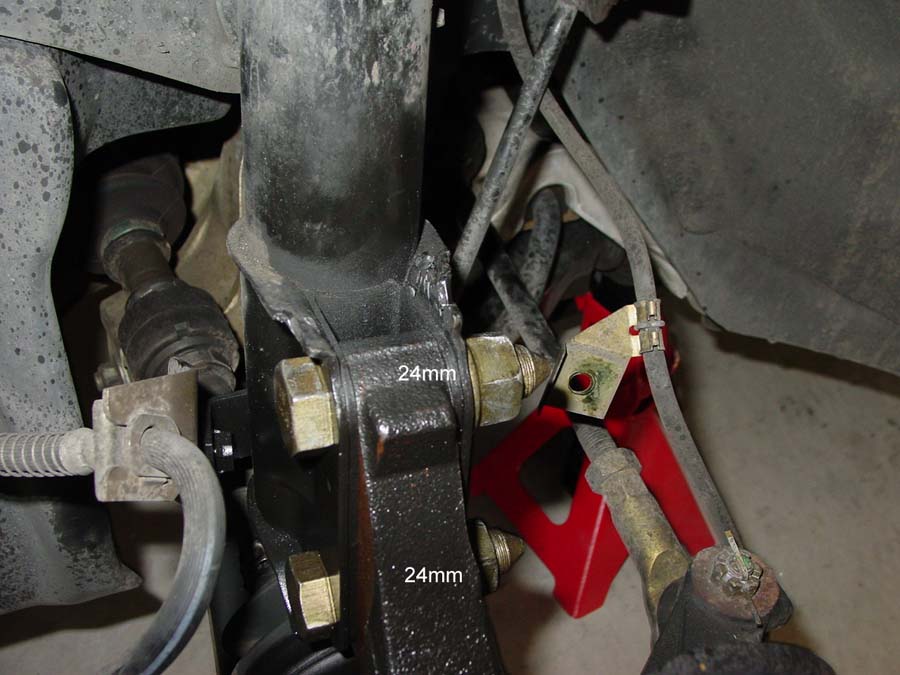
move around freely. Next step is to remove these two massive bolts:
For these 2, you'll need this:
Theirs no other really easy way to apply the 240 ft-lbs of
torque those bolts require. When you get the nuts off, keep the bolts
in for the time being (atleast the top on ~ so that the brakes dont
fall down).
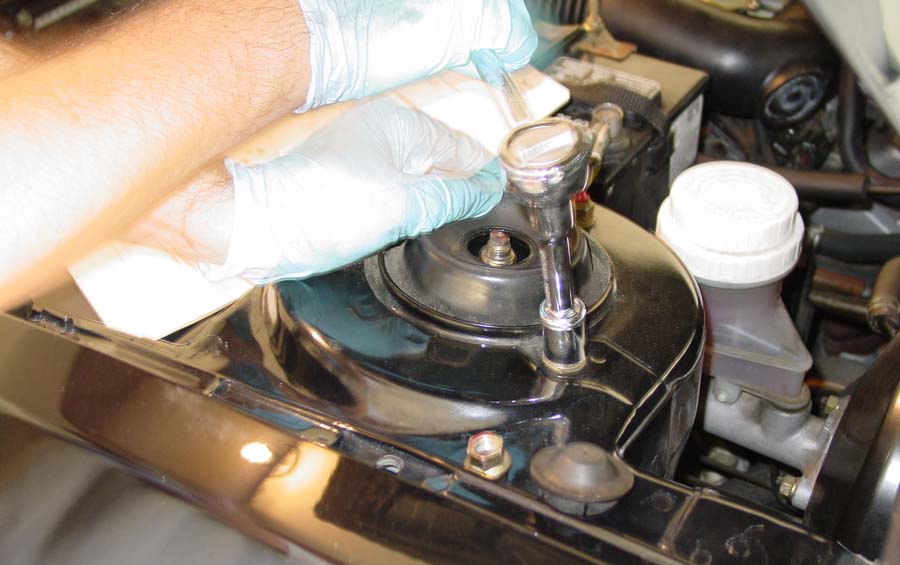
Next pop the hood and start to loosen these nuts (only the 3
outer ones, DO NOT TOUCH THE MIDDLE ONE OR SHIT WILL HIT THE
FAN!!!
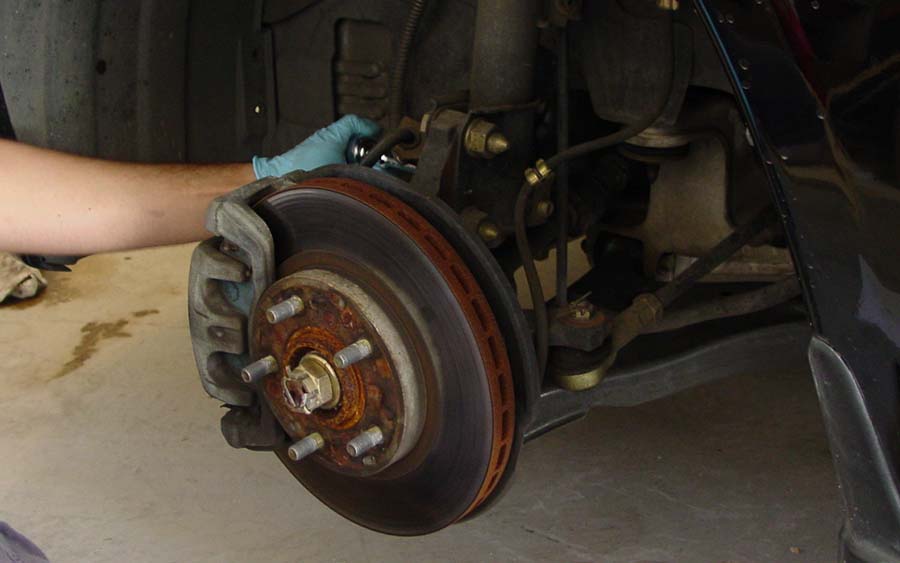
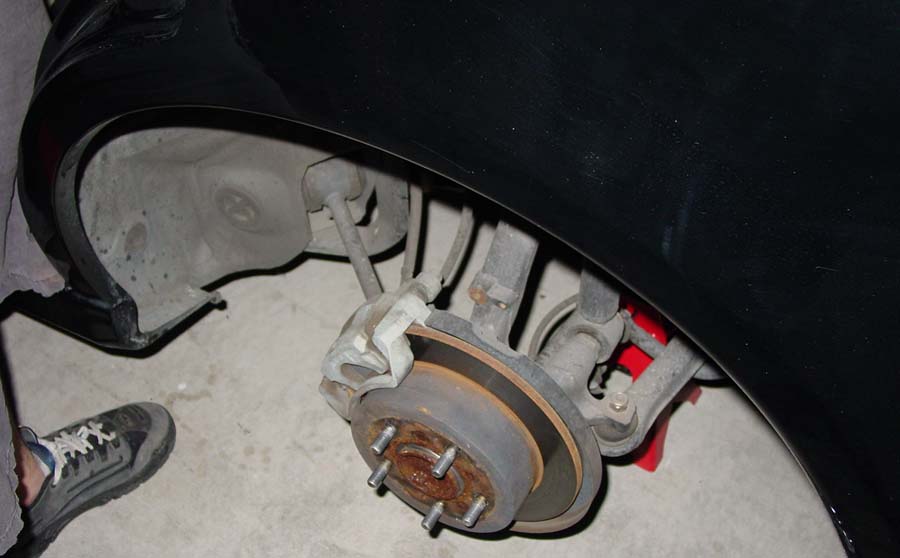
When you have done that, grab something to prop the brake
up:
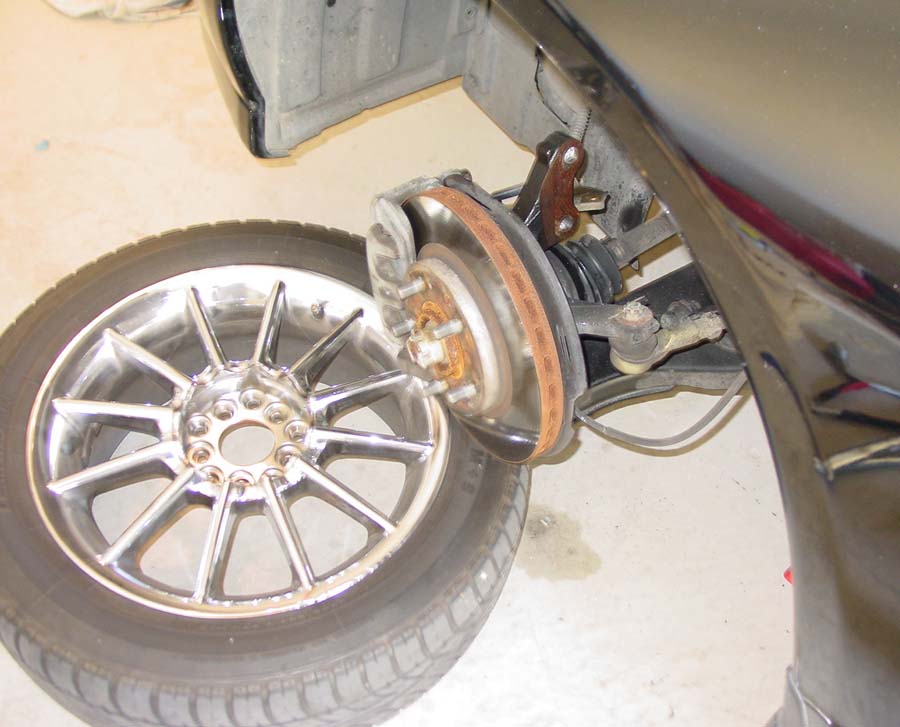
DO NOT TAKE THE 2x24mm BOLTS OUT TILL THE BREAK IS PROPERLY
SUPPORTED. Then when it is supported go ahead take the bolts out, as
well as the whole suspension.
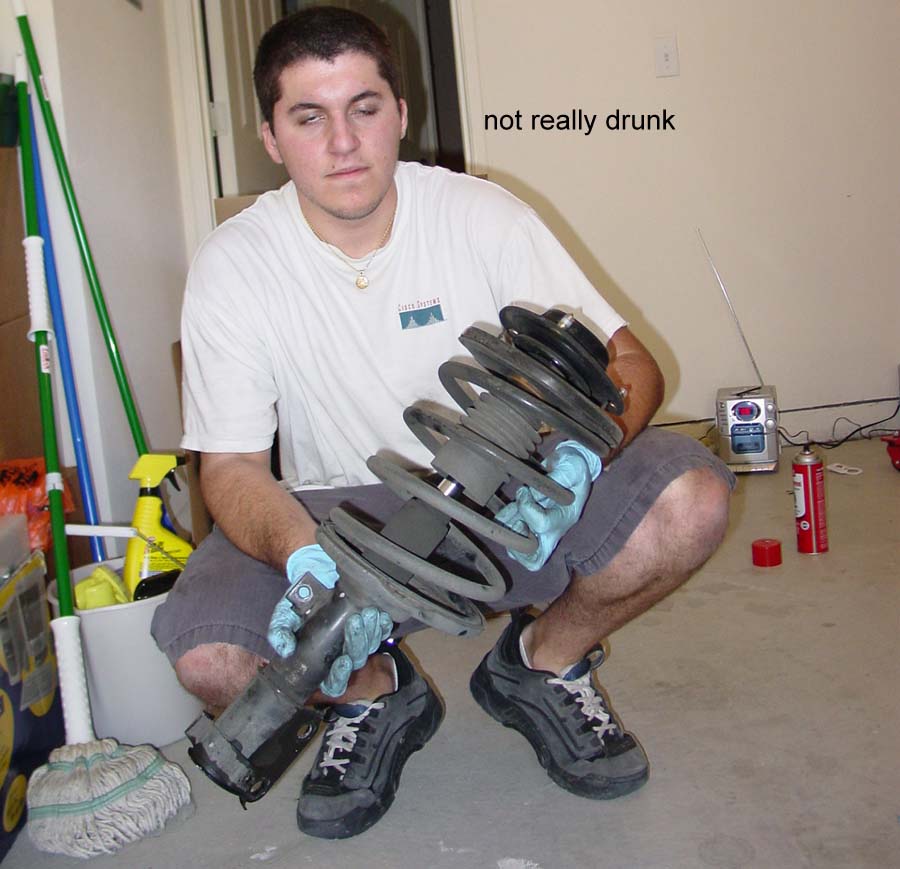
Ya he's not drunk...but you may notice the aersol can behind Peano...(jk)
The springs are held in place by ONE nut on the very top, in the
middle of the whole thing. Go outside and carefuly loosen the nut.
When its coming to the very end, be extra carefuly. These springs
store MASSIVE amounts of energy.
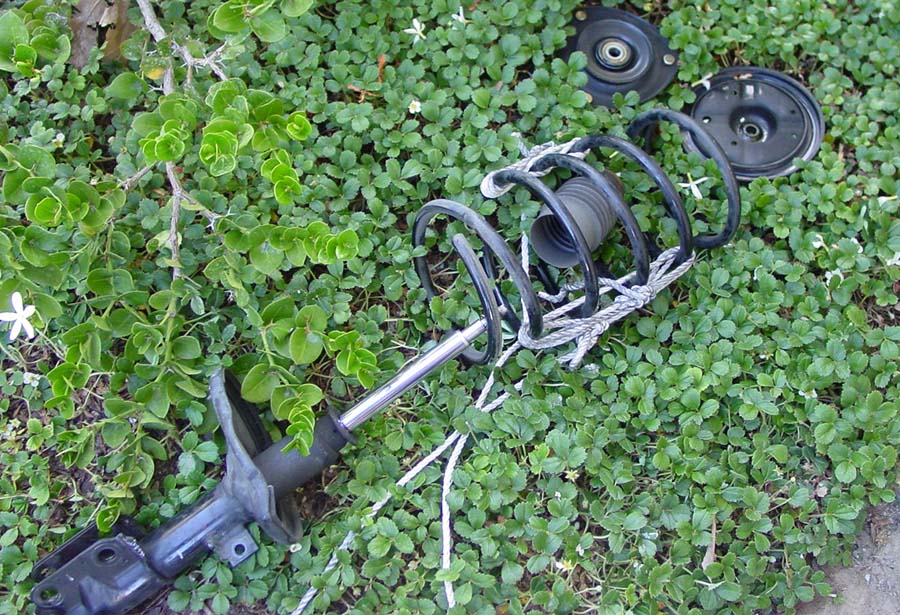
We went ghetto fab before we decided to grab some spring compressors.
We tried using rope. But when the last bolt came off the whole
suspension blew apart. Seriously it really blew apart:
So be a bit careful (on the rear springs, you dont have to
sweat half as much).
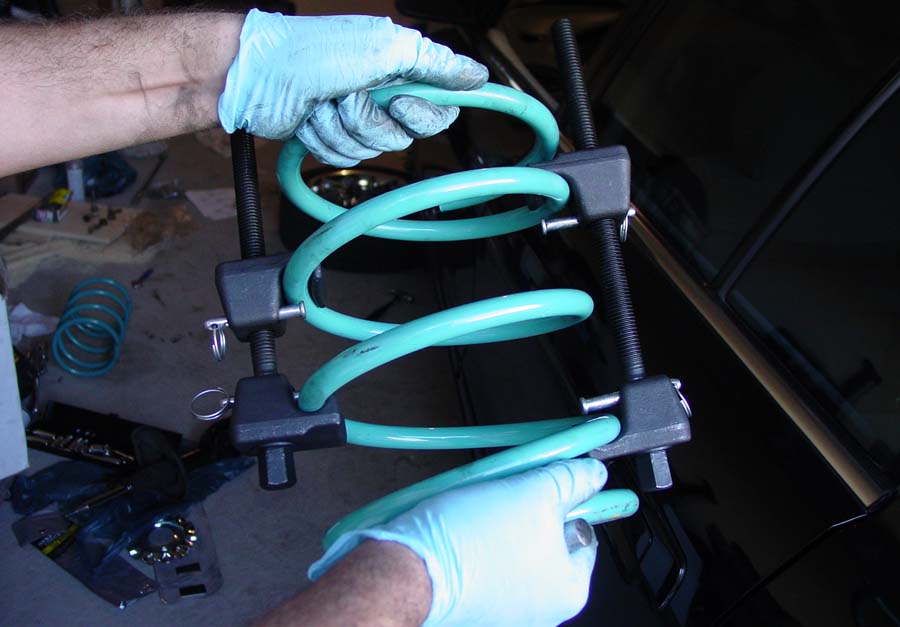
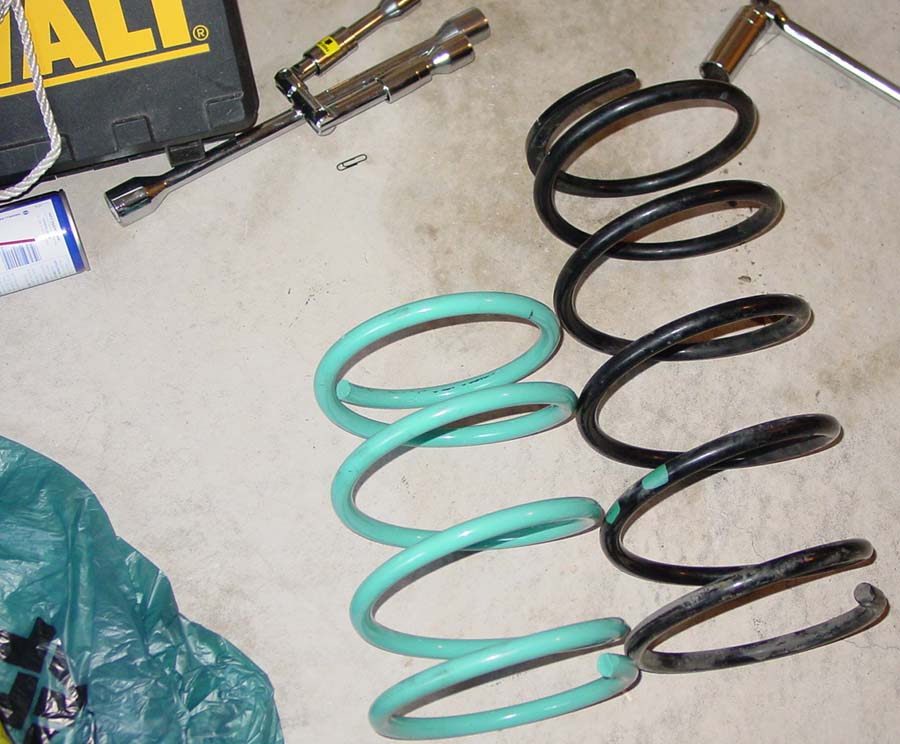
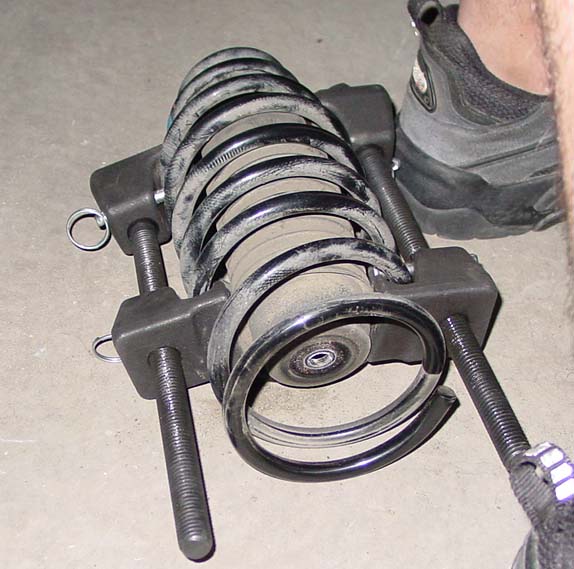
Alright, throw the compressors on the new set of springs:
At this point it should be obvious that Peanos doing atleast
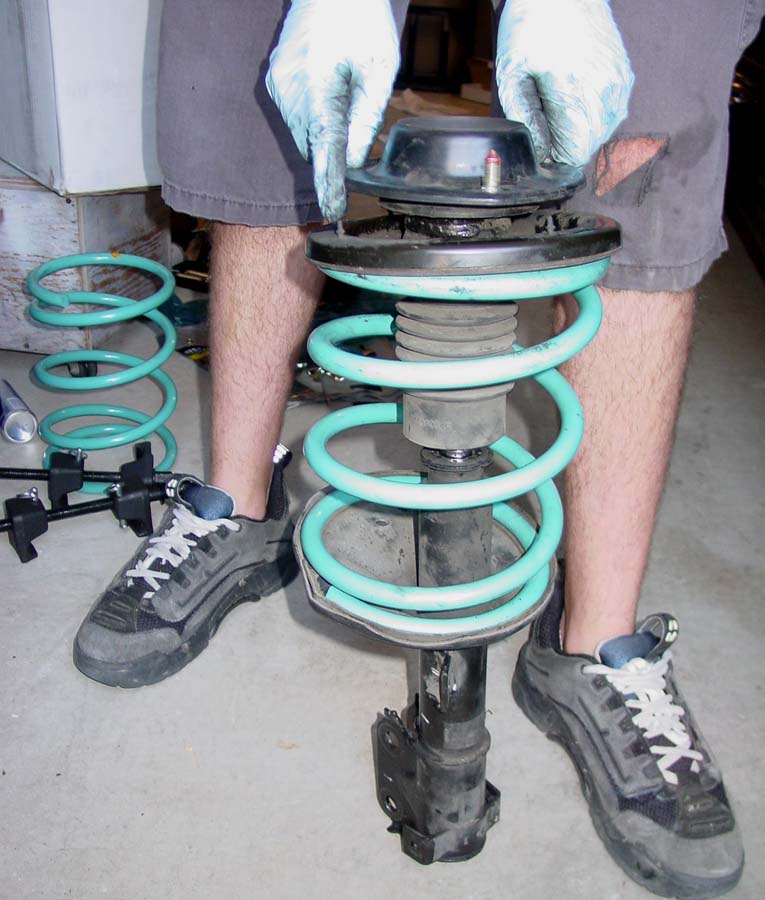
80% of the work (many props to Matt for that). Now go ahead and seat
the springs. Make sure their seated correctly! The top coil may not
fully touch the top plate (but it will when you put it in the car, and
the car is set on the ground):
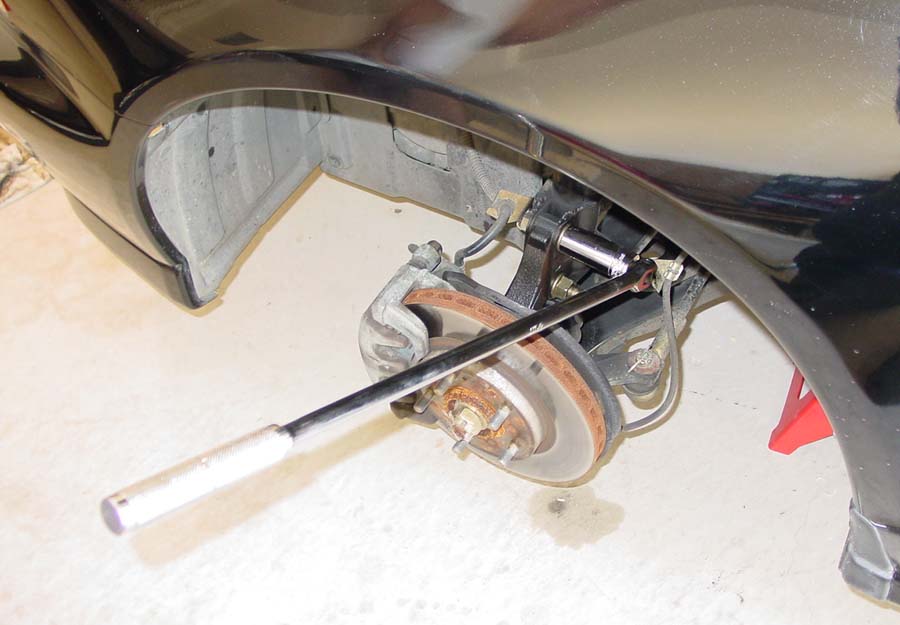
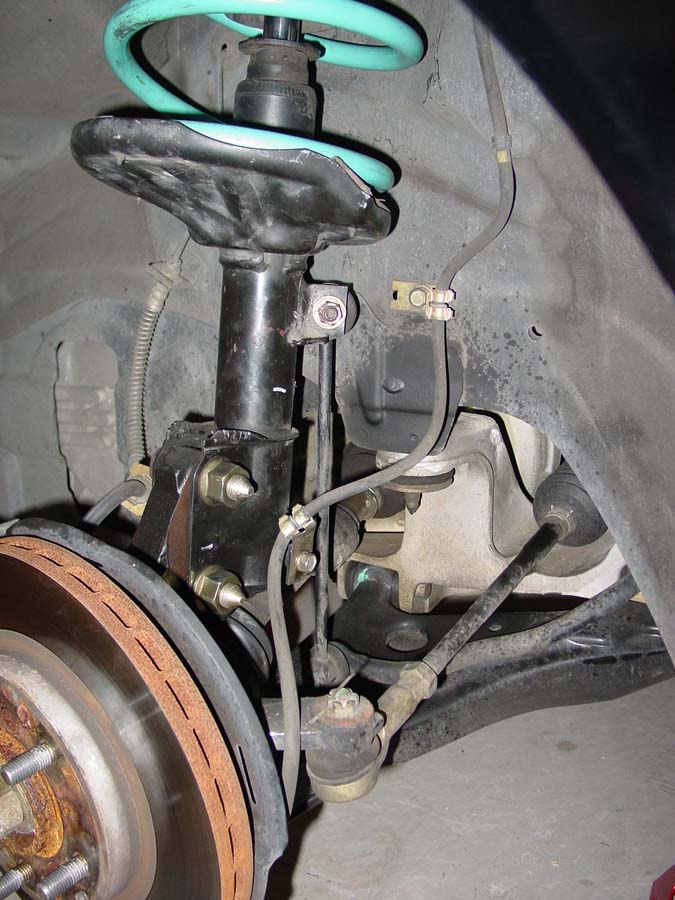
Stick it back in, this is where an extra pair of hands
become REALLY helpful:
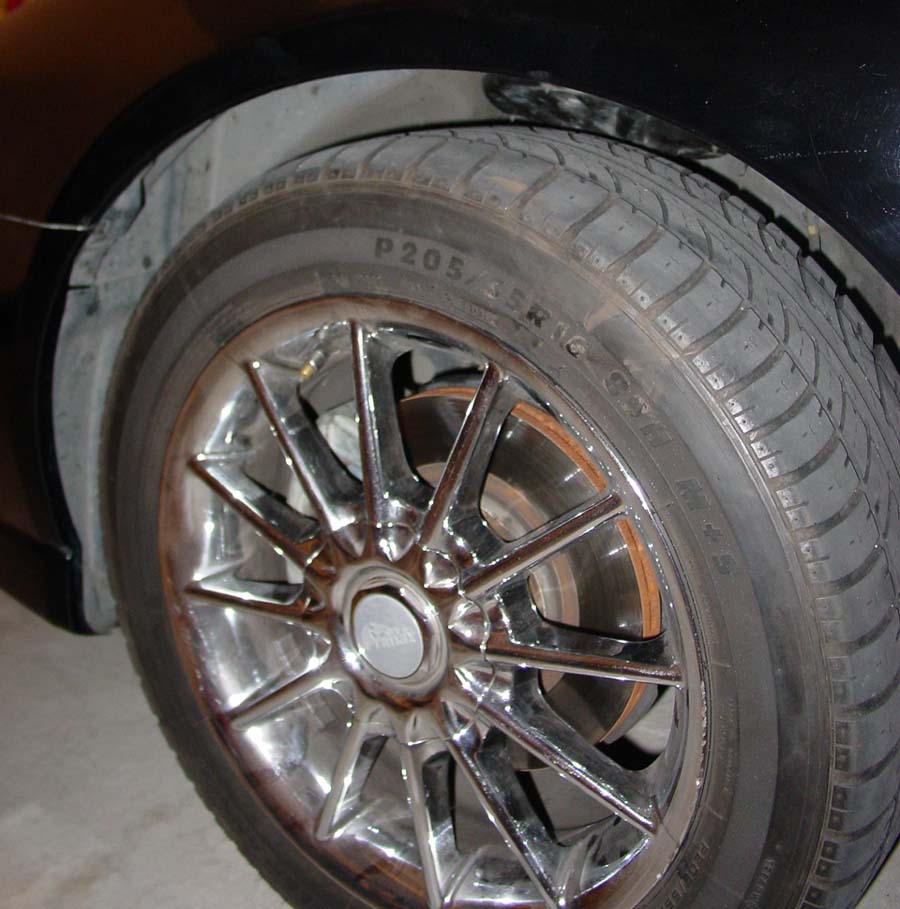
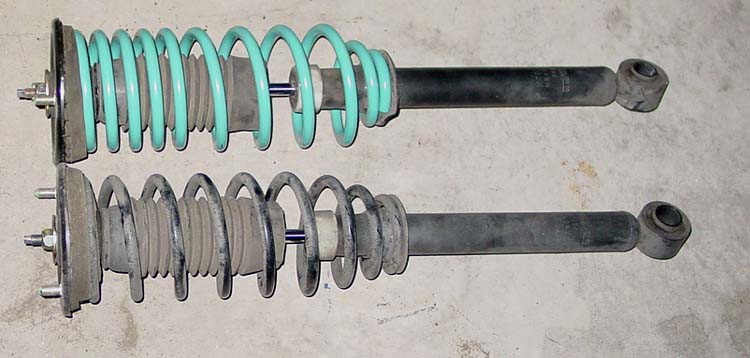
Heres the differance in sizes:
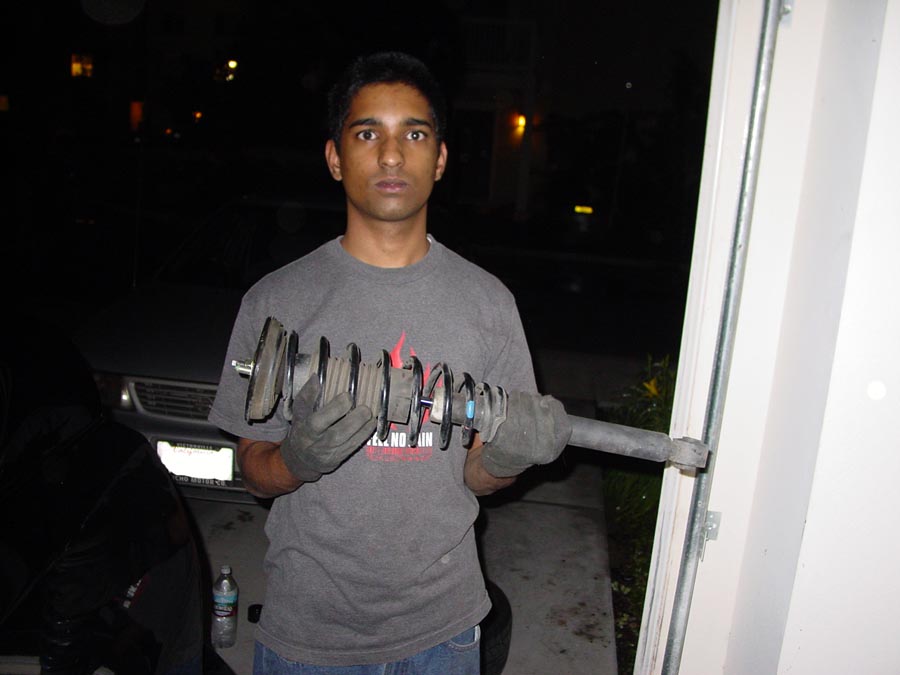
AND ITS IN!!! We have done the front:
^Notice how its dark outside...
Ok, take a break, go reup on some food/beer/fresh 'filtering
water'/ect. It's time for the rear suspension. Though don't worry,
this takes half the time.
Last edited by Jet Black; 11-29-2009 at 09:41 PM
<span style='font-size:30pt;line-height:100%'>REAR SUSPENSION</span>
Jack it up on the control arms (where the bushings are), and take the wheels off :
Take out the rear seats. The bottom-cushion-bench-seat is held in by 2 clips:
The back seats (not the rear bench), are kinda tricky. First their are 4 bolts that you have to unscrew on the bottom of them (I could only locate 3 of the 4 in this pic at the time ~ the 4th one is right next to Peano's pinky):
Now when you get those 4 bolts off, the seats will not come off immediatly. You will need to push UP, then pull OUT. Their held in by 2 or 3 metal hooks up near the headrests.
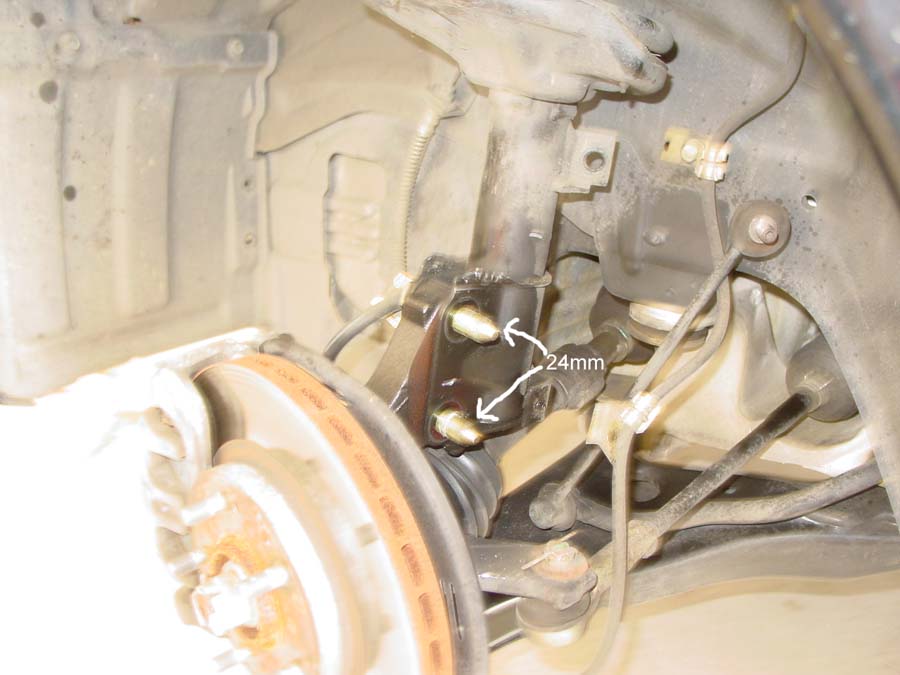
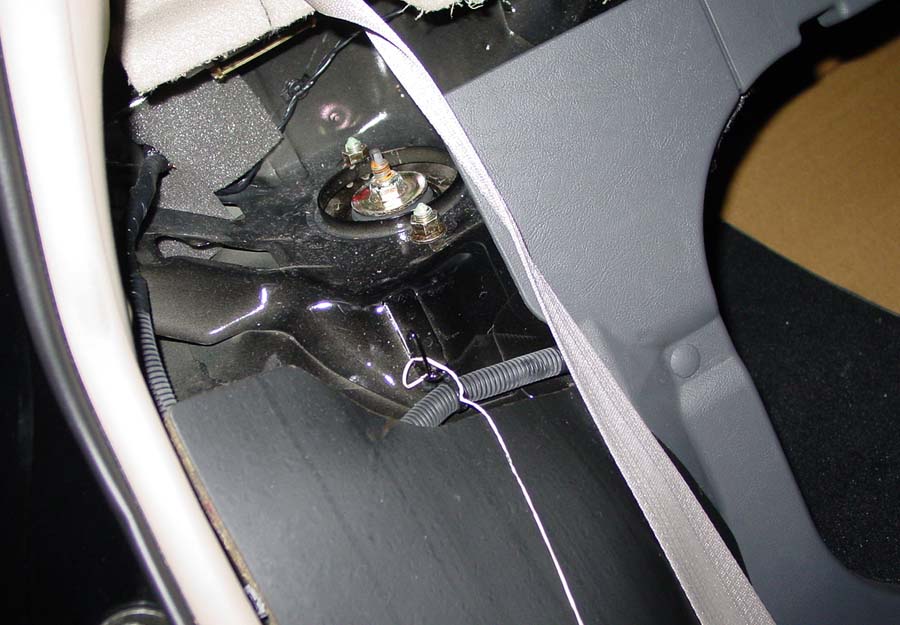
After getting the rear seats out, you have access to the suspension (take the cap off) :
[quote][b]Unscrew the 2 outer nuts (not fully though).
Next look at this diagram and take apart number 3. <span style='color:red'>WARNING: The break is storing engergy as well, when you take the whole suspension out (#4 on diagram), the brake will fly up very fast.</span>
:shock:As you can see, Peano nearly got his whole hand ripped off (BE CAREFUL ):
Now go ahead and take those 2 nuts off (the ones you loosened a few seconds ago).
Then while still holding the suspension, make a mean face (like so), and snap a picture (also try to make your eyes as crooked as possible):
After taking the whole suspension out, go ahead and stick the spring compressors on the springs (while its still on the strut/unlike in this picture).
And disassemble. This time around it should be 10x easier to take it apart.
Heres the whole assembly layed out:
Throw the stock springs on their. You probably dont even have to use the compressor (we didn't, but then again we were installing Progress, with Eibach Pro's you might have to)
And go ahead and stick everything together again. Though this time around it will be a bit tricky. Your going to need someone to put weight on the brake to bring them down low enough so that you can put the #3 (see diagram above), bolt in again.
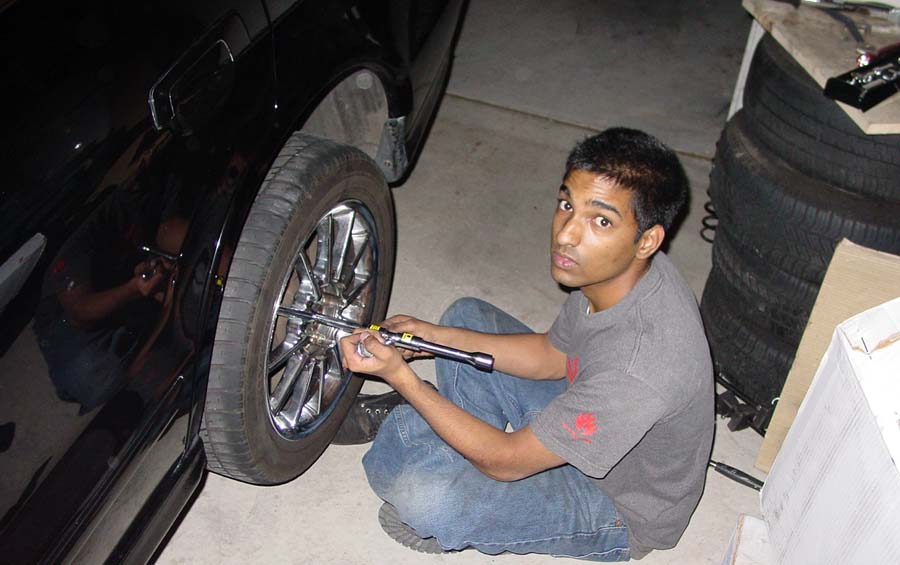
Reassemble everything (break lines/ect). And put the wheels back on. Also make a face like you just got caught jacking off by your mom (look at those big sexy guns in action).
AND FINALLY VICTORY!!!
Grab your tire iron, let out a primal scream, and break all your windows. Now go get your car aligned.
peano looks 120% different than i imagined...
BWAHAHAHAHA :laughing: :laughing: :laughing: :laughing: :laughing: :laughing: :laughing:
ahh....this is great....more pics of people please...u guys look too funny....
nice write-up too......
HAHAHA When you put the two pictures together side by side, we really look like freaks.
Peano looks like he has down syndrome, I look like I'm about to murder someone.

How fast does the rear brake setup comes up? 'Cause I don't want to get hurt? And should I cut the factory bump stop in half?

i tapped the shock out with a hammer. the hammer handle was long enough so that i'd be out of the way. but yea. as soon as that shock comes off the rear brakes go up. not not all the way though. just tap it with a block of wood or something so your hands are clear.
wow.....that looks like good stuff

What ever happened to the pictures? It seems like a great tutorial to me.
<div class='quotetop'>QUOTE(9G)</div><div class='quotemain'>What ever happened to the pictures? It seems like a great tutorial to me.</div>
there back up
Cool. BTW, its basically the same thing for the 9G except the rear struts have 3 bolts on top and they are all under the cover on the trunk(no seat removal at all)
Man, thank God the rear spring are not as stong as the front springs :shock: .
THIS is the reason why your supposed to prop the brake up:
PS The axle is not connected to anything...

This helped me out alot.
This is a 2 man job. It took me by myself 7 1/2 hours and i'm very sore.
I had a couple problems though. Mine is a 01 es.
For the front i had to break the stabilizer bar nut loose then use a hex and a open hand wrench to take the nut off. It kept spinning otherwise.
Those big 24mm nuts were very hard. I picked myself up one one and i'm 220 lbs. The other side would turn when loosening and tightening. First i broke it loose on one side. Then i had 2 sockets and 2 breaker bars one going up and one going down. That was pretty hard. An open wrench on one side will work but i had problems keeping it stable with it and started stripping the nut.
And the whole stem started turning on the struts and the shocks while trying to take off the top nut. So i put 2 vise grips on it to stop moving. Although it might not be reusable again.
For the front i simply raise and lowered it to the right point to slap on the strut and stabilizer bar, no lifting.
The hardest part on the rear is getting that shock back on by stepping on my drums.
2001 I4 White ES
Injen intake
Arospeed bomb
Magnecore wires
Denso iridiums
Gdi stb
Alpine cd
polk components
2 alpine 10s
2003 17inch eclipse gt rims
Yokohama tires

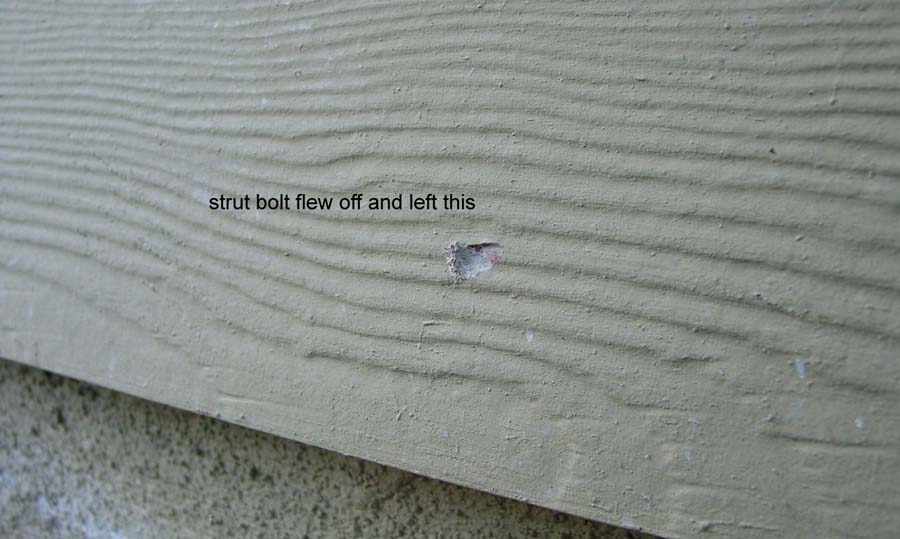
Just want to put the size of the bolt in lower part of the shock:
rear shocks needs a 17mm socket.

what is that one thing almost got his hand chopped off ??
'00 Mitsubishi Galant ES 4g64T (Samantha)
'01 Mitsubishi Galant ES 4g64 (Daily)
'02 Mitsubishi Galant ES 4g64 (SCRAPPED)
'00 Mitsubishi Galant ES 4g64 (SCRAPPED)
'91 Volvo 740 Turbo B230FT (SOLD)
'88 Mitsubishi Mighty Max (SOLD)
'91 Kawasaki ZX7 (SOLD)
'95 Kawasaki ZX9R

nice tutorial!!
anyone have an answer. What is it that i have to watch out for?Originally Posted by spdracr
'00 Mitsubishi Galant ES 4g64T (Samantha)
'01 Mitsubishi Galant ES 4g64 (Daily)
'02 Mitsubishi Galant ES 4g64 (SCRAPPED)
'00 Mitsubishi Galant ES 4g64 (SCRAPPED)
'91 Volvo 740 Turbo B230FT (SOLD)
'88 Mitsubishi Mighty Max (SOLD)
'91 Kawasaki ZX7 (SOLD)
'95 Kawasaki ZX9R

what he means is the rear knuckle is held down by the shock when you knock the shock off the knuckle it'll "lift" up cause the shock is not pushing it down same happens when you put it back on you have to have someone push it down so you can fit the shock

If you're seriously worried about a little scrape.. maybe you shouldn't do it. It's just the bolts on top of the rear assembly.
~Lady Driven~


 2000 Mitsubishi Galant ES


Bookmarks