The Galant Center - Powered by vBulletin

Thread: Tearstone V6 Turbo Kit (Lots of Pics)

Page 4 of 8 FirstFirst 12345678 LastLast
Showing results 61 to 80 of 157
  1. #61
    theblackpearl
    Guest
    sucks your not gonna have it done for tomorrow man, i was really lookin forward to having you come down with me and brandon! hope everything comes together, looks awesome dude keep up the good work and keep posting pics pics pics...

  2. #62
    Experienced TGC Member DryBear's Avatar
    Join Date
    11-05-2003
    Location
    San Francisco Bay Area
    Posts
    1,517
    Quote Originally Posted by underated
    aww your is a little different then mine. mine doesnt have the second bend near the crash bar but i didnt unbolt the whole thing just that bottom 12mm then pulled the bracket out alittle and slid the power steering loop down and behind it...

    are you trying to take the whole thing off?
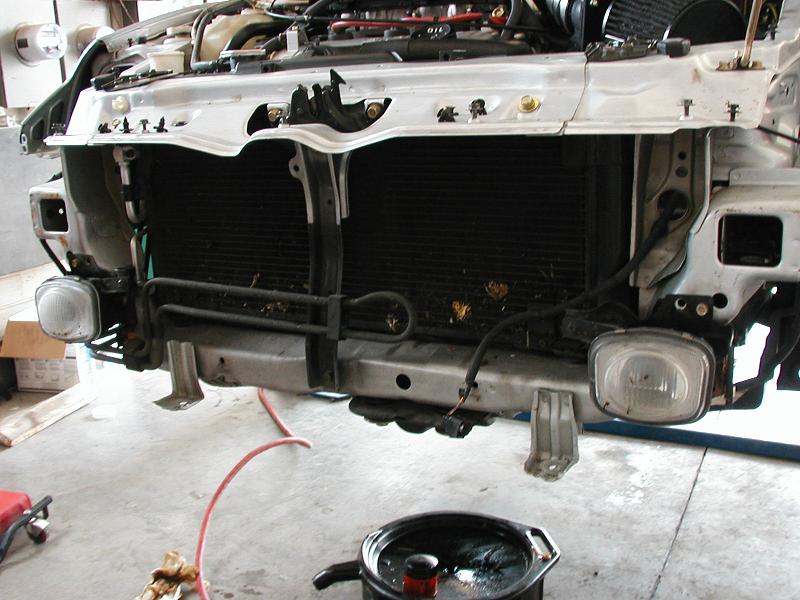
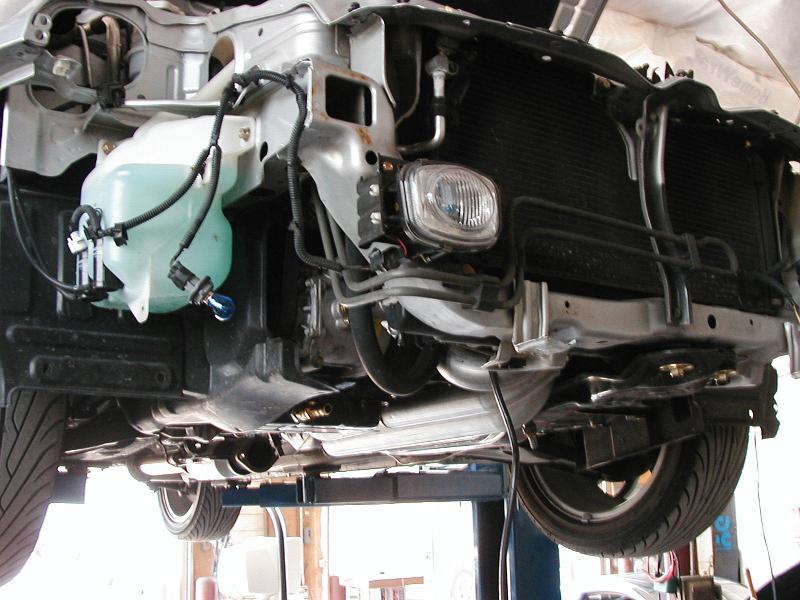
    That's actually not a bad idea - from the sounds of it, it looks like that bar is staying, but with the power steering loop behind it.

    Quote Originally Posted by theblackpearl
    sucks your not gonna have it done for tomorrow man, i was really lookin forward to having you come down with me and brandon! hope everything comes together, looks awesome dude keep up the good work and keep posting pics pics pics...
    Yeah, I was really hoping to get it done for the meet, but I ran into a lot of bumps. Besides, I still would have to do the breakin, and it would be sooooo hard not to push it

    Well, at least that gives me time to put in some other goodies like the additional tranny cooler.

  3. #63
    Tearstone
    Guest
    <div class='quotetop'>QUOTE(wanderingpinoy)</div><div class='quotemain'>
    Yeah, I was really hoping to get it done for the meet, but I ran into a lot of bumps. Besides, I still would have to do the breakin, and it would be sooooo hard not to push it Â* Â*

    Well, at least that gives me time to put in some other goodies like the additional tranny cooler.</div>

    I totally feel responsible for this and I am sorry that we have not gotten the FMIC installation instructions to you sooner. But we have been super-duper busy and Donny just returned. I'll get back up with them tomorrow to find out what the status is with those instructions.

    Thank you very much for your patience, I know you've had more than enough through this whole entire process.

  4. #64
    Tearstone
    Guest
    These were the pics I wanted to share with you today.

    This is my custom FMIC on the car to demonstrate a basic idea how much clearence we have between the bar that you want to hack off versus how well the FMIC stays underneath the affixed bumper. Again this is the FMIC on my car and it is upside down in comparision to how your FMIC will be installed.


    Here is a picture with the bumper cover off and the bumper out


    Another


    Here is a picture with the bumper cover on and the plastic air dam that your car does not come with. Also do not put a fan in front of your A/C condensor as it impedes flow. (We have learned a lot over the years)


    I hope that helps

  5. #65
    Experienced TGC Member DryBear's Avatar
    Join Date
    11-05-2003
    Location
    San Francisco Bay Area
    Posts
    1,517
    Thanks for the pics Russ - as a comparison, here's a pic I took for Jimmie - was on the phone with him discussing the intercooler piping and he wanted to get a pic of what the bar looks like:


    I tried to e-mail them to him but his computer was acting up. Anyway, I described the bar to him and he stated that it sounded like the earlier design of the 3rd Gen with the first bumper. It does appear that I will have to modify the bar to get the intercooler piping to fit, as with the earlier 3rd gens, but it shouldn't be too hard - just cut a bit of the bar so that I can flatten it out a bit to get the piping to fit behind the bumper. I measuered the bar, and the U shaped indent out was about 1/2" or less, while the distance from the flat part of the bar to the crash bar was about 3" - enough for the intercooler piping to go behind.

    Here's a pic of what Jimmie was able to describe in terms of the intercooler piping, about 90% done:


    Good news is that I don't have to mess around with the power steering loop too much - just pass it behind the bar as Underated had suggested.

    Right now the exhaust setup is complete:


    Need to finish off the vacuum lines, wire up the emanage, wire in the last injector clip when it arrives (got lost in the mail :? :cry: ) and finish off the intercooler piping.

  6. #66
    Tearstone
    Guest
    Cool deal, I hope you have enough information to finish up your installation now Let me know if you need more info Len

  7. #67
    Experienced TGC Member DryBear's Avatar
    Join Date
    11-05-2003
    Location
    San Francisco Bay Area
    Posts
    1,517
    follow-up on the problem of the turbo sitting a bit over the transmission housing - the manual control lever of the park/neutral position switch was touching the turbo while in park:


    Since the part of the manual control lever that is hitting the turbo housing is apparently only for alignment purposes, I yanked out the manual control lever:


    And cut off a bit of the tip:


    No more problems:


    Since I had the cutting tools out, finished up the ghetto fab of the Braille battery tie-down - pulled out the OEM battery tray, marked the outline of the battery, then made a hole for one of the tie-down posts:


    My tie-down "kit":


    Cutting the bracket to size:


    Finished bracket on battery:


    Braille battery mounted:


    I'm hoping to get the eManage and Zeitronix wired up tomorrow. The missing injector clip should arrive Monday, and hopefully I can finally finish everything up by then.

  8. #68
    Tearstone
    Guest
    The clip was overnighted to you yesterday so you should be receiving it today. Good luck on finishing up your turbo project.

    Be sure to check your e-manage to insure that it is not blinking red. If it does then pull the code out of the manuals supplied with it. It's okay if the green light turns orange as that simply indicates that it is passing through an A.A.V. point.

  9. #69
    Experienced TGC Member DryBear's Avatar
    Join Date
    11-05-2003
    Location
    San Francisco Bay Area
    Posts
    1,517
    Update from yesterday:
    Modified the front support bar that holds the power steering coil - the intercooler piping now fits perfectly behind the crash bar -
    Before:


    After:


    Later I'll probably flatten it out more then weld it all shut, but it is still pretty rigid.

    Got the last injector clip and got everything wired in, as well as some of the intake pipes. Getting that damn elbow on the throttle body was a pain:


    Started wiring up the emanage injector harness to the main harness - hopefully I'll get that all wired in tonight, as well as getting the intercooler mounted.

  10. #70
    8G_GTZ
    Guest
    lookin real good Len. after the warranty is done for me in 3 years, this will be mine. BTW, did you have that intake on you?

    And keep the updates comin. It's been 3 days.

    Steve

  11. #71
    Experienced TGC Member DryBear's Avatar
    Join Date
    11-05-2003
    Location
    San Francisco Bay Area
    Posts
    1,517
    <div class='quotetop'>QUOTE(shogun7g)</div><div class='quotemain'>lookin real good Len. after the warranty is done for me in 3 years, this will be mine. BTW, did you have that intake on you?

    And keep the updates comin. It's been 3 days.

    Steve</div>

    Just have to finish off wiring up the emanage, then finish up the intercooler plumbing - been kind of working on and off due to the holidays and relatives and stuff, but I did get all the wires all cleaned up and all the sensors installed.

    Good news for me is that the piping shifted around a bit after tightening up, and I can now use the Greddy oil-filter adapter again. 8)

    Hopefully I can fire her up real soon now!

  12. #72
    8G_GTZ
    Guest
    great news man. thanks for the update. Happy Holidays.

    Steve

  13. #73
    Experienced TGC Member DryBear's Avatar
    Join Date
    11-05-2003
    Location
    San Francisco Bay Area
    Posts
    1,517
    Since the exhaust piping shifted around a bit, I test fit the Greddy Oil Filter adapter+filter and it fits! 
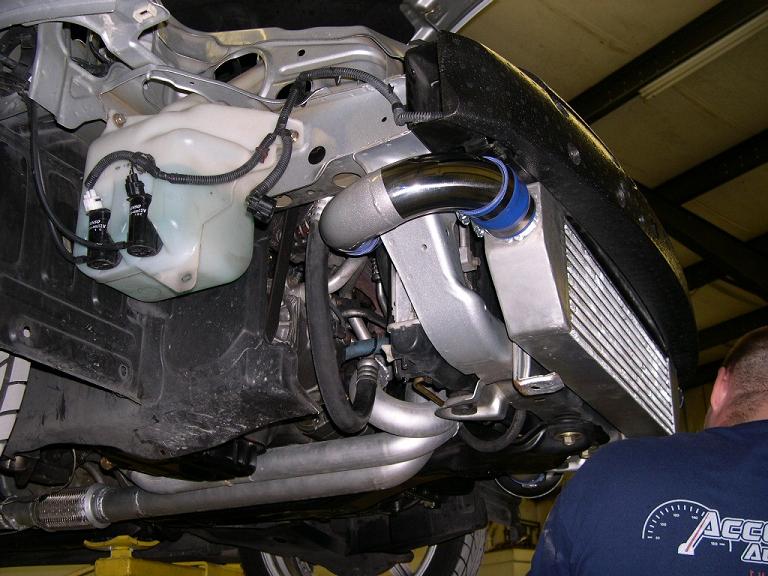
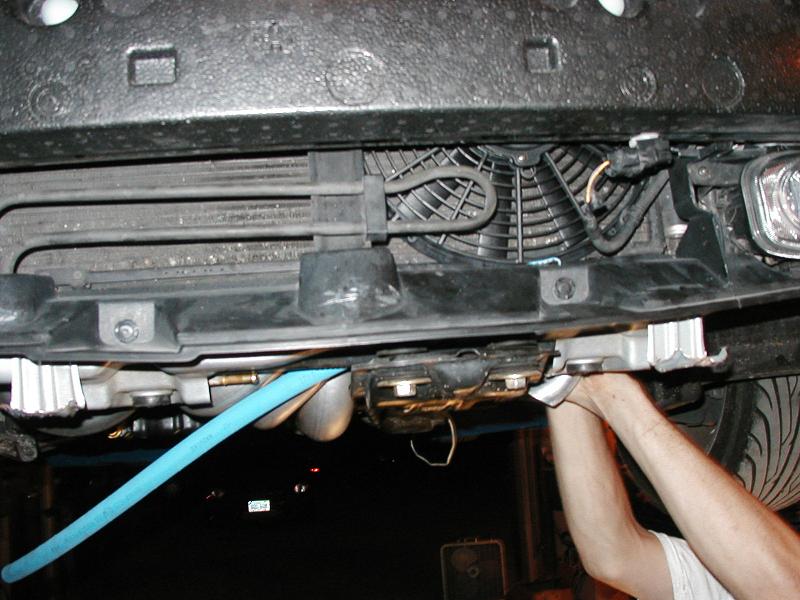
Now I get my oil pressure/temp sensors back without hassle :mrgreen:

    Finished the intercooler piping - still have a bit of tweaking to do, but I at least have the general layout done:


    While piecing together the intercooler piping, I felt like I was playing Tetris :laughing:

    Update: although the pipes seem to fit the way I have it - the layout is apparently wrong, so back to the drawing board :?

  14. #74
    Experienced TGC Member DryBear's Avatar
    Join Date
    11-05-2003
    Location
    San Francisco Bay Area
    Posts
    1,517
    Turns out my intercooler piping was incorrect, as the BOV needed to be closer to the throttle body - the way I had it, the BOV was closer to the intake, so it needed to be relocated:


    Think I found the correct setup, just need to confirm it with Tearstone:


  15. #75
    Experienced TGC Member DryBear's Avatar
    Join Date
    11-05-2003
    Location
    San Francisco Bay Area
    Posts
    1,517
    Still waiting for the official intercooler piping instructions, but I'm just going to buy some 2.5" tubing to temporarily finish off the rest of it.

    In the meantime, started hacking up the bumper to fit the FMIC:


    Still have to trim maybe about 1/4" more to get it to fit at the bottom, but its getting real close.

  16. #76
    Senior TGC Member lonestar22's Avatar
    Join Date
    01-24-2005
    Location
    DFW/Stillwater
    Posts
    2,752
    damn, makes me wish i was cutting up my bumper for an intercooler install
    RIP GALANT, GOOD MORNING BMW 330i

    330i ZSP (E90) - S4 (B5) / hellaflush

  17. #77
    Experienced TGC Member DryBear's Avatar
    Join Date
    11-05-2003
    Location
    San Francisco Bay Area
    Posts
    1,517
    Everythings buttoned up, except for the front bumper - I need to make a few more cuts, and it looks like the intercooler piping is running into the driver's side driving light by a little bit.

    Tried starting up the car but it dies out at idle. I'm guessing I have an exhaust leak somewhere. There was a bit of white smoke coming from the downpipe connection to the turbo, so I'm thinking I need to redo that section.

    Hopefully I can iron out the bugs tonight.

  18. #78
    You are here entirely tooo much!! seth98esT's Avatar
    Join Date
    08-01-2002
    Location
    Keokuk, IA
    Posts
    8,348
    Your car wont die due to exhaust leaks, it will because of boost leaks though. Have an air compressor?
    7g for life!

  19. #79
    Experienced TGC Member DryBear's Avatar
    Join Date
    11-05-2003
    Location
    San Francisco Bay Area
    Posts
    1,517
    Yes, I have a compressor - I'll go look up boost leak as well.

  20. #80
    Senior Moderator DOHCstunr's Avatar
    Join Date
    12-17-2004
    Location
    Louisville, KY
    Posts
    4,328
    <div class='quotetop'>QUOTE(seth98esT)</div><div class='quotemain'>Your car wont die due to exhaust leaks, it will because of boost leaks though. Â*Have an air compressor?</div>
    AND VAC LEAKS.
    http://www.vfaq.com/mods/ICtester.html

    keeping boost leaks under wraps will keep your injectors from being overworked, minimize spoolup, and keep your fuel trims accurate
    ______________________________

    1994 Galant GS-Turbo

Page 4 of 8 FirstFirst 12345678 LastLast

Posting Rules

  • You may not post new threads
  • You may not post replies
  • You may not post attachments
  • You may not edit your posts
  •