The Galant Center - Powered by vBulletin

Thread: F/G Dash *** COMPLETED!! NEW PICS !! ***

Page 2 of 4 FirstFirst 1234 LastLast
Showing results 21 to 40 of 79
  1. #21
    I will put on together when it is all done but i want to make sure it comes out good first. I dont want to give bad info if it is shitty , ya know. So for now i will just post pics as it comes along, plus i still dont know all the steps yet , this is my first time ever with F/G

    when it is all done and looks good thats when we can look to see a tutorial

    Psssssssssst Got Air???

  2. #22
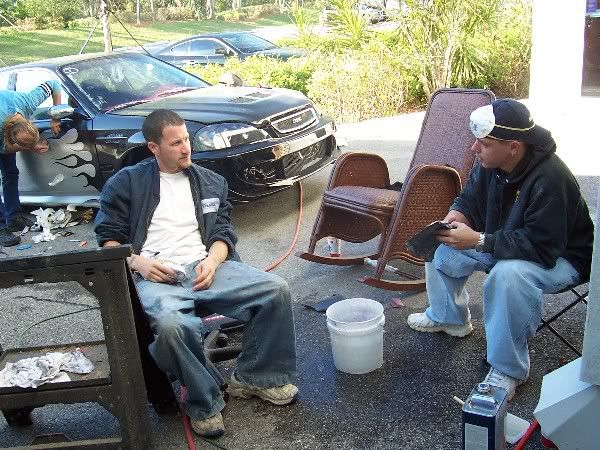
    Well yesterday and today ( all day both days ) i have been working on my dash.....
    as you will see i am almost done. We have been sanding,
    put another coat of fiber glass and
    sanding put another coat of fiber glass and sanding ( total of 3 coats of fiber glass resen)
    now that it is all smooth we used a wet sandable primer

    on it and then wet sanded it to check for any dimples and imperfections. we found quite a bit so we filled the imperfections with a bondo filler putty,

    and wet sanded it again so that it is all absloutly smooth.


    now all the parts are preped for automotive primer & paint ( it will match the new paint job of the car !! ) I will take all of this an put a tutorial together once it is ALL DONE :shock: :shock: should be all done in about a week or so ...

    Some people have asked me to do this for them .... as of right now i am not taking any orders just cuz i want to make sure it all comes out right and to see if i really want to do all this all over again, so far it looks like i will but no promises , this is alot of work and time but we'll see

    Psssssssssst Got Air???

  3. #23
    mmmmmmmmm damn pure s3x...can't wait to see the final product!...Did you get my e-mail?...i'll send u another email...

  4. #24
    send it again, been a bit busy and might have deleted it by mistake...... i cant wait to finish the dash, but as soon as this is done i have to start on the doors and the rear pillars !

    Psssssssssst Got Air???

  5. #25
    what kind of matte or cloth did you use, all i see is resin?....looks cool
    TEAM GENESIS

  6. #26
    LOL very tight man...
    2000 Galant With 20 Inch TeZZen Wheels
    Rapped in Nitto 555 Z Rate 225/35/20 Tires!!

    http://www.cardomain.com/memberpage/350820/

    Yeah I have other stuff too but who cares LOL!

  7. #27
    no matte no cloth.... it is all resen... on parts like this you dont want to make them thicker or heavier.. so i just have sanded and resened my ass off... i know i could have just saneded the plastic , but that just doesnt have the F/G look... i dont care what anyone says thats the truth... it may be close but just not the same... ya know... like Coke & RC ... there both colas but just not the same

    Psssssssssst Got Air???

  8. #28
    ipaintu
    Guest
    why not just 2 k prime with some good Dupont Primer? Two good coats and your set...

  9. #29
    very true i paint for you, but i do kinda see where your coming from.......but resin distorts and warps easy if you have nothing to reinforce it, just a heads up....keep up the good work
    TEAM GENESIS

  10. #30
    the 2kprimer is the next step , probaly this weekend... ill post pics...

    Psssssssssst Got Air???

  11. #31
    ok so today we didnt get as much done as i hoped but we started out by cutting 3 pillar pods off of a pillar and tapeing them together to set a base desigh and get an idea where we wanted to put the gauges...


    then we took a dremil and wut out the area on the dash where the air lines and power lines will need to go

    now the fun part.. yeah right .. lol we layed out some F/G matte over the pods to start basing out the new pods


    we then let it all dry and harden up took about 45 min to an hour i think


    once it was ready to be sanded the sun was down and we had to put it up for the night but got a lil bit of the sanding done not much tho , before we packed it up for the night we wanted to test fit all three gauges to make sure it was all correct so tomorrow we can really get to work on it


    as you can see all gauges fit and tomorrow we will have to fit the PS2 where the air bag was and start to mold that section. once that is done we can get this top part of the dash done and ready for paint. We are shooting for paint next sunday !! i will have more pics and updates , i cant wait till it is done!!

    Psssssssssst Got Air???

  12. #32
    Experienced TGC Member
    Join Date
    04-13-2005
    Location
    Schaumburg, IL
    Posts
    1,455
    that looks really goodd

  13. #33
    damn i should do that seeing i got a extra dashboard

    2010 Evo Gsr
    2001 GTZ
    1999 eclipse sold
    http://www.cardomain.com/ride/633489

  14. #34
    having an xtra is sweet.. this is my 1 an only... try it but remember, it takes time , time and more tim... lol but it is deff worth it. I will be posting a full tutorial when it is done

    Psssssssssst Got Air???

  15. #35
    TGC Regular
    Join Date
    08-01-2002
    Location
    S. CAROLINA/GEORGIA
    Posts
    758
    Looking good man!! Definately keep us posted on this project. I've been wanting to put some gauges in that area since I saw how that sat there in the new 350 Z's. But there's nothing like buying spare parts, just incase you F something up. Just as the ATL members, they know I got enough spare parts to build another "G".. By the way, did you remove the vinyl on the dash before starting this project? Or did you lay matte and resin over it?

  16. #36
    hey BIGMONEYDAY... if i need parts ill hit u up first.. as for the vinyl on the front part of the dash... yea i had to remove all that crap that was a pain but it was all removed and sanded down.... yester day was the first day of real work on the top part of the dash besides removing the vinyl and preping it .... so here is todays progress...

    first we started by taking a piece of plexi glass and sanding it all down to give it a rough surface to lay the fiberglass bondo on... then took the new PS2 and mapped out where it was going to sit .... cut out the area in the plexi and super glued it into postion so it didnt move....
    then we layed out some fiberglass bondo


    we also filled in the seam on the dashboard ...

    then it was on to more sanding ... lol and thats all that we got done today... should all be done and preped by next sunday!!

    Psssssssssst Got Air???

  17. #37
    it looks like you guys filled in the vent for the defrost??

    Webhosting for less than $3 a month? put "pinoyesv6" as a promo code.

  18. #38
    yea im in Fl and there is no need for that here ever.. i have had the car now for 2 years and never used it once ... ill probaly regret it once it is done cuz there will be that one time i will need it but oh well i dont care ... lol

    Psssssssssst Got Air???

  19. #39
    once the dash is done i am going to start a total custom back seat area , remove the back seats totaly and put my air tank there and some tvs , etc....

    Psssssssssst Got Air???

  20. #40
    whats the point in this? Please enlighten me

Page 2 of 4 FirstFirst 1234 LastLast

Posting Rules

  • You may not post new threads
  • You may not post replies
  • You may not post attachments
  • You may not edit your posts
  •