 Log in
 Register
 2001 Mitsubishi Galant ES
On the engine break in, I'd throw down a hard shift as well on those redline pulls. I generally keep the rpms around 3k for its first 10-15 minutes of running.


not to mention the welder so the custom kits can come screaming out of that garage.


On the engine break in, I'd throw down a hard shift as well on those redline pulls. I generally keep the rpms around 3k for its first 10-15 minutes of running.
RIP: Colin McRae, you will be missed.
"I shall go before thee and make the crooked places straight."
2001 ES V6 M/T under construction
1991 Volvo 244ti 300 whp daily driver
www.gooichimotorsports.com

what i usually do it pour my 4qts in though the top of the motor with the valve cover off and coat everything so between the assembly lube and engine oil then the rotating of the oil pump it works pretty wellOriginally Posted by WarmAndSCSI
oh yah dont forget to bleed the lifters if your reusing your old ones wouldn't want to bend any valve on that beautiful motor
need a welder too that would be alot of fun i wanna make a custom strut bar lol
Brandon - 2001 Galant GST 5speed
Wiseco // Eagle // PTE // Holset // Turbonetics // Supertech // Blox // Prosport // Vibrant // Innovate // OpenEcu // Mishimoto // Magnaflow // Walbro // XXR // Rotora // Brembo // Hawk // R1 Concepts // Dc Sports
Thanks for the tips. I'm going to pick up a gallon or two of diesel to refill these lifters. Just gonna follow the service manual. I'm not sure if we bend valves on the 6G72 if the lifters aren't bleeded... the service manual just talks about cleaning them if you take them out.
And by screaming you mean two.
It's going to take me a looong time to get proficient at MIG, but I should be done by the time you get back.
Should I go ahead and buy some T4 and 3" V-band flanges? I know that's going to be the config for my GT4088R.
bro.. u are the man.. i have never seen a build like this where its almost step by step..
im actually learning alot of the internals just by reading and looking at the pics..
thanks lol
04 Maxima SL in Bronze with Black leather
I'm really glad it's useful for some people! 8)
I'm going to try to compile a list of EVERYTHING I've purchased for this build along with part numbers and whatnot. Should be useful for those looking to do this in the future. I'd estimate I'm saving around $5000 doing this myself - a race build like this would be at least $8000 just to drop it off at a speed shop and let them go at it.
UPDATE: Remember kids, a good machine shop needs your flywheel and crankshaft pulley to do an engine balance. Lucky for me, the 6G72 is internally balanced so I only had to give them one of the components so they could use it for the balancing (has something to do with mounting a component of the reflective balancing system). Taking that flywheel off would have been a pain.
Total price for machine work: $865. That includes all the block, crankshaft, and head work I'm getting done. V6's are expensive :shock:


looking good man. Can't wait to see the final product
Back in the Family!!
yah man machine work labor is expensive i just realized that too :shock: lol
Brandon - 2001 Galant GST 5speed
Wiseco // Eagle // PTE // Holset // Turbonetics // Supertech // Blox // Prosport // Vibrant // Innovate // OpenEcu // Mishimoto // Magnaflow // Walbro // XXR // Rotora // Brembo // Hawk // R1 Concepts // Dc Sports
I justify it by reminding myself these are the BEST engine builders in Utah. They build engines for the local high-HP Supra guys (1100-1400 WHP). I'm sure they'll do a bang up job on my block.
Any way, I just bought some basic stuff: antiseize, fuel injector cleaner, copper spray-a-gasket, and an engine hoist. This 2-ton hoist was on sale for $120 :shock: It's foldable for easy storage. 8) I'm sure it'll appear in several of the upcoming pictures. I plan to pull this block during the week so I'm ready for the install this weekend.
I received my Fel-Pro PermaTorqueMLS head gaskets and a Fel-Pro water pump gasket today from Rock Auto. The larger part of that order comes tomorrow. I had to order the oil filter bracket gasket from the dealer since Fel-Pro doesn't sell that individually.
Tomorrow I drop off the freeze plugs at the machine shop so they can put those back in. I expect the block will be bored and the heads will probably be surfaced. I think there is a total of about 12 hours of machine work to be done on the block and heads, so hopefully they can fit that into 5 days. It would be a big disappointment to have to wait until next week.
Once I'm done with the build, I'll post a list of absolutely everything I had to buy (including services) for everybody's future reference.
Good on you!!!
CURRENT STAUTS: Just got off the phone with the machine shop. They're really concerned with getting the balance right on the crankshaft, but I let them know the Fidanza flywheel is just solid, uniform aluminum. Balancing the engine internally shouldn't be a problem.
What's done so far: heads are disassembled and resurfaced and block is honed and decked. All that's left is for them to gap the rings for me and balance the crankshaft. I'm going in after work to drop the freeze plugs off and check everything out - I'll have lots pictures and more details. Still, I'm very pleased that the whole short block is almost done after only 2 days of them being able to work on it.
CURRENT STAUTS: The machine shop is almost done! Things left for them to do: install the freeze plugs, gap the rings, and chamfering the oil holes on the crank.
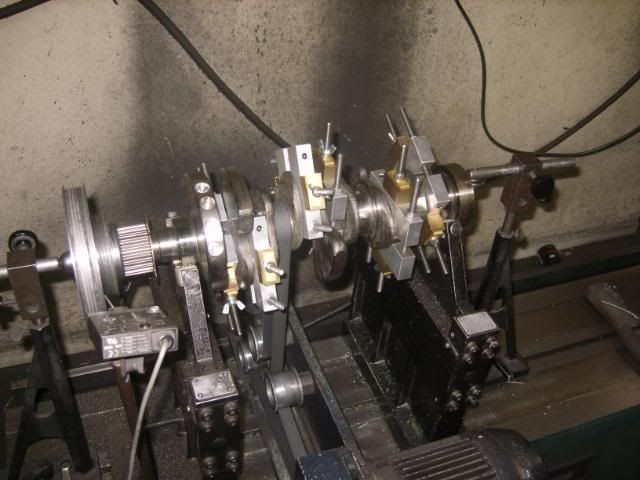
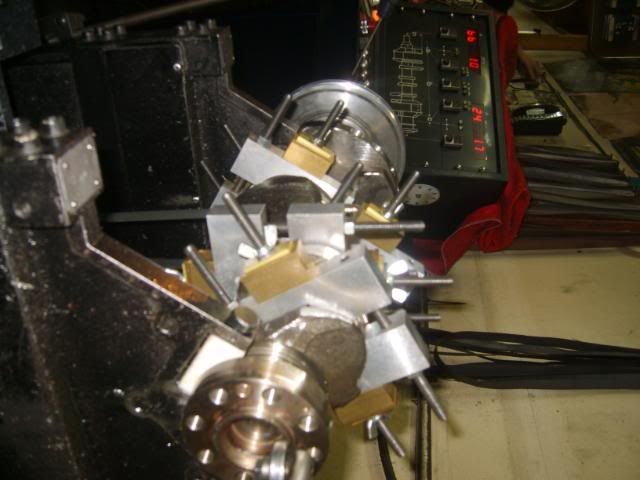
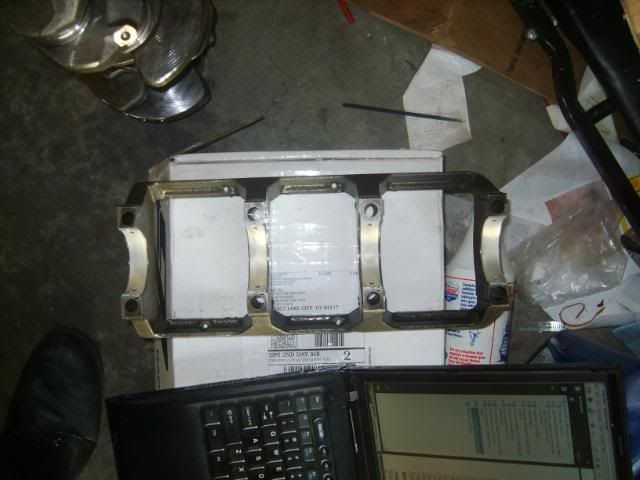
When I went in yesterday, they had the crankshaft polished and balanced out. I've got some pictures of the crank on their balancing machine:
NEW PICS:
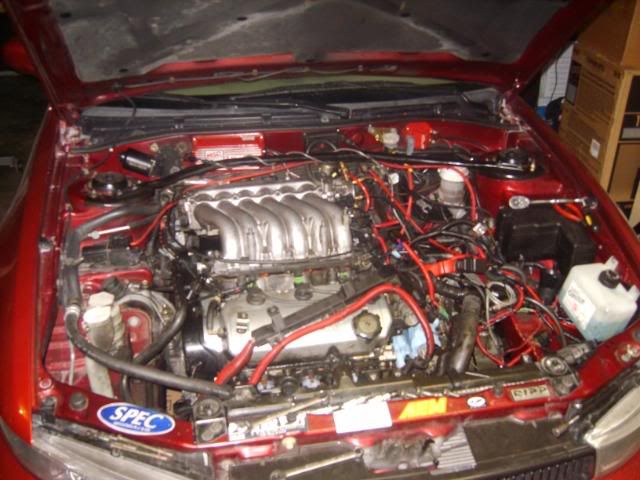
Getting ready to pull the engine - supercharger pulled.
And stay out, bitch! - I wish... Turbo setup coming soon.
Plenum separated, coolant hoses disconnected, and wiring harness moved aside.
I got tired and gave up for the night. :cry: I should have it pulled tonight, though. New engine should be on the stand tonight and in the engine bay Saturday! Sunday is break-in day - I'll annoy all the damn Mormons with my 21 lbs of boost exhaust while they're in temple.
UPDATE: Machine shop is finished! I'm picking up the engine after work. Will post lots and lots of pics of the engine assembly. :D The one extra day to get this done will be nice - I was expecting the machine work to be done tomorrow!
Fucking awesome man ...Congrats on the build, you are going to have one hell of a beast. :twisted:
222whp/250wtq
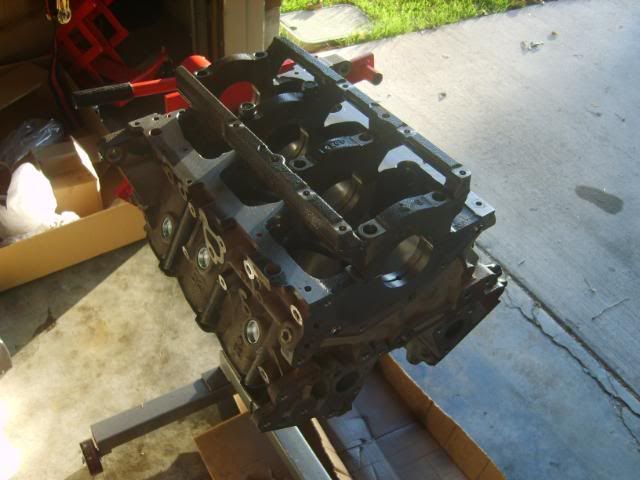
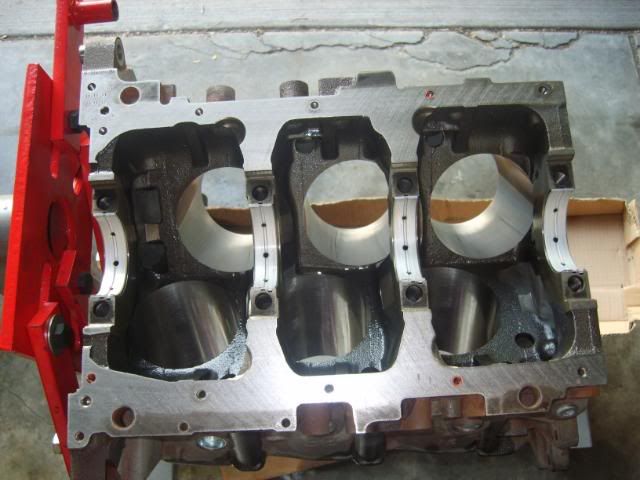
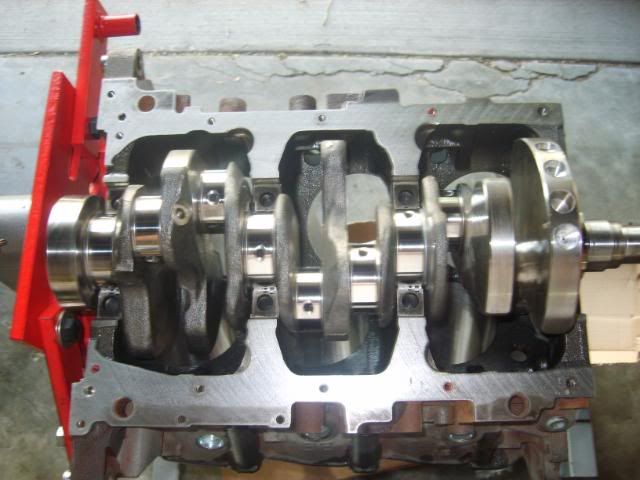
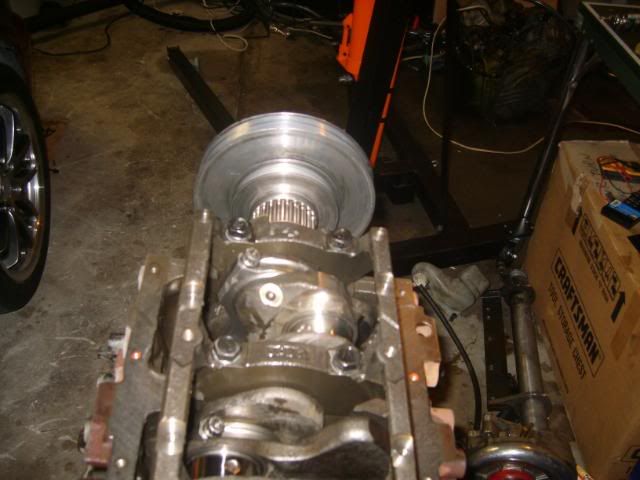
UPDATE: Well, I got everything to the house and started putting the block back together. I have the crankshaft in, with bearing clearances checked, all 6 piston-rod assemblies put together, and 3 pistons in the block.
PICS:
The new block - ver nice! How much? :D
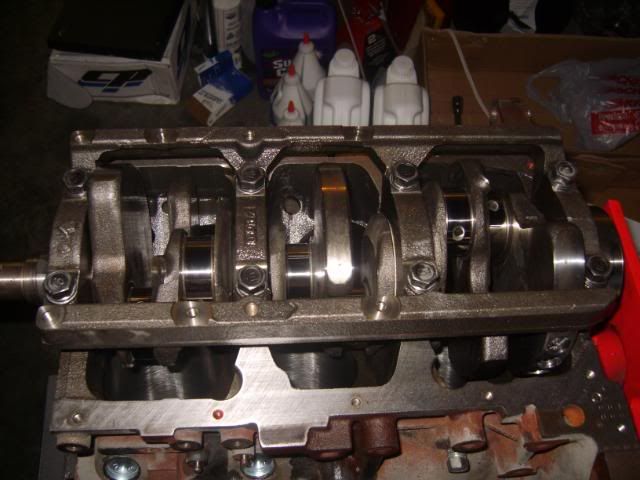
Main bearings in the block.
Main bearings in the main cap.
Crankshaft in the block ready for bearing clearances to be checked.
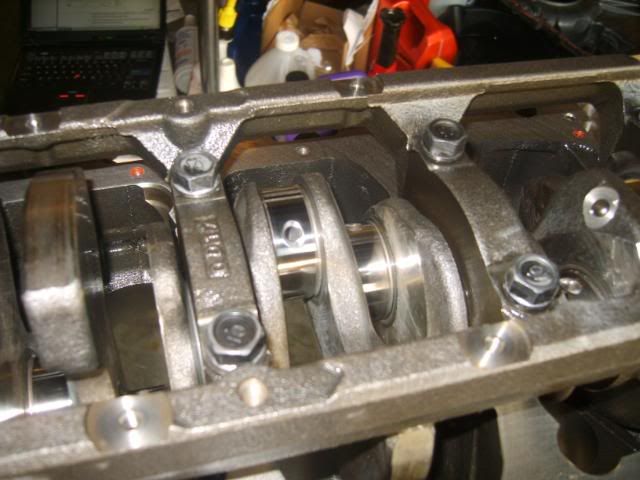
Main cap installed.
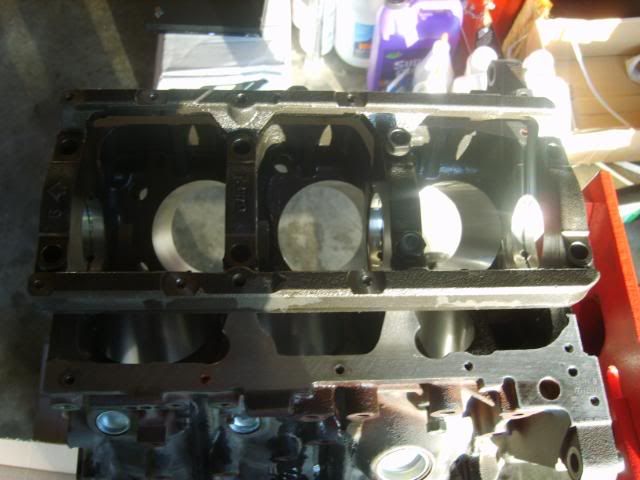
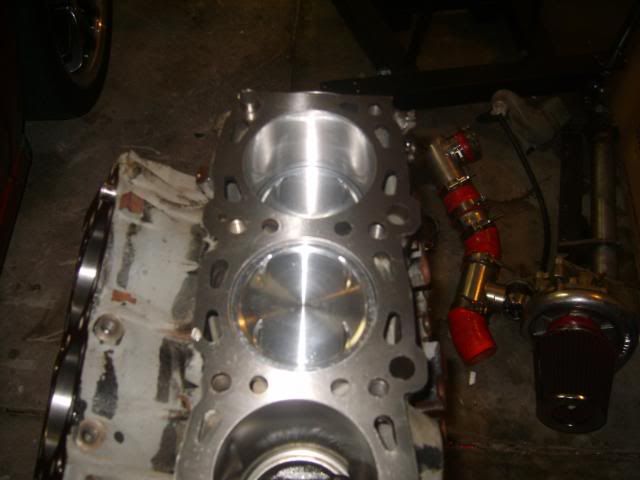
Check out the polish on these journals - had the oil holes chamfered too!
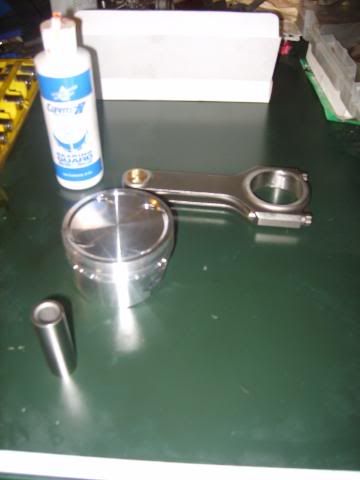
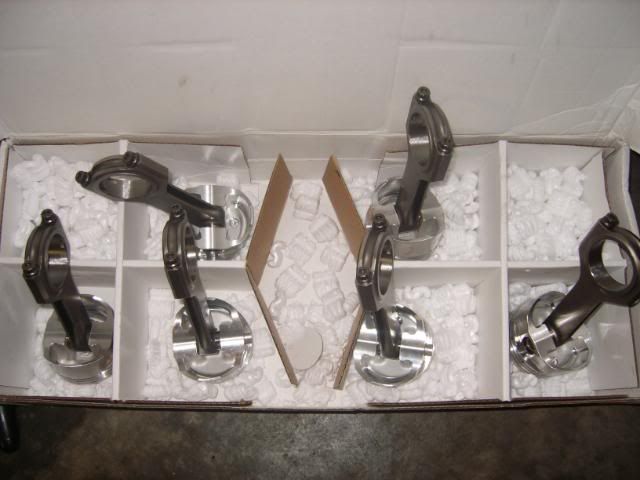
And 6 of these things to put together.
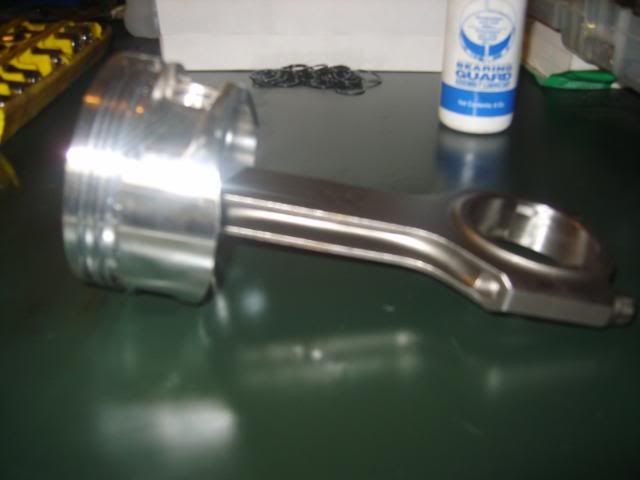
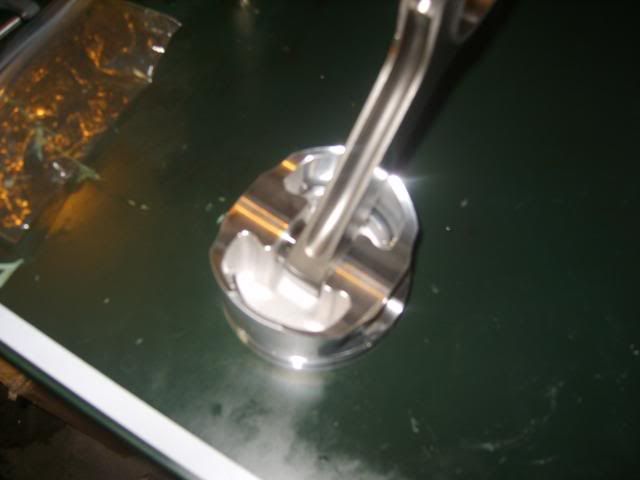
Here's one done. Actually, the hard part in this is putting the Spiro Locks in to hold the wrist pin in place. 4 of these locks for each piston - ugh.
Which would you prefer?
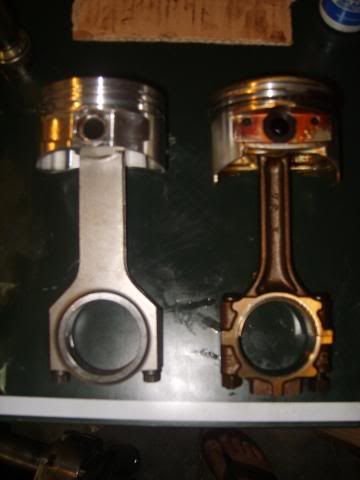
All 6 done!
Look, 2 rod caps installed!
And the two corresponding pistons. :D
That's all for tonight!
This thread got me entertained for far to long tonight (just read it all) and now it's 2:17a! Shiiiiiiiet I got school and working early in the morning tomorrow! Damn youuuuu and your interesting-ness of the build-up. =o
'o4 Acura TL: Dynamic ;; AEM | P2R | Falken
Sound.Vision.Soul // Drive.Drift.Dream

man this build up is sick.
I'll take some pictures of the actual piston install process (since I have 3 left). I rushed through the other 3 without taking pictures because I was so excited :P
 Posting Rules


Bookmarks