 Log in
 Register
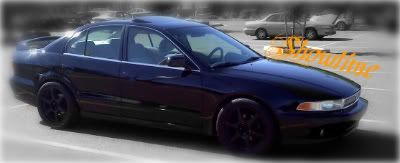
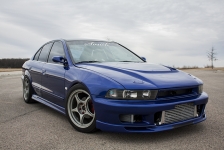
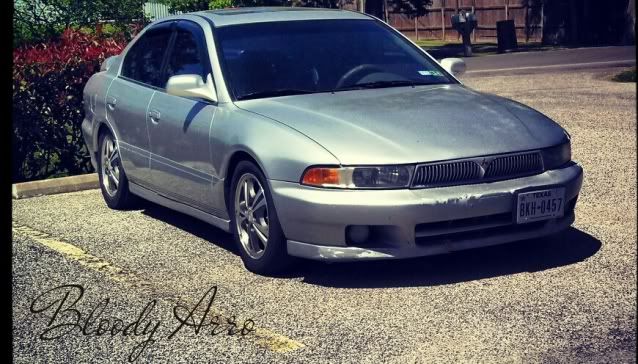
 2003 Mitsubishi Galant ES


 Reply With Quote
dude thats a sick DIY. Nice Job!


Screwing around with some left over fiber glass material, I decided to try my best at some eye lids.
**REMEMBER - SAFETY FIRST fiberglass and body fillers are extremely harmful. I'm not responsible for any damages done to you or your car**
MATERIALS: Fiberglass sheets, Fiberglass Resin & Hardener, Masking tape, latex gloves, Respirator, Cooking Spray, Mixing tray & Utencil, Dremel, Body Filler
Step 1: Clean your headlight lenses & Mask off the desired design for your lids
Step 2: Protect your headlights. Cover the entire lens with masking tape. I chose two colors to differentiate my guide.
Step 3: Pre-cut strips of fiberglass sheets. I used 3 layers per lens, which is pretty flexible. *This is where you want to lightly spray the masked area with cooking spray - preventing any damage to the masking tape & your lenses*
Step 4: PUT ON YOUR MASK - Mix the fiberglass resin and hardener according to appropriate directions.
Step 5: Apply the resin mixture onto the lens, place a strip down, brush on more mixture to the top of the strip. Repeat.
*Remember where your guide is. This is where two colors of tape come in handy. You can go over the line, because you will cut it later*
Once all layers are down, take any remaining resin mixture and put another whole layer over it again.
Let it cure 1.5 - 2 hours (depending on how you made the mixture)
Step 6: Once fully cured, draw a line on the fiber glass where your guides are. Carefully pull off the tape and the fiberglass. I slid a finger underneath one edge and inch by inch got it to lift off.
Step 7: Cut along those guides. I found a dremel was the best way to do this.
Starting with coarse sandpaper, sand down the eye lids to get any bumps & rough spots out. Use a 300 grit to make it extra smooth.
Step 8: Apply Body Filler. I used a Glazing Putty, because it's very easy to apply and extremely easy to sand. Bondo will work too, yet is pretty strong. Whatever's your preference.
It's helpful to put it back on the headlight, so make sure to put down some masking tape again to prevent any damage to your lenses.
Give it the appropriate time to cure, then go back and carefully sand it down. Again, I worked with them on the headlights.
Step 9: Primer & Paint to preference.
Used a filler primer
Viper Graphite to match the grille and pretty close to the rims.
Test fitted - Caught it on a weird angle, they're not really lop-sided. I'll mount it when the paint cures over night
Installed: Used 3M Double Sided Tape.
Enjoy!
Last edited by CHICAGO_ONE; 05-20-2009 at 04:58 PM

dude thats a sick DIY. Nice Job!

Nice tutorial! Might have to try this someday.

Good tut man.

awesome tut JOn!
Jigz-TGCIL Sosick Motorsports
R.I.P. Christopher "CRAZY CHRIS" Beckmann
"you dont appreciate friendship until you lose your bestfriend...."
I'd rather have the knowledge and ability to do it than the money to buy it already done.

Nice work man
2001 5 speed 4g64T
The funny thing is, I was scared to work with FG although I work with CF. So this tut will help me start somewhere with the FG. Even if it becomes a waste. Its a start.
looks good jon. If you take a sharpie and draw your line on the tape BEFORE you lay the fiberglass, the marker line should transfer to the inside of the cured fiberglass. it may save you a little time. Keep up the good work.
Need some paint or bodywork done in Chicagoland or NW Indiana???.. http://www.alsautobodyexperts.com/
Thanks Eric, didn't think of that. I gotta say, the tips you've given me in the past of how to use these materials really gave me the confidence to try it out. Much appreciated
Where can you get fiberglass?

the auto parts store, home depot, walmart.
Hmm never seen it there. Thanks. Just got to get a pair of heads now. I don't really want to risk using my own.
Edit:


nice! great idea and clean results

That doesn't actually look all that hard to do.
Nice work!
Originally Posted by Blue8g


Hm, I have about a month left of summer. I might try this out to make the car look a little more aggressive >:)


Do it.

now if your a little smarter youd once laying the glass on the headlight,pull it off trim it to where you want and then...POLISH THE INSIDE OF THE ARTICLE YOU JUST MADE AND LAY YOUR EYELIDS UP IN THAT.. thus you get your SMOOTH eyelids and dont need to FILL anyhting and sand anything lol.....,well thats how i do it,and then you have a mold aswell!!!!!!!
www.qcustoms.co.nz
But then it will be too small?
nope....... i have sold MILLIONS of eyelids to happy clients and never once had a complaint lol,so im confident itll be fine
www.qcustoms.co.nz
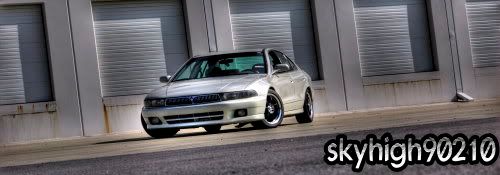
 2000 Mitsubishi Galant ES


Bookmarks