 Log in
 Register
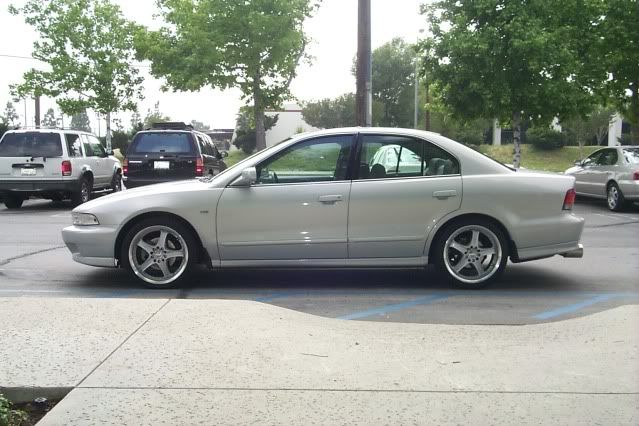


 Reply With Quote
nice write up and beautiful build and car. funny how these cars seem temporary then we cant seem to get rid of them and then we mod them haha


*WARNING* - this is gonna be long so don't hold ur potty (it took me a few nights to write this so i don't expect u to read it all at once)! - *WARNING*
well i thought i would put an article together on what a 10 year USDM 8G build looks like and to commemorate my car's 10th anniversary! i bought this car in JULY 1999, brand spanking new. at first it was supposed to just b a temporary car until i bought the car i really wanted (in fact this was my second choice as i was gonna buy another SUV instead), but i fell in love w/ it and just had to make things to my liking. i will now never ever sell it, not only because i could never make my money back (the total still depresses me a little), but also because it is and will always b my toy. i can't promise that my next car will b a daily like this one was supposed to be (i'll probably mod the crap out of whatever i buy), but it's safe to say, if i had to do it all over again, i probably would have done it just about the same. although this time i would not have to try so many diferent parts and directions to get to the goal.
i actually got off to a fast start on this car (started modding it on the dealership lot, haha!) since i allready had plenty of experience tuning Honda's, my cousin's Mazda as well as my first car (SUV), i was not intimidated at the thought of being a little modified right away... but i didn't know at the time i was going to lose my mind and do this much to it. i did mods in bunches since i would get bored, then do a lot, then get bored again, then do alot, then get bored again, then do alot more, well u get the picture. throughout this build, i had to prototype lots of parts, improvise/invent alot, import parts myself or pay premiums since they were either not made or not available here; all of us in the early days had to do all kinds of stuff to get parts made, u guys have it so easy now. over the years, i've also worn out or broken hundreds of parts so don't get discouraged if the same thing is happenning in your build... nothing ever lasts forever, but it always gives you an opportunity to upgrade.
i'd like to thank all the members who helped me, give a shout out to those i've had the pleasure to meet in person, and i'd like to pass on what i've learned in the proccess. for the OG's this will be like a walk down memory lane (try not to get too misty eyed w/ the nostalgia guys), for others it will be kinda like a history of this platform that u might not have been aware of... of course others have done more, but not many. anyways, enjoy!
here's my most recent MOD LIST:
1999 USDM ESV6 EA8A 3.0L SOHC 6G72
OUTSIDE
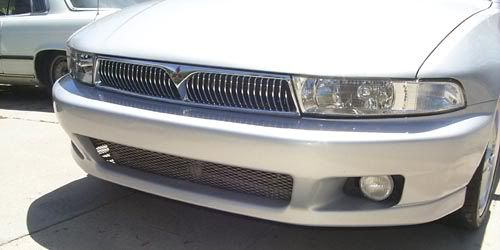
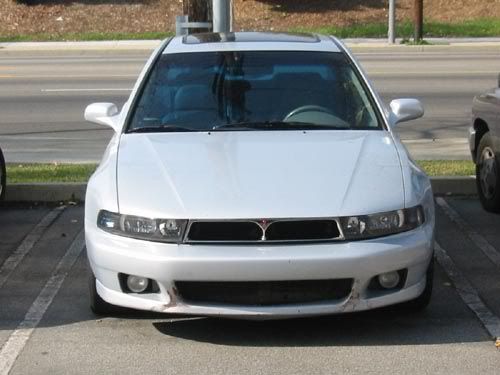
'98+ JDM 1 piece headlights w/ custom clear corners
MCCULLOCH H7 6000K HID low beam
MCCULLOCH H1 6000K HID high beam
MCCULLOCH H3 6000K HID fog beam
custom wiring and relay network converted to H7/H1 from H4 dual filament harness w/ diode bridge
AUTOLUMINATION switchback 1157 white/amber dual colored LEDs
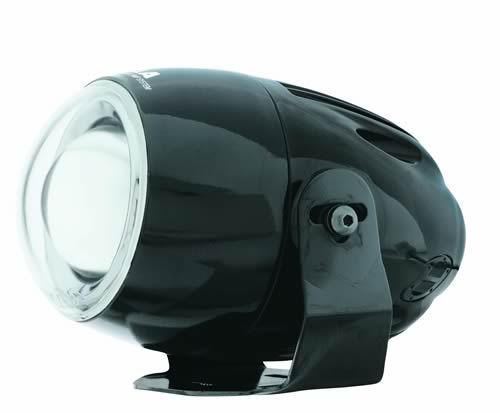
PIAA 998 projector fog lights
'96-'98 JDM gunmetal grill w/ black mesh custom mounted.
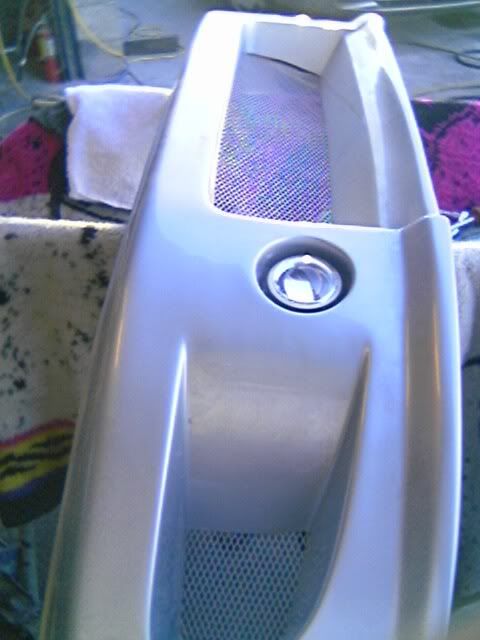
JDM ROUTE SERVICE NIFTY-R front bumper w/ black mesh
JDM SUPER VR4 side skirts custom molded
JDM SUPER VR4 rear lips custom molded
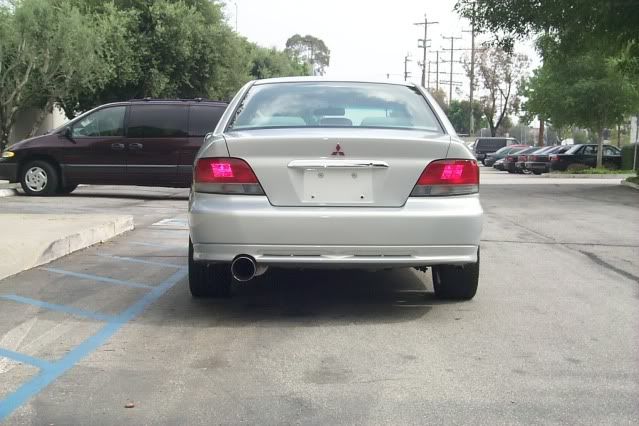
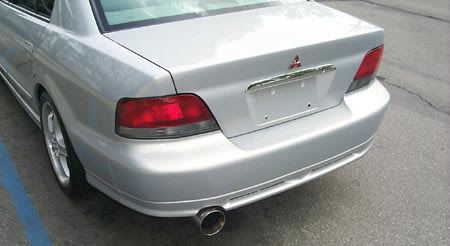
SLP SS rear valence custom molded
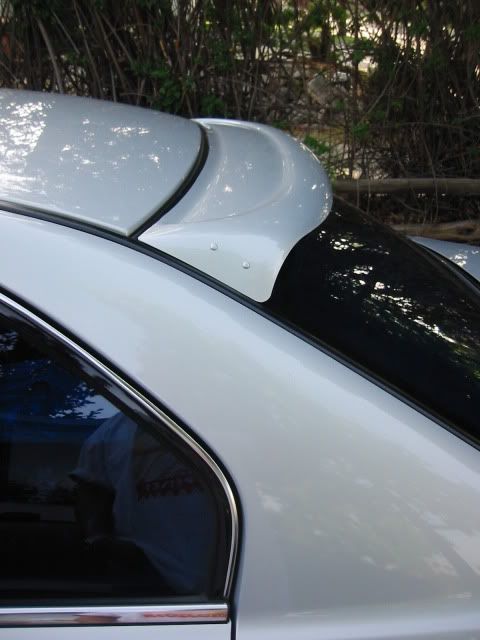
EGR colormatched rear window visor
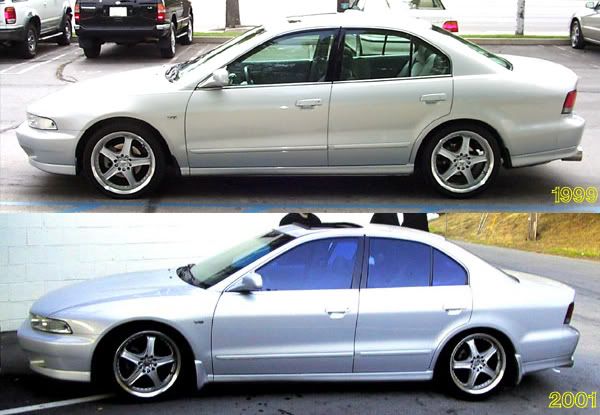
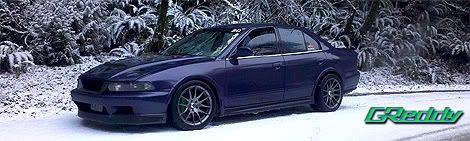
MERCEDES BENZ diamond silver full car paint
REDLINE TUNING elite hood struts
35% blue marine application tint
VALEO frameless wiper blades
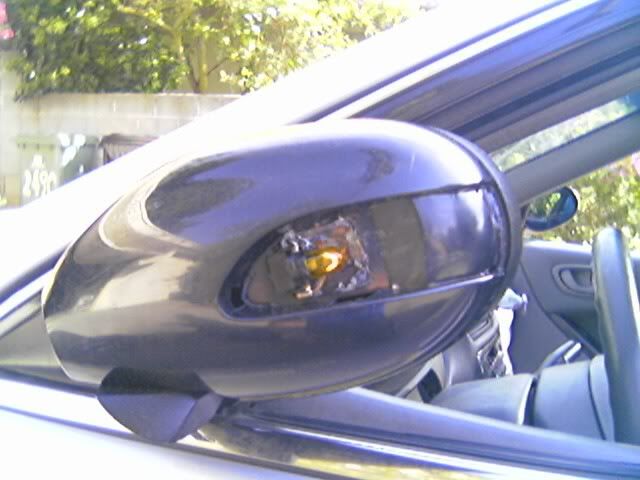
RACTIVE power folding mirrors w/ custom amber LED turn signals
dealer installed one-touch moonroof w/ illuminated switch relocated to center bezel
'96-'98 JDM tail lights custom wired all LED
custom V6 3.0 LITRE side badges
debadged rear (all removed except the red triple diamond)
INSIDE
ACAUTOTECHNIC buttonless shift knob atop stock cut shift knob
ACAUTOTECHNIC brake handle over trimmed stock handle
NOKYA blue anodized pedals and dead pedal
'02 GTZ OE carbon fiber twist trim
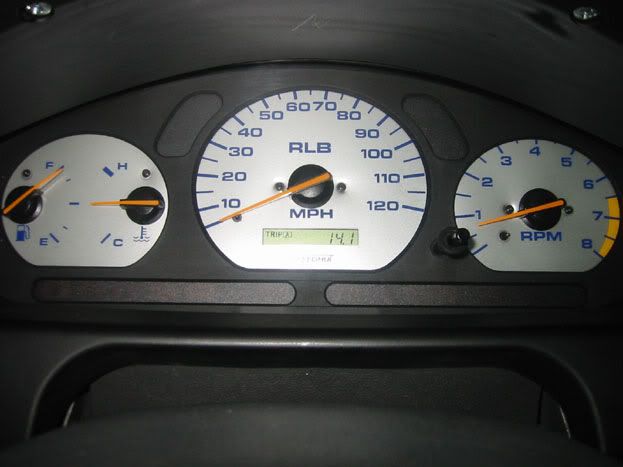
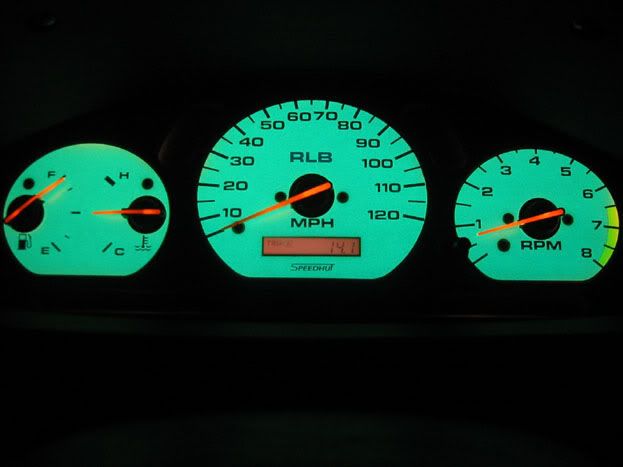
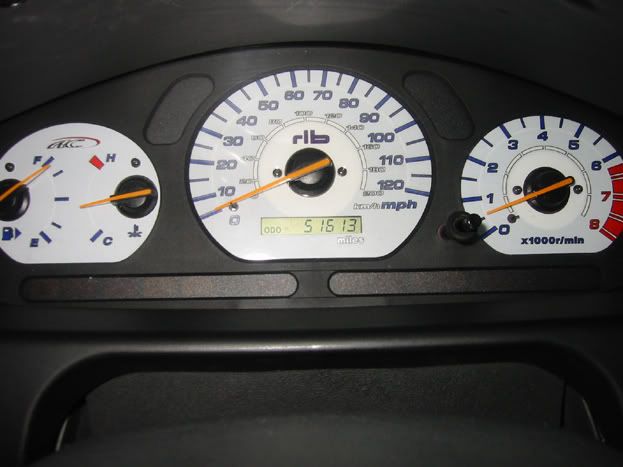
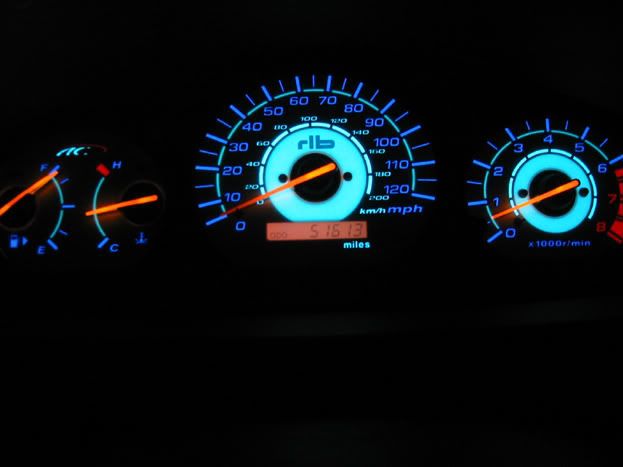
ACAUTOTECHNIC S7 reverse EL gauges (customized w/ initials on speedo) w/ SPEEDHUT inverter
DEFI VSD CONCEPT heads up display
BROADWAY convex rearview mirror
custom LED dome light boards
COVERLAY black dash overlay
SEM satin black vinyl dyed passenger airbag cover and forward dash vents
Carbon Fiber gauge cluster bezel
CLASSIC SOFT TRIM installed one-touch moon roof
relocated custom sunroof switch
'96+ JDM door sills
silver airplane air freshener
dealer installed leather
AUDIO and SECURITY
BOSTON AUDIO pro 6.5" and tweeter separates w/ crossovers
MTX 10" 8500 1000 watt RMS subs x2 in a slot ported box
MTX 1501D 1000 watt RMS (2 ohm) digital monoblock amp
MTX 1004 360 watt RMS 4 channel amp
OPTIMA blue top deep cycle marine battery
PHOENIX GOLD 4 gauge wiring and power distribution
MONSTER CABLE patch and speaker wire
VIPER w/ on-arm 4x auto window roll-up, auto moonroof close, 1 blue LED in each door window sill, trunk pop, dual stage shock sensor, dual microwave scan and other top secret stuff
PERFORMANCE
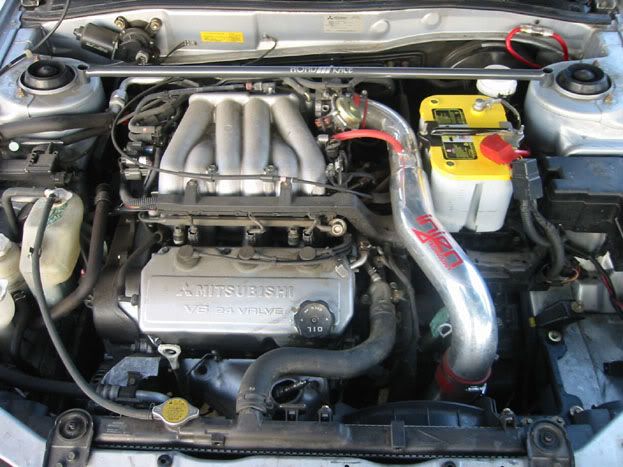
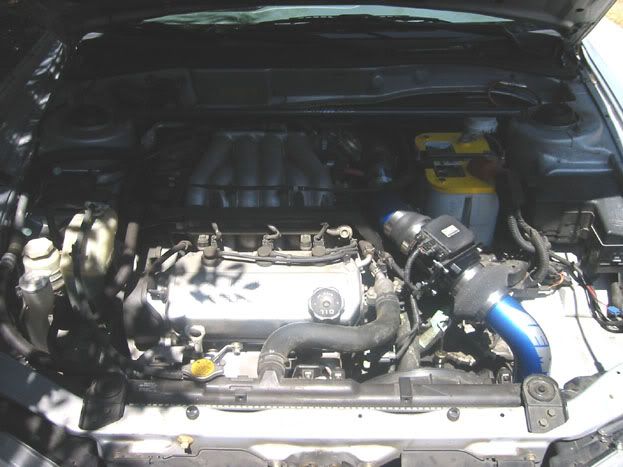
AEM CAS blue cold air intake w/ bypass valve
AEM 9" DRYFLOW air filter
MAGNECOR KV85 competition ignition wires
HOSE TECHNIQUES blue silicone hosing on all vacuum lines
AC AUTOTECHNIC blue anodized battery tie down
custom mandrel cat-back exhaust w/ 2.75" to 2x 2.5" piping
AERO TURBINE resonator
AERO TURBINE straight through mufflers x 2
SLP SS dual center mount wide oval exhaust tips
SUSPENSION
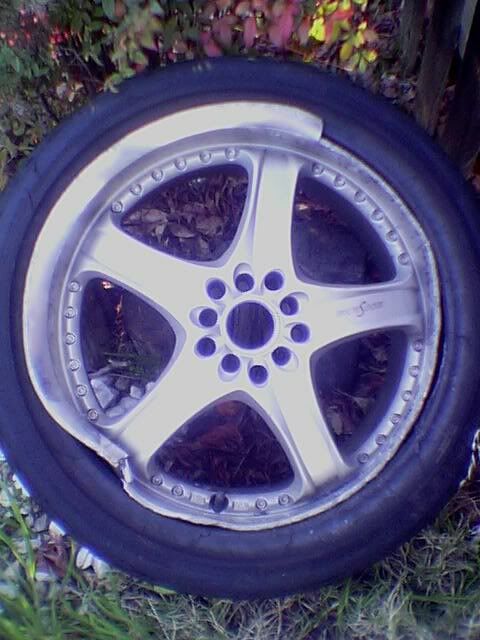
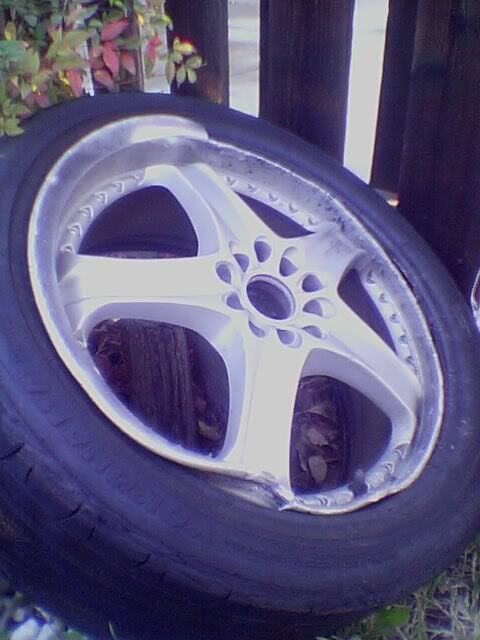
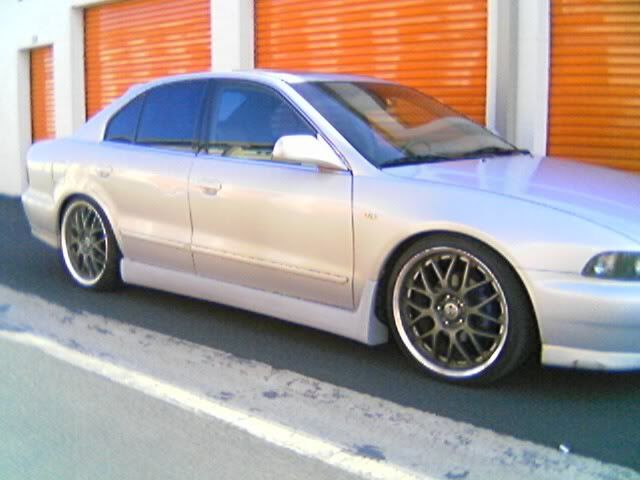
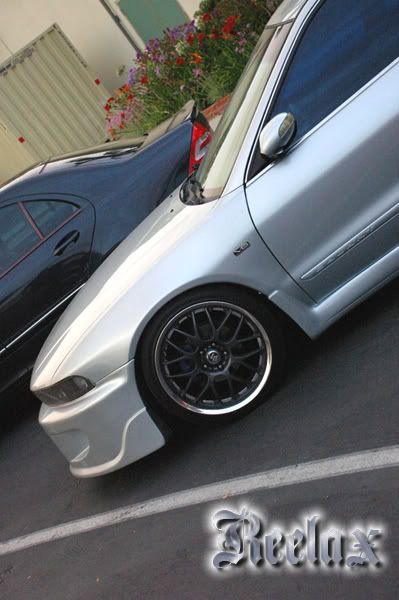
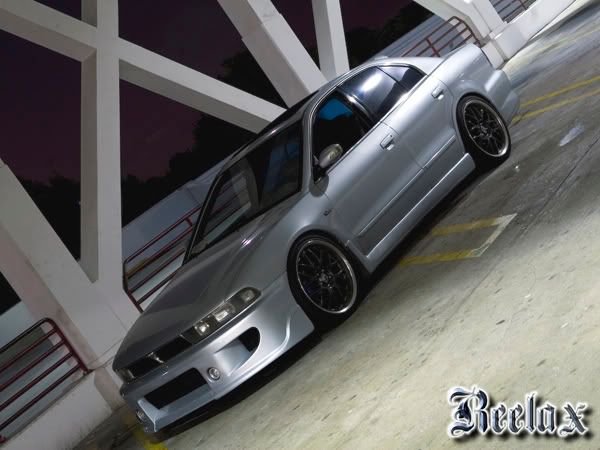
VOLK RACING SF-WINNING gun metal forged multi-piece 19"x8.5" +48mm
NITTO INVO 235/35zr19
POWERSLOT slotted rotors front and rear
G2 blue painted brake calipers front and rear
AKEBONO street compound brake pads
GOODRICH stainless steel braided brake lines
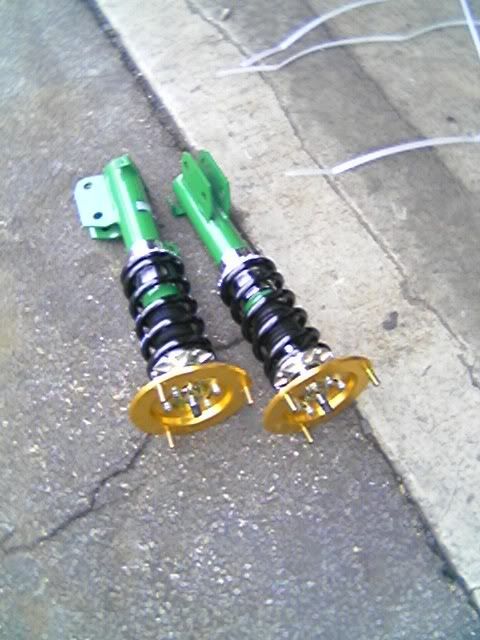
TEIN SS-P full matched adjustable dampening coilovers w/ pillow ball upper mounts and front camber plates
INGALLS camber kits front and rear
ROAD RACE ENGINEERING limited edition front upper strut tower brace
D3DESIGN Full Chasis Stiffening Kit (prototype)
OLD PARTS (i know i'm forgetting alot but here is what i can remember)
THERMAL R&D straight through race muffler
THERMAL R&D 5" exhaust tip
MPHUNLIMITED downpipe w/ straight pipe (cats eliminated, prototype)
INJEN 1-piece cold air intake (1st generation for 3G eclipse)
'99-'01 OE front bumper custom cut, flushed and meshed removing lower bars
'99-'01 headlights w/ clear corners bright rewired w/ custom relay network
'99-'01 OE mudflaps colormatched x4
'99-'01 OE mudflaps x8
H&R springs (prototype) cut 1 coil per corner
KONIG MONSOON 18"x7.5" +45mm x6
YOKOHAMA PARADA SPEC-2 225/40zr18 x10
PIRELLI 7000SS 225/40zr18 x8
DUNLOP W-10 225/40zr18 x6
FALKEN GR-B 225/40zr18 x4
TOYO proxes FZ4 225/35zr19 x4
CRUNCH 500Wx2 amps (2)
MTX THUNDER 10" x2 in a badpass box
SPEEDHUT CUSTOM EL gauges (prototype)
AC/GDI reverse EL guages
HIDKITS H7 4250K-10000K adjustable frequency HID
METAL POWER H1 6000K HID
RAYBRIG chrome amber 1157
NOKYA 893 hyper white fog bulbs
there were three major stages to get to where it is now, each stage was about 3 years long. here we go:
STAGE 1: 1999-2002
H&R prototype 8G V6 springs making this among the first few, if not the very first, USDM 8G lowered on aftermarket springs (no other aftermarket springs were available and the 3G eclipse had not even been released yet). 18x7.5 KONIG MONSOONS (softest wheels in history) w/ 225/40r18 FALKEN GRB's
most likely the first JDM tailights on a USDM... brought them home w/ me in my luggage from a business trip to asia, having no idea if they would fit or not, or even what bulbs they used, ended up adapting and adding bulbs/sockets to the stock harness and boring out the JDM holes to fit USDM. no plates yet... the car is less than 4 weeks old at this point.
THERMAL R&D racing muffler w/ THERMAL R&D 5" tip, full cat back piping. i also debadged the car on the dealer's lot as i was taking delivery... thought the trunk badges looked ugly when i first saw them (but i liked the red diamond) so i peeled the model off after i checked if there were pins going through the trunk lid, then i peeled off the brand name... the salespeople thought i was crazy!
cut/flushed lower front grill w/ expanded steel mesh riveted in then molded (the whole bumper was repainted)... i thought the stock lower grill looked too cluttered so i got this idea and brought it to a body shop. i cleared the corners w/ a screwdriver and may have been the first to do this as well; this was all before i joined BGR's yahoo group (the predecessor to TGC), so we don't really know for sure.
tinted the windows blue 35% and cut the H&R's 1 coil at each corner (i hate wheel gap!), added and colormatched the mud flaps (and kept cracking them on driveways because they were too low).
INJEN 1st generation CAI (3G eclipse V6)... first cold air intake on a USDM 8G, my service advisor at mitsubishi told me he would try fitting it since the engines were the same... he even kept it on my service record as a mitsubishi installed item, saving my warranty! my first ever post on the yahoo group was about this fitting our platform. also in the pic, limited edition ROAD RACE ENGINEERING strut brace i bought and installed at TGC's first ever meet... august 2001.
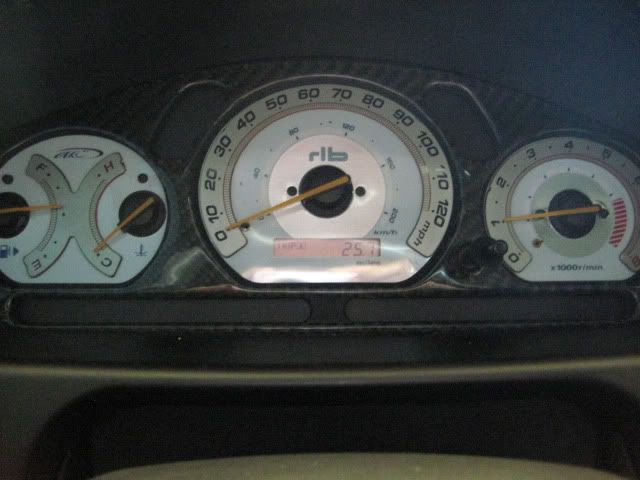
first ever EL guages made for the USDM 8G (SPEEDHUT prototype); after lengthy email and phone conversations (of me pleading with them to make these), i had to send my entire gauge cluster to SPEEDHUT for them to do their r&d to measure and fit these... so i was driving around not knowing how much gas i had, or how fast i was going, for about a month while they had my cluster! i was glad to do it though: all SPEEDHUT 8G gauges were/are made off the original measurements from my cluster, and none may have been made if i didn't beg them and promise we would buy a bunch.
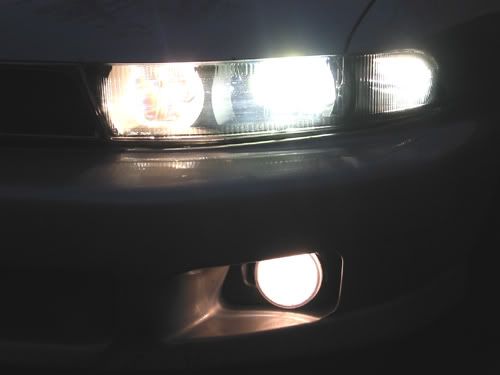
the first JDM 1-piece heads and JDM grill conversion on the USDM 8g. i just decided to get my ROTOZIP and start cutting (shooting sparks all over the place)! took me 9 hours to install (just to fit, not including wiring). i had no idea what, how much, or where to cut so i ground off a little at a time (from the car and the headlights) and test fit over and over... time consuming as hell but i was determined (but cautious at the same time). being first involves alot of risk, but being unique carries alot of reward. i also cleared these before i installed them by splitting them w/ a hair dryer and removing the screw that holds in the amber reflector lenses then resealing w/ silicone... way more trouble than stock heads.
my first set of HID's... HIDKITS H7 low beam 4250K-10000K adjustable (these could actually change color and were controlled w/ a dash mounted dial/mode switch!). HID was SO expensive back then... about 10x more expensive than now. notice the high beam, fog and corner (bright re-wire) are all hyper-white halogens which are blue coated (ewww).
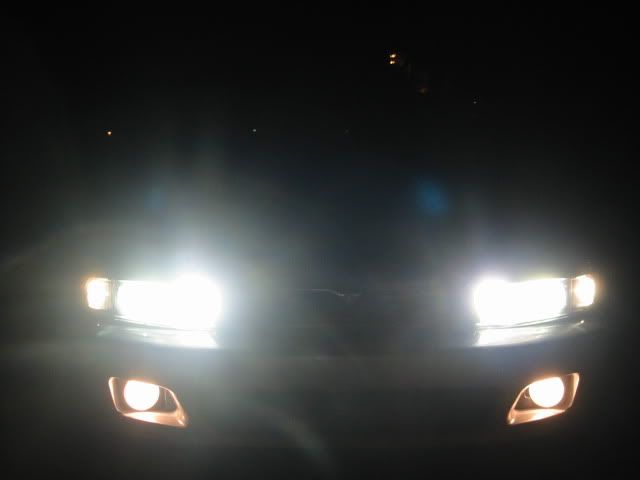
well soon my infatuation w/ HID led me to replace the high beam H1 halogens w/ METAL POWER HID H1 5000K... these were totally ridiculously bright, and completely unnecessary (notice how bright the unshielded high beam HID closest to the grill is compared to the shielded HID of the low beam next to the corner). i loved it.
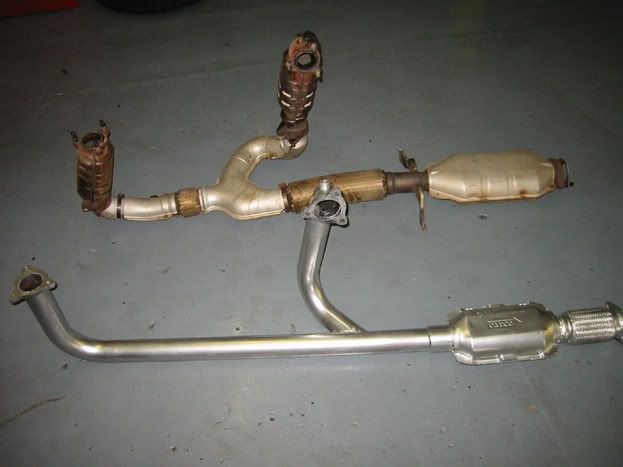
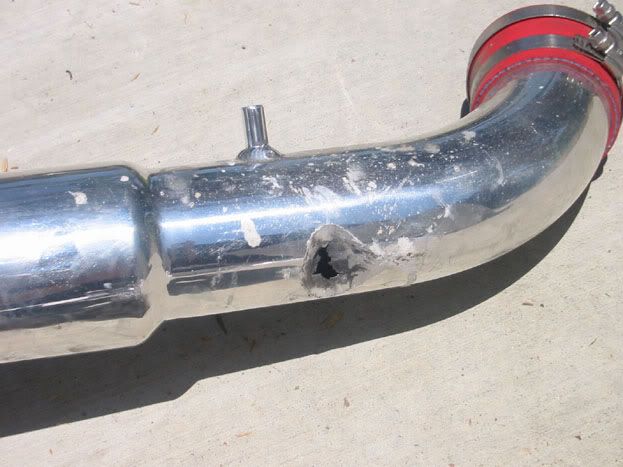
MPHUnlimited down pipe with high flow cat (prototype). which one do you think flows better? again, the first USDM 8G to test this part. increased high-end horsepower but moved the power curve up in the RPM range as well. plus it made my car sound like a ski boat! i went this route because headers were not made by anyone yet. btw, totally illegal, but hey i didn't have to smog until 2004 so what the heck.
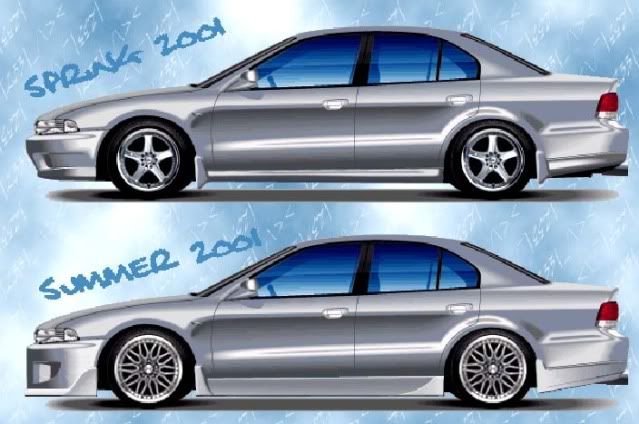
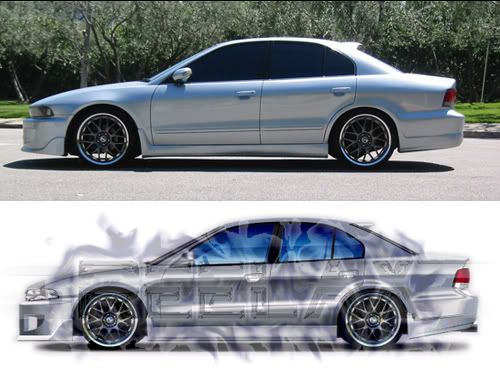
early renderings of what i wanted to do to my car... very optimistic (naive) timeline of summer 2001 (who knew it would take years to actually get there)! i started doing lots of research around this time into acquring these elusive parts... but i formulated a blueprint in my head and this shows that i allready had the overall "look" in mind way back then.
STAGE 2: 2003-2006
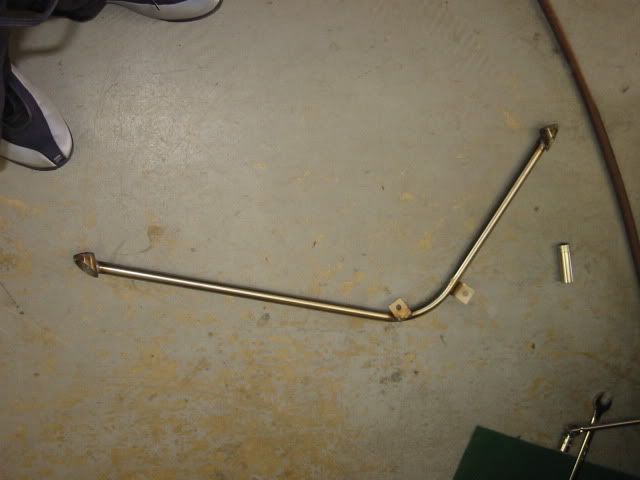
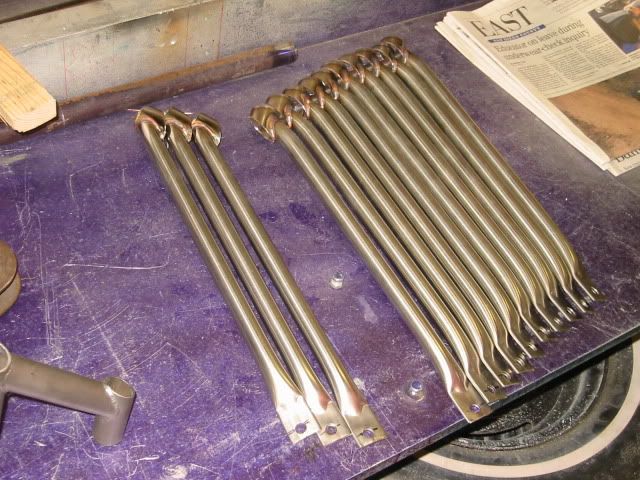
so more prototyping... D3DESIGN CHASIS STIFFENNING KIT. went down to get this 5 piece chasis stiffening kit installed (one of the first sets fittd to the galant). went to check compatibility and have the car measured by D3DESIGN for differences... good news, there wasn't any! changed the car's characteristics and eliminated alot of flex! the fabricator took my for a crazy ride to show me what differences it made to the car's handling... he actually scared me a little w/ how he was flinging the car around hairpin turns in this windy road near the shop... but the car held firm and felt much more planted.
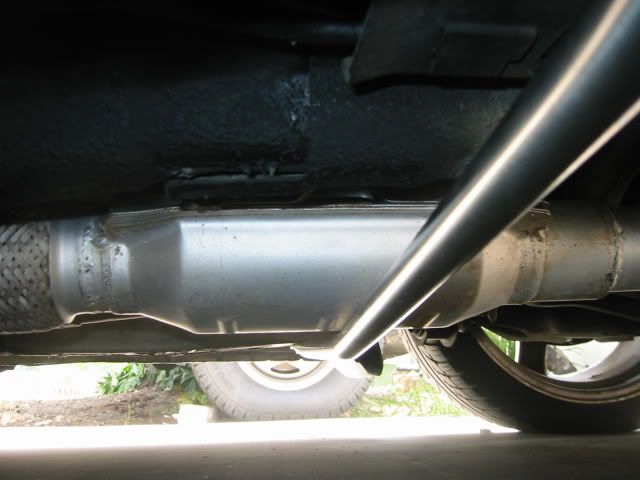
well nothing is ever perfect. one of the braces under the car was banging/rubbing the CATCO hi flow cat that was installed on my downpipe... these braces were designed to fit w/ stock size piping and my larger piping and larger cat did not completely clear this brace and ultimately it broke the cat's internal packing and the car started rattling inside (sounded like sand and change inside). the solution: i removed the cat and went test pipe (i still didn't have to smog untill 2004 right?). with test pipe, my car was pretty much straight piping from collectors to the muffler... it sounded stupid loud and actually spit fuel out the tailpipe (u could always smell the fuel that the cat was supposed to burn up). i seriously contemplated the AUTOLOC flamethrower mod (tailpipe spark plug and cabin switch) but decided against it as i didn't need any more reason for the law to impound my ride.
on a trip to the dealership for some other parts i saw the "new" 2002 GTZ and really like the "carbon fiber twist" trim pieces as opposed to the cheezy woodgrain stuff that came with my car. i didn't want to do the overlay stickers as i thought they looked like, well, stickers, so i bought the entire set from a dealership online (4x door switch covers, shift surround, radio/HVAC bezel). also pictured are a buttonless shift knob (the whole top half of the shifter moves down to depress the shift release button) and a E-brake handle (required cutting and stripping the vinyl material that sits underneath it for it to fit) from AC AUTOTECHNICS. also you can see the blue NOKYA pedal/dead pedal set i installed; they are not clamped on but are actually drilled into stock pedal arms.
around this time, GDImports (GALANTESP) and AC AUTOTECHNICS got together to prototype and release the first set of "reverse EL" gauges for the 8G... i like them better than my SPEEDHUT set so i scooped up a set and swapped them (of course i had to modify them to keep my initials on the speedo).
so for years we had been trying to track down this rear window visor we had seen on pics of JDM/world spec 8Gs and after years of our inquiries DANGERDANJ found them in hong kong! he set up a group buy w/ ECARBOY and we snatched up 5 of them from him (we paid around $170 each!). this is one of the first 5 of these in the US... i had mine colormatched and clear coated. i also got my JDM door sills in this GB.
well the INJEN 1st generation CAI had a design flaw... the elbow that comes out of the throttle body puts the piping too far outboard and makes the piping come in contact w/ the battery tie down which eventually rubs through the piping since the engine and pipe move, but the battery and tie down don't (this is why this version is no longer made). all the new versions use a rubber/silicone elbow at the throttle body allowing more clearance to the battery tie down. so i switched to an AEM CAS w/ bypass... it fit much better and the added bypass protects agains hydro lock in wet conditions. also the new AEM and INJEN designs keep the MAF in the engine bay, my old INJEN put the MAF at risk right next to the filter behind the driver's fog light.
so i'm a dumbass, seriously. i'm driving home from OC in the middle of one of the worst rainstorms in years... the freeway is flooded a few inches deep and i have bald tires (i never bothered to fix my rear camber since i dropped the car). i lose it and end up doing a 540 into the center divider at around 50mph. KONIGS suck (this is not the first time i've had trouble w/ these wheels, i had to buy six of them as they kept bending and i had to kleep replacing/fixing them). i guess it's a perfect time to upgrade!
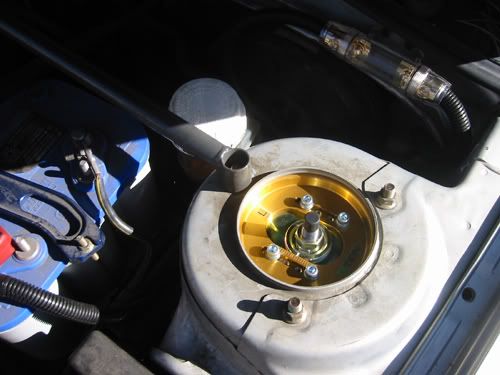
wells since my rear suspension was damaged in the accident, i replaced major parts of it. it was a no brainer to step up to coilovers and i promised myself at this point that i only get "top shelf" parts, no more budget concerns... enter TEIN SS-P fully matched coilovers w/ upper pillowball mounts and front camber plates (one of 1st 3 sets installed on the USDM 8G - TEIN was even suprised when i told them they were on my car). things start to get expensive from here forward. i also had the shop install INGALLS camber kits and correct my camber (front and rear) so that i wouldn't eat through tires every few months (had allready been through 8 full sets of 18" tires by this point) as the wheels i had in mind were 19's and 19" tires cost significantly more than 18's. also put in a OPTIMA BLUE TOP deep cycle marine battery (D34M) to match my intake and HOSE TECHNIQUES blue hose kit.
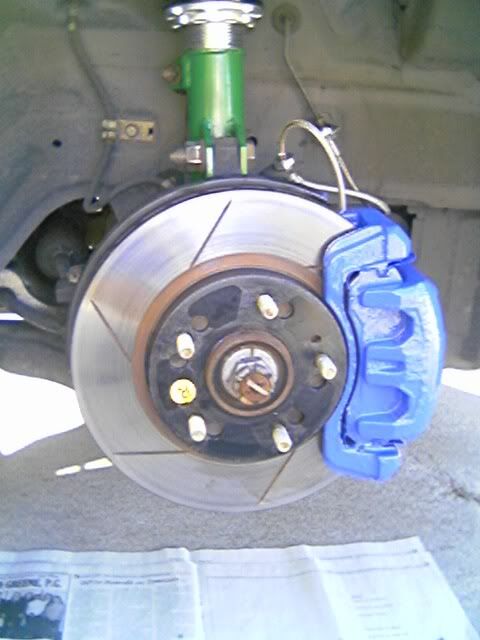
POWERSLOT slotted rotors, AKEBONO ceramic pads, GOODRIDGE stainless brake lines, G2 painted calipers (twin piston fronts). didn't want to have boring brakes behind my new wheels that were on the way from japan.
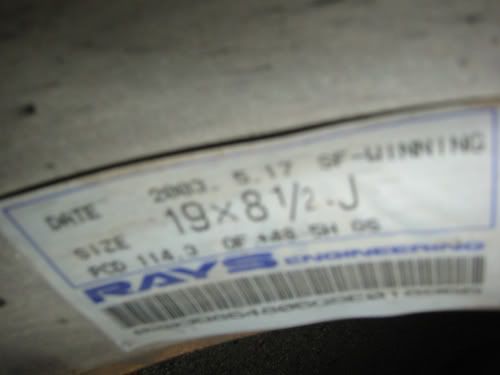
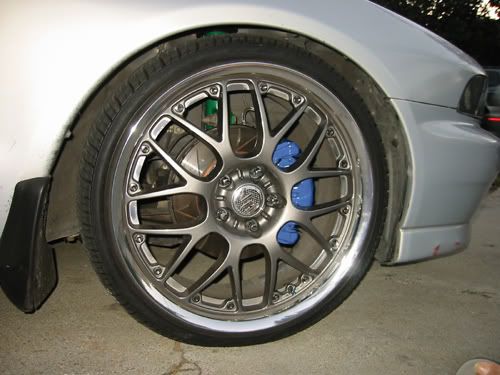
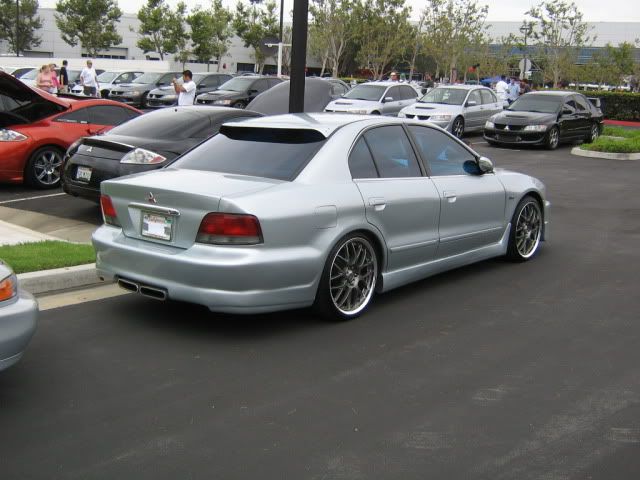
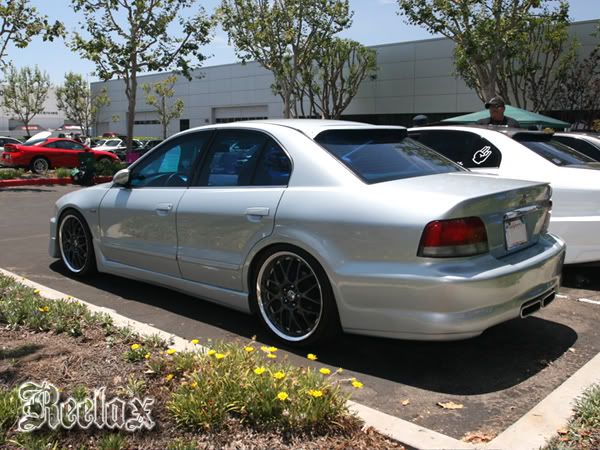
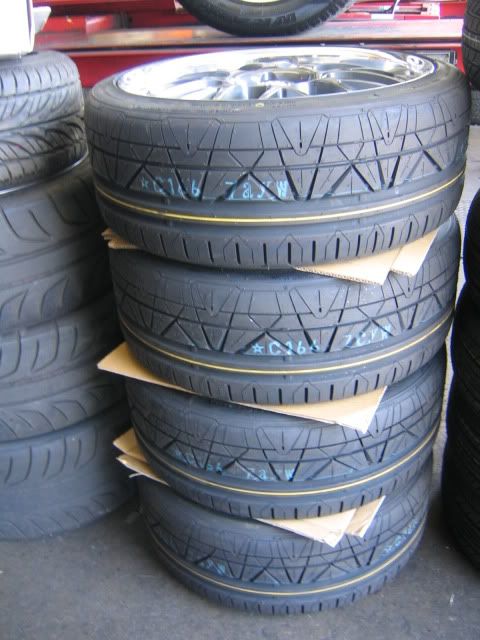
after a few weeks of wait they arrived! special order color gunmetal VOLK RACING SF-WINNING multi piece forged wheels, 19x8.5 +48 w/ 225/35zr19 TOYO PROXES FZ4. had to get the rear fenders cut to keep these from scraping at the ride height the TEINS were set at. also notice the notch ground out of my tailpipe since the car was so low, it would make contact w/ every driveway i used...
so i wanted folding mirrors but i also wanted mirror mounted turn signals that could be seen from the front AND the rear. what else to do but improvise. modified some mirrors made for a HONDA ACCORD. ground down the metal mounting bases w/ the ROTOZIP to sit flush, modified the blinker section (they came w/ an LED board w/ bue LED's, gross!) using new 194 sockets and amber LED 194's (the pic above was a test w/ a regular amber 194), drilled new holes in the door and used new screws and washers to mount. i also modified the passenger side mirror's tilt motor mount to angle the mirror down further.
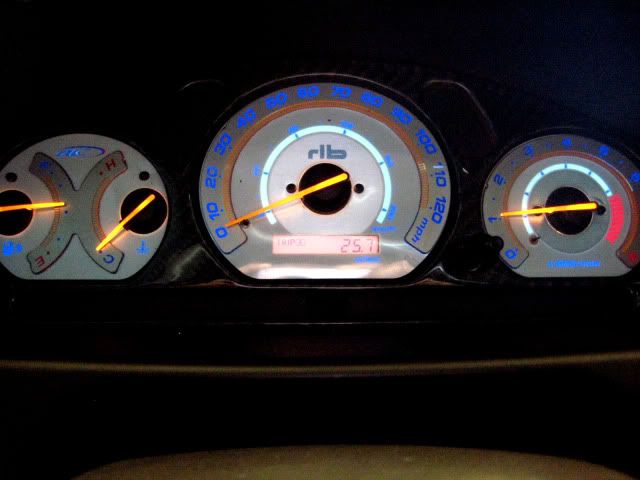
new gauges again... PROPHET (DNARACING) and MESSIAH persuaded AC AUTOTECHNIC to produce S7 gauges for the 8G by placing an order for a few hundred sets. i had to show support (and they looked pretty sweet too!). i added a real CF guage bezel and customized the guages w/ my intials on the speedo.
here's how the car looked in 2004-2005. i was happy. i left it alone. i was gonna focus on other stuff, then i got the itch again...
STAGE 3: 2006-2009
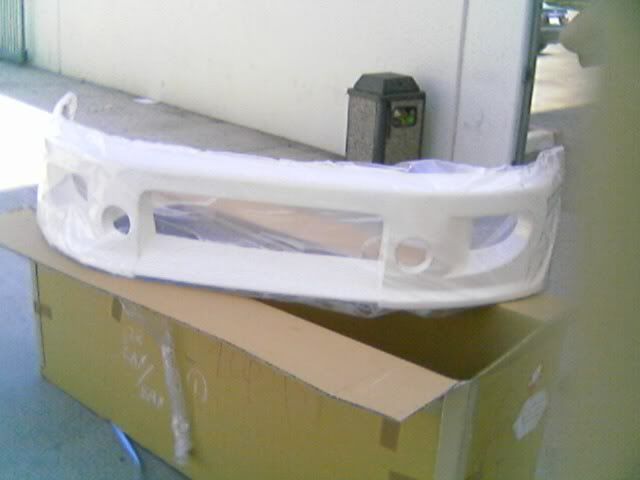
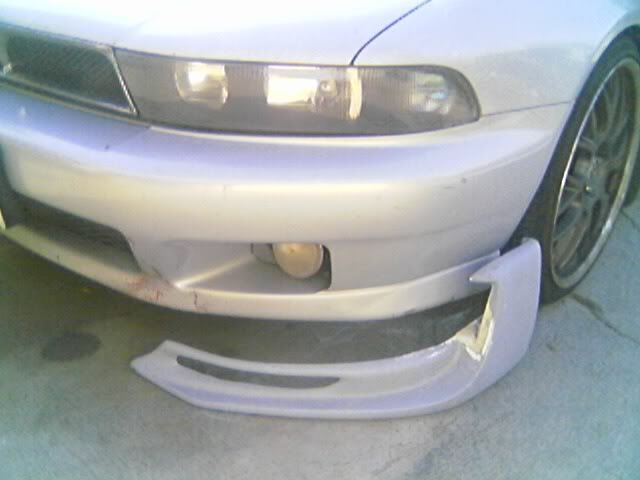
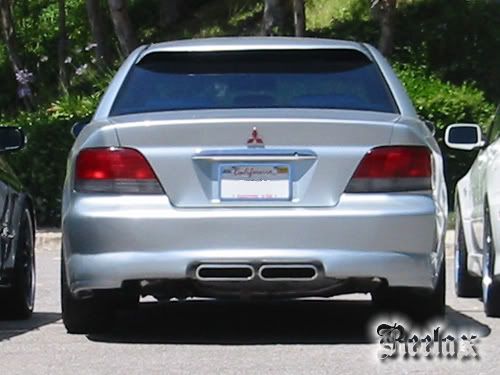
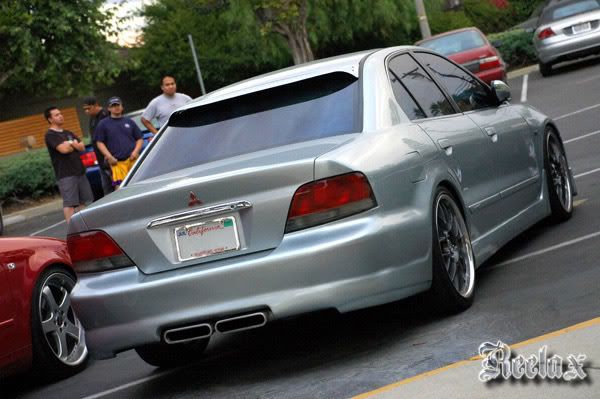
i had this plan way back in 2000 when i first saw it on a pic of a white VR4 in japan. i researched it, located an importer in japan but then never pulled the trigger... fast forward to the end of 2004,i finally decided i would do it so i made the calls, paid for it and then just waited. ROUTE SERVICE NIFTY-R bumper for the LEGNUM VR-4. this bumper is hand made and never kept in stock... it is only made after the order is paid in full. 1 month and about $1500 later i picked it up at US customs near LAX. look at the size of the box! this is the second one in the US (i helped another member acquire it and he brought it home w/ him after his service tour in asia); there are only about 10 of these in the world, and i've only ever seen pics of 5 cars w/ it.
i also had one of the first 5 SUPER VR-4 kits imported into the US (GDImports) just sitting around collecting dust since 2001. i never sold this kit because i knew one day i would use the parts (only ended up using the sideskirts and the rear lips). SILLYASIANZ once yelled at me when he came over to my house and saw it laying on the floor in a spare room back in 2002... he couldn't believe i had it and had no intention of selling it, copying it, or installing it in the near future.
this is how i got the front bumper home... the box would not fit in my car! for the next few months my newly acquired bumper would join my SUPER VR-4 kit, sitting and collect more dust until i located the exhaust and rear valence that i wanted.
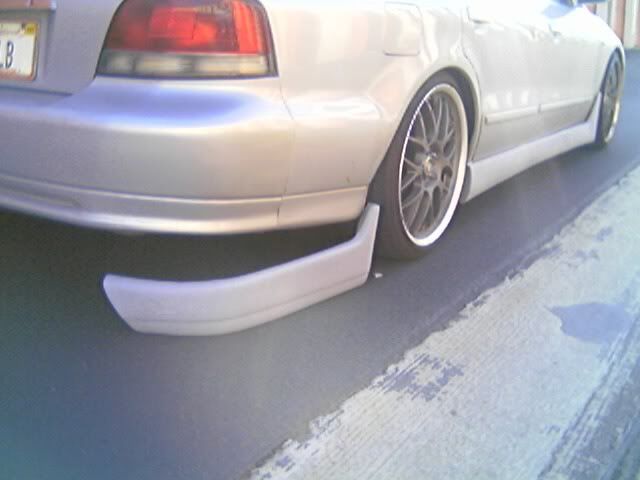
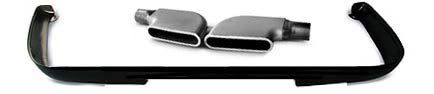
here are the parts to complete my vision. i always wanted a dual center exhaust. found exactly what i wanted... on a 35th anniversary SLP CAMARO SS! did more research and joined muscle car, LS1 and F-body boards to locate and reserach these parts and finally ordered them from SLP. they are now out of production and extremely rare... they might pop up on ebay once in a while but the combo will still grab a premium and chevy guys covet this setup (so i know when they ever see it on my car they will hate me that much more)!
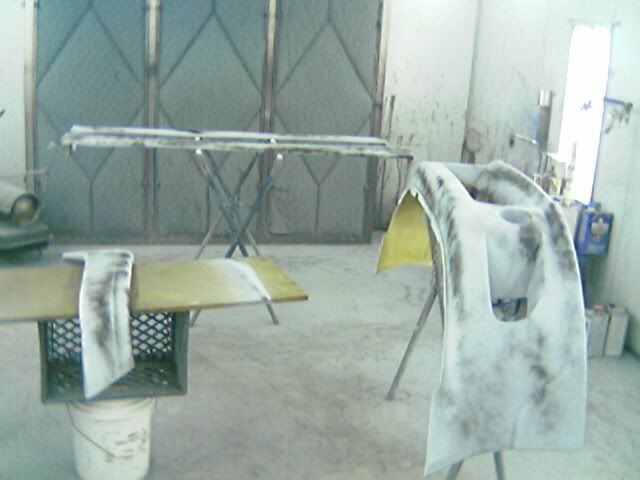
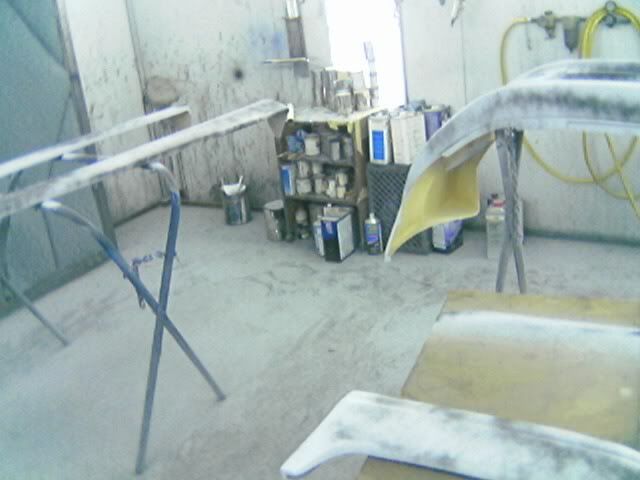
ready, set, prep!
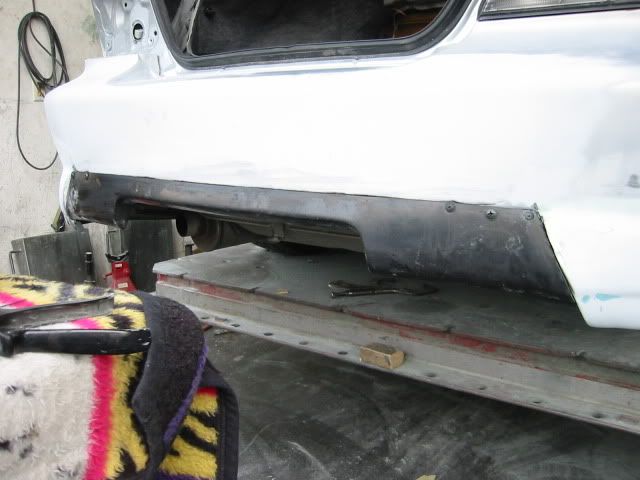
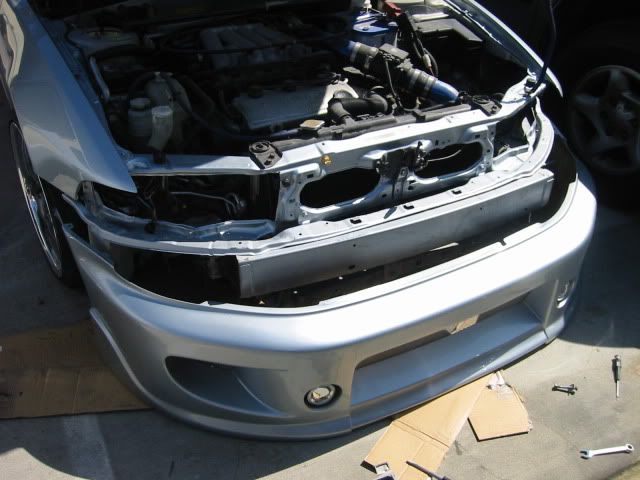
test fitting and more prep
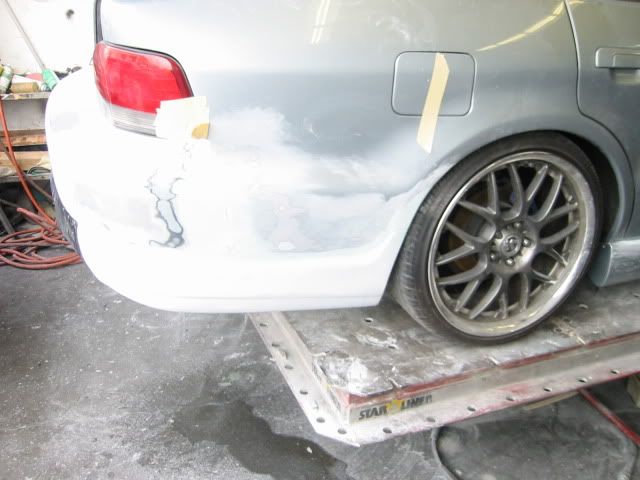
rear bumper molding
rear bumper fabrication... 4 pieces, 3 materials: urethane OEM '02 bumper + fiber glass SUPER VR-4 lips + ABS SLP CME valence. the screws were removed after the bonding material dried.
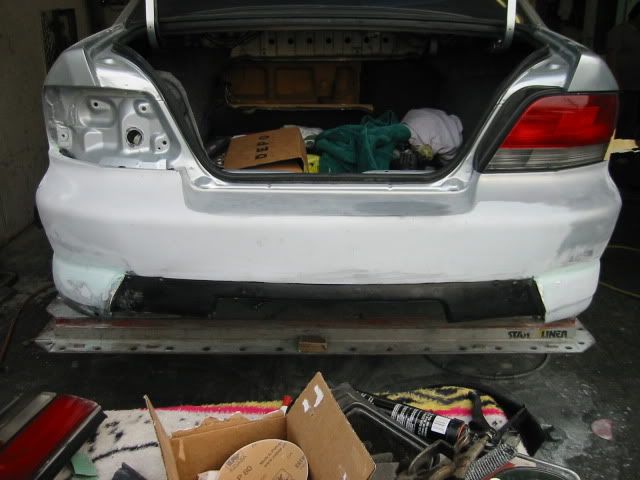
front bumper painted
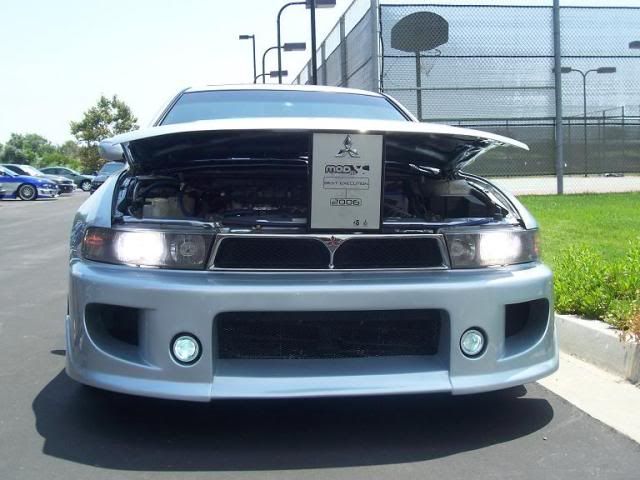
fogs mounted and aimed... PIAA 998 projector fogs converted to MCCULLOCH H3 6000K HID
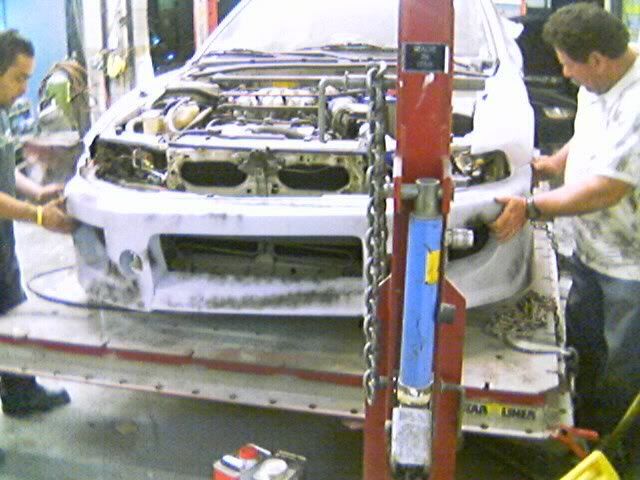
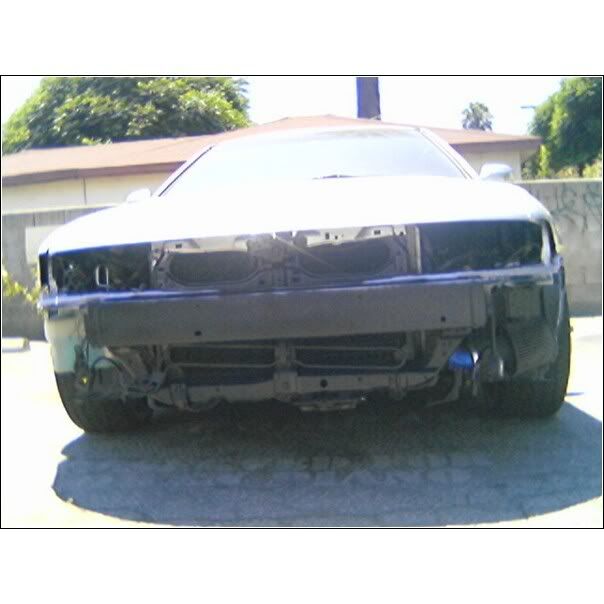
crash bar trimmed on the sides.
everything behind the grills blacked out in flat black
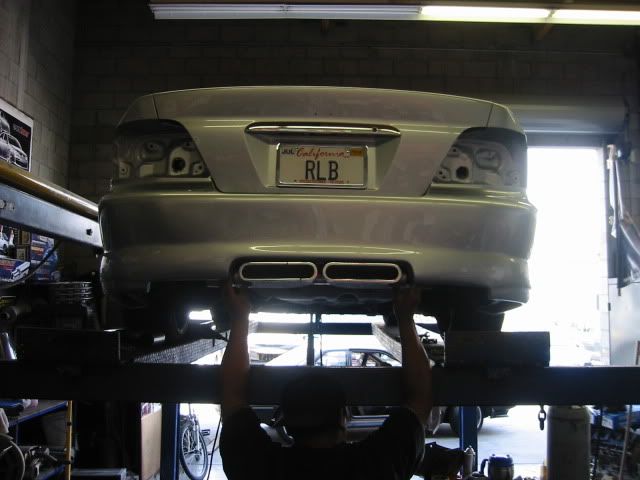
holding up the tips where i want them. btw, the reason i had to keep the USDM bumper is that it is longer than the JDM versions. the way my exhaust is routed needs that length in order for the tips to sit flush... the JDM bumper sits much closer to the trunk and would make the tips stick out about 4" ruining the "clean" look i was going for. i wanted the tips to be hidden from the side of the car and from the top, but not sunken into the bumper. they are exactly flush as if it came off the assembly line that way.
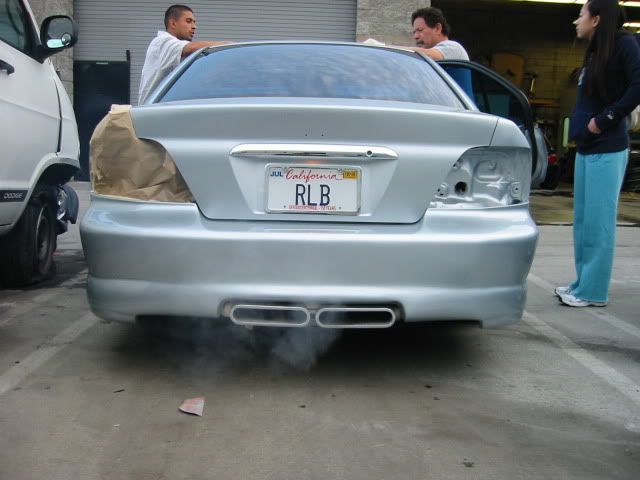
it's alive! first time the car has started in almost 3 months of surgery and paint! you can almost smell these pictures and the smoke coming out of the new exhaust.
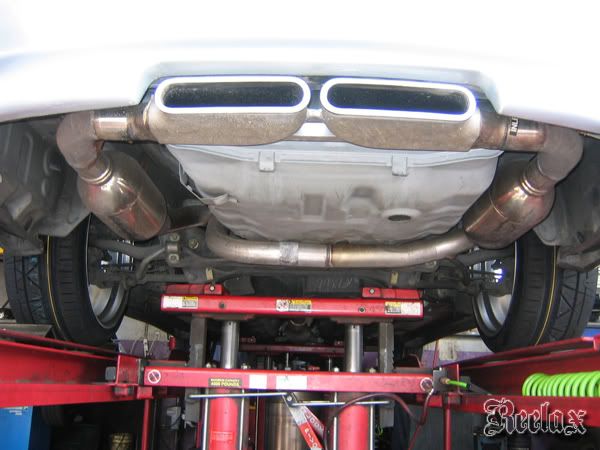
here's a better look at what went into the exhaust... AERO TURBINE resonator to 2.5" custom split before the rear axle, 2X AERO TURBINE stainless mufflers (airfoil design w/ no internal packing), SLP 35th aniversary CAMARO SS Center Mount Exhaust tips (rare and discontinued). the axle back piping ran about $300... and that was the cheap part.
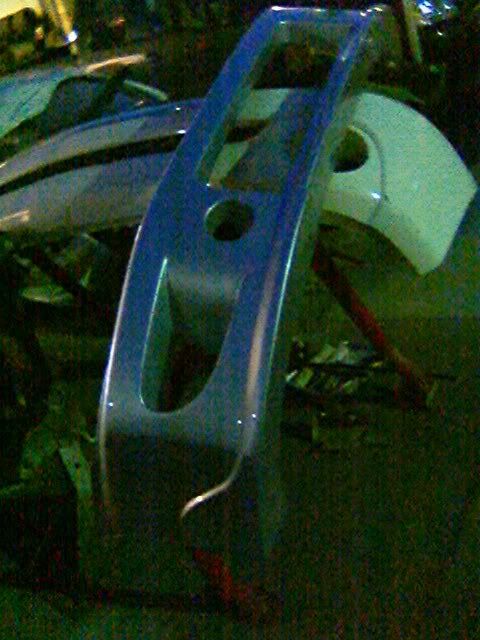
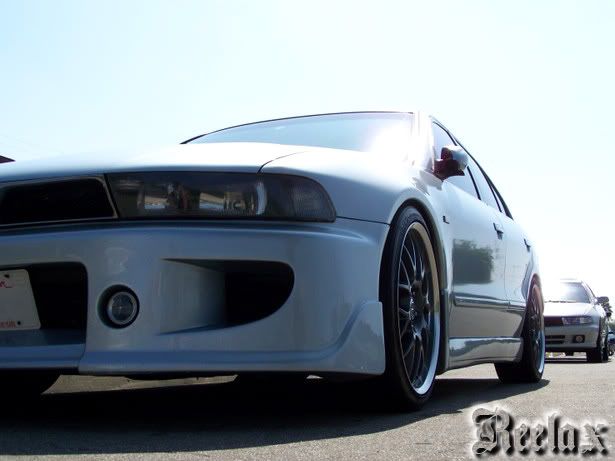
detail of the side mirror finally painted! looks like it came stock right? well almost... the accord window is almost the same shape and i did my best to make it look like it matches up, but there is a curve on the front edge of the galant window that doesn't exist on the accord... o well, u can only see it if you are really looking for it!
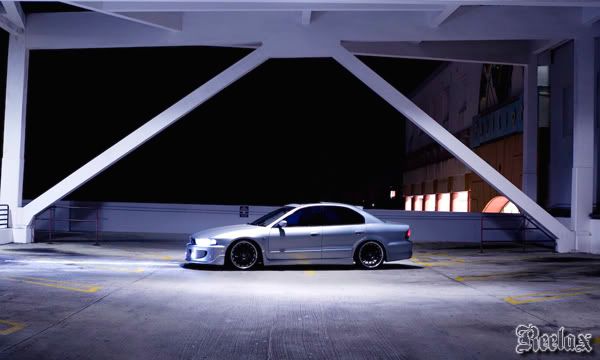
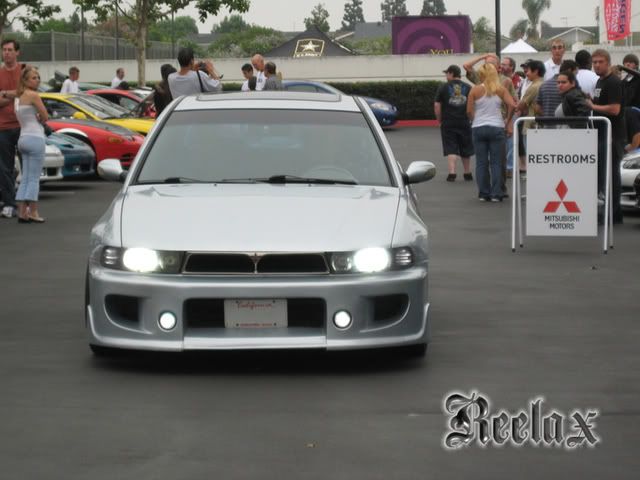
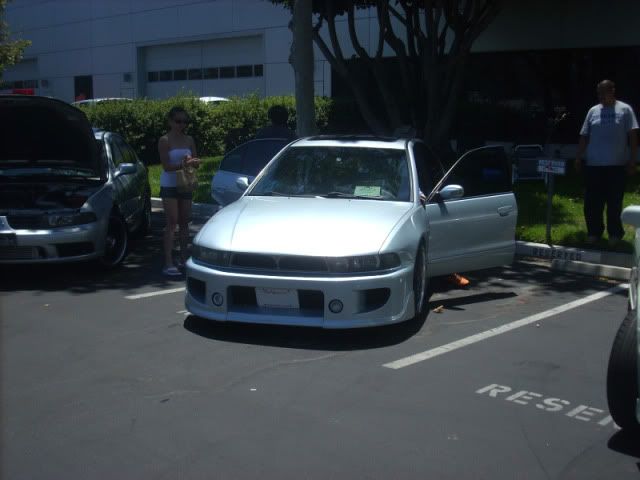
well here is my car's first public appearance since the makeover... MOD'06 (Mitsubishi Owners Day 2006). it is an annual event thrown by MITSUBISHI for their tuners... over 1200 modified mitsubishi's of all types attended and they rolled out the CONCEPT X (EVO X concept) for it's west coast debut. my car took home "best execution" (best in show) honors as judged by the MITSUBISHI senior designers and executives.
my vision turned into reality... i think i came pretty close to my rendering from 2001-2002!
well after that things slowed down alot on the tuning. i only did mild tweaks every once in a while (when i was bored). but stage 2 and 3 cost roughly $15,000 so u can see why i cooled down.
MOD'07... only new mods are REDLINE TUNING ELITE hood struts (finally got rid of that stupid hood prop!) also i dropped the front end another inch (we actually raised the front slightly when i first got the car back from the body shop, but i liked how it looked so much better at the lower stance before i had the kit put on, so back down it went).
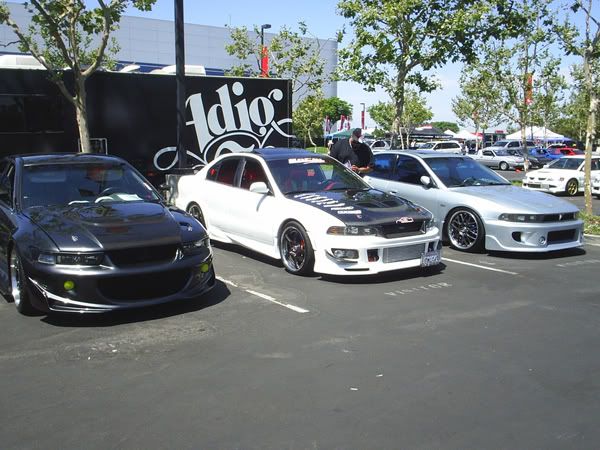
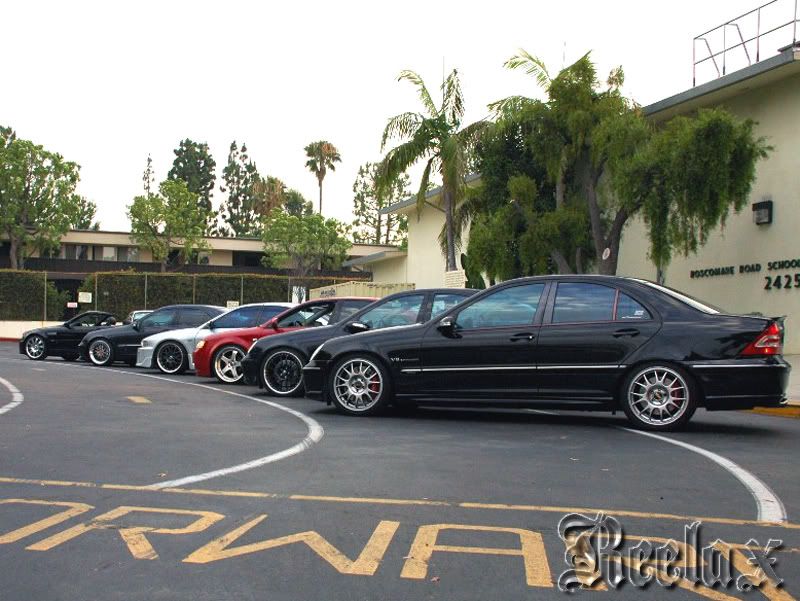
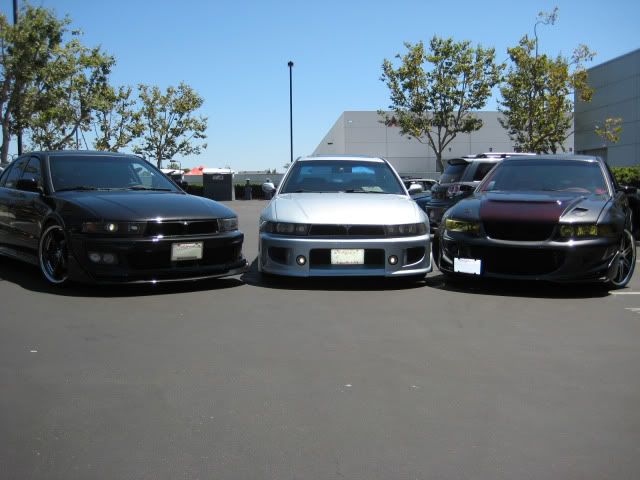
2 of the other most infamous G's from the west coast parked next to me... BILLET and CALI! this is actually the first (and last) time these three cars have ever been in the same place together.
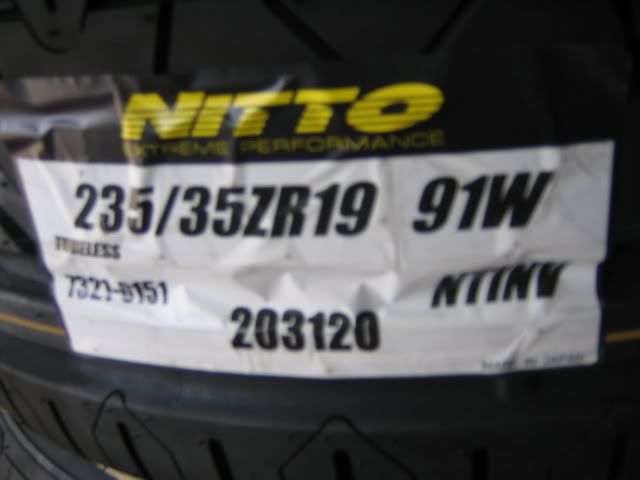
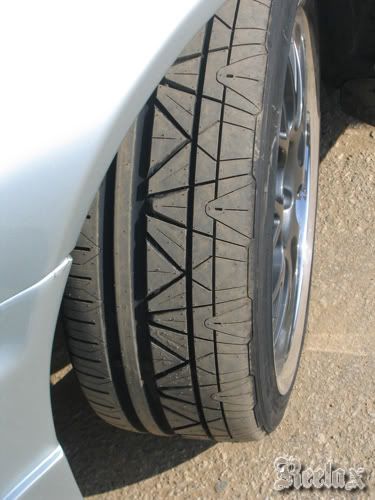
well 2 years was the longest i've ever had tires last on this car because i never bothered to correct the camber until i got the coilovers... correcting the camber was something i should have done a long time ago! new tires: NITTO INVO 235/35zr19
a 2007 impromptu euro meet... i wired quad fogs for my cousin's C230K, and other members of his club showed up, so we went to the school down the street and took some pictures.
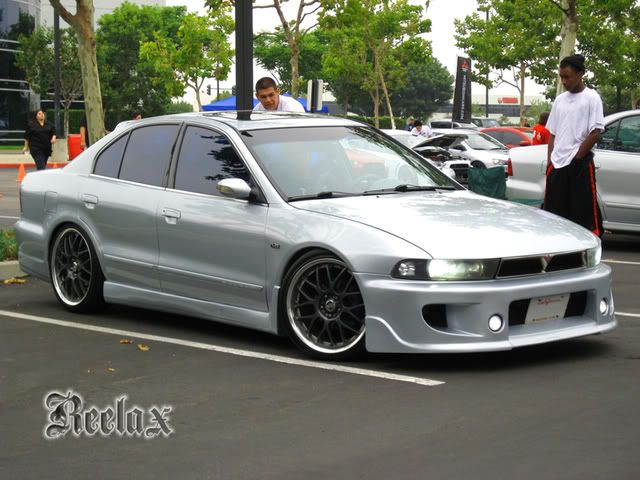
a 2007 MBWORLD.ORG photoshoot i crashed... they were shooting w/ tripods and expensive DSLR's. i was flattered they wanted to shoot my car, and the results were pretty cool!
MOD'08 and the after party. i don't think i did a single mod to my car from MOD'08 to MOD'09... o wait, had to get a new battery, same model, just new (and it went dead the night before MOD'09 because i let it drain since i never drive the car).
MOD'09: CALI, BILLET AND REELAX together again... my car hasn't changed but BILLET did it big w/ new wheels and new candy red CF, and CALI is in a whole 'nother G!
well thanks for looking! i'm going to bed!
UPDATE:
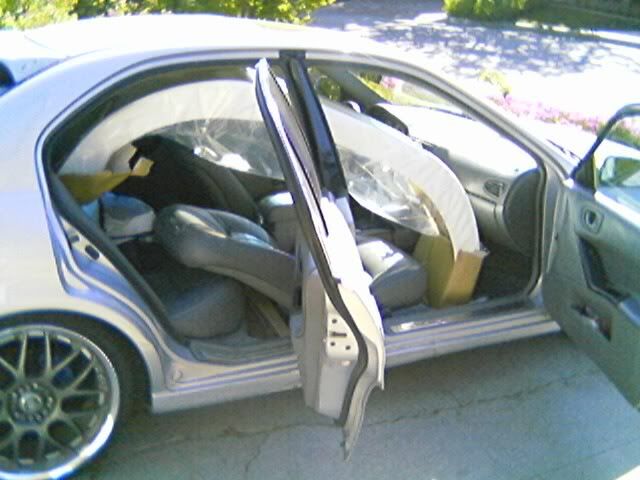
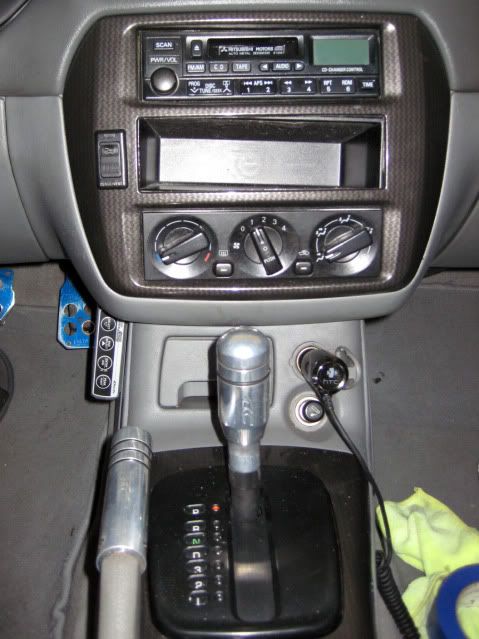
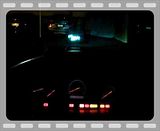
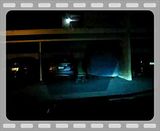
i had a big crack and hole in my dash (well the car is 10 years old!). i painted the airbag cover and front airvents black then installed a black COVERLAY the night before MOD'09... last week i installed the VSD CONCEPT (heads up display) taken out of my cousin's old EVO VIII MR. the pic of the center console shows the relocated sunroof swtich next to the center pocket and the VSD control box on the side of the center console. the last 2 pics are videos so click on the pic to see the HUD start up, switch from MPH to RPM, then shut down. works perfect and has given me some more ideas, but i'm done modding for now...
Last edited by Reelax; 07-08-2011 at 02:32 AM

nice write up and beautiful build and car. funny how these cars seem temporary then we cant seem to get rid of them and then we mod them haha
2014 Lancer Evo GSR
1996 Galant S 5 Speed Turbo
Need a Turbo rebuilt or upgraded--> http://www.thegalantcenter.org/showt...ebuild-Service


the memories. great build reelax.

Nice write up, 10 years is a long time.. I was late to work because I read the whole thing.. lol

awesome write up worth the read!

One of my favorite Gs on this site. Thanks for the writeup. Amazing!
If you post stupid and incorrect information, you will get red nuggets.

Its always cool to see a build with pics of the steps. Awsome build man...one of the cleanest 8g's for sure!
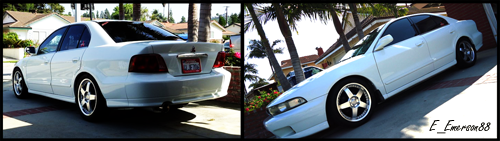
1991 Galant VR4 1948/2000_________1996 Galant "S" 5 speed 2.4L turbo
amazing car, i hope one day my car will look half as good

sweet.


wow. you were a ricer back in the days. cut springs. konig wheels. huge muffler. indiglo gauges. hehe

wow! nice write up, great build, i remember the car when i first joined the Yahoo boards, *sniff* memories *sniff* lol

nice write up
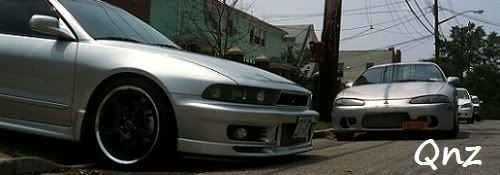
99' Galant ESOriginally Posted by qnz
4G64/63T
AEM EMS

What a pile of crap
.
.
.
.
.
.
.
.
.
.
.
.
.
.
.
.
.
.
.
.
.
.
.
.
.
.
.
.
.
.
.
I just took!
Oh the car is awesome. Back in the day with those open cats...the car sounded like a cesna! LOL. It used to spit gas out on the ground...it was the single reason the global warming temps have risen in the last few years! LOL...Still, Rani had a vision and executed beautifully
"Why fart and waste it when you can burp and taste it!"

wow, nice write up, great to see the history of this car!
OZ Rally Crew #001, Quaife Club member :D

It's cool reading the whole history of your car. Its an amazing looking Galant.

A lovely G that is :D
Congrats on a great build :)

Thank you for paving the way for so many. The write up was a great read!
dang that's a history!
palnning on doing anything else??


question, temp controlled HIDs, still around?
 Posting Rules


Bookmarks