 Log in
 Register


 Reply With Quote
GJ using the stock adjustment screws Brian looking clean. I cut and rewired my ballasts too yesterday, but my halos have so many wires its insane. You gonna fit a dust cap?


Ok so I have been messing with this retrofit for about a month now on and off. This is my first retrofit of any kind and believe it or not its the first time I have ever opened up a set of headlights. I was originally going to mount the projector into the stock reflector and make brackets but this left the projector too far toward the back of the housing which would mean cutting the housing and thats what I wanted to avoid. Pics below of the assembly today, I didnt take pics along the way because I was too focused on making everything work correctly.
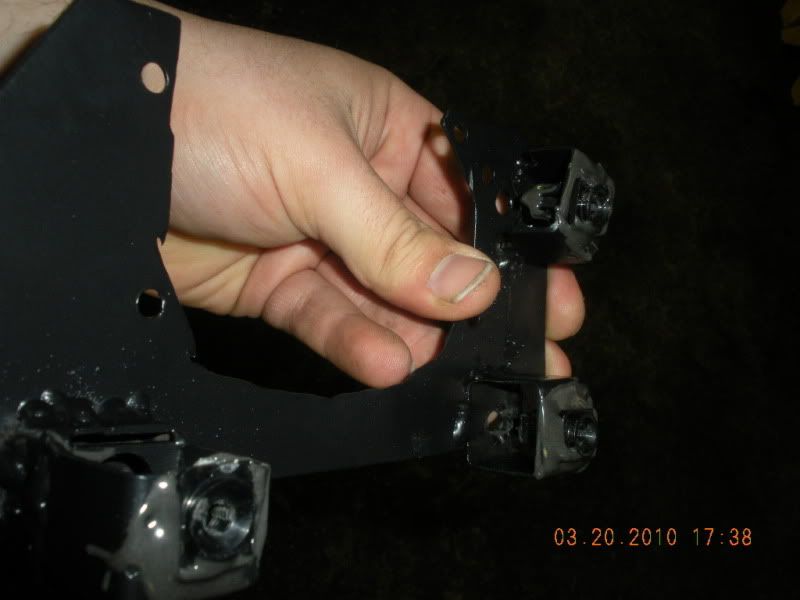
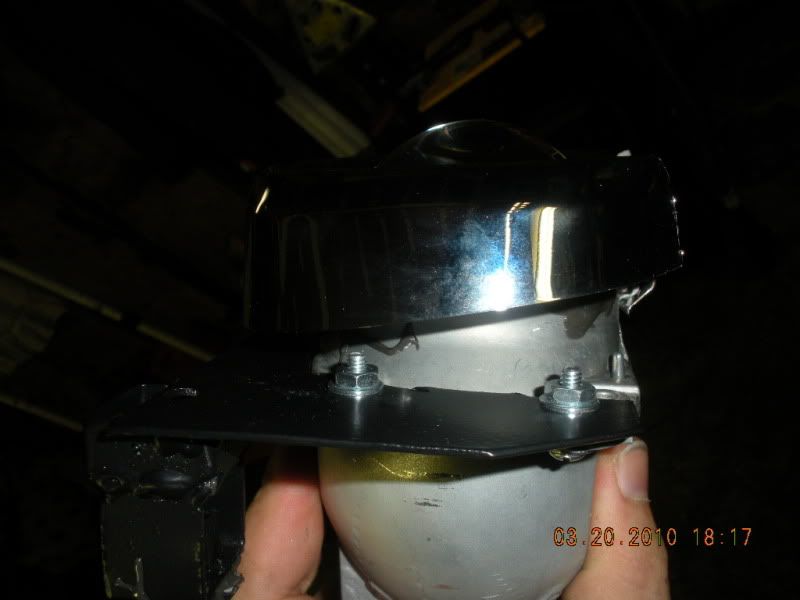
So this is the mounting bracket I made. The plate is 16 gauge mild steel and the mounting posts are 1x1 mild steel square tubing. I designed it this way so that I could still utilize the stock adjuster screws to aim the lights, it puts the projector far enough forward that it JUST BARELY clears the back of the housing so it doesnt need to be cut, NO CUTTING AT ALL on the housing. I talk about using JB weld alot below, I used the kwik weld which sets up in 4 minutes and dries in like a half hour, you need to work FAST with this stuff.
I tried very hard to find steel nuts that were the same thread as the factory adjuster screws and couldnt find anything locally that would fit, so I made holes in the mounting posts to fit the retainers that clipped into the stock reflector, I then secured these with JB Weld. I didnt want to just clip them in because I was afraid the weight of the projector would pull them out.
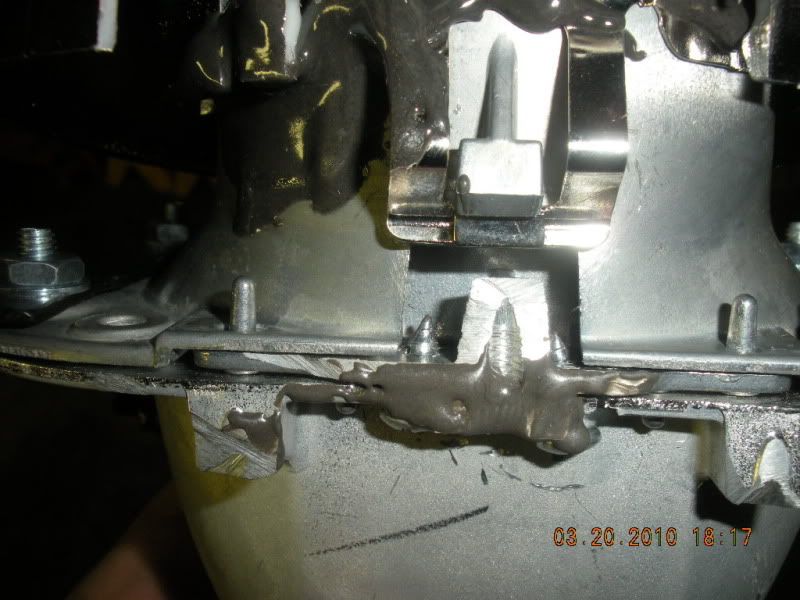
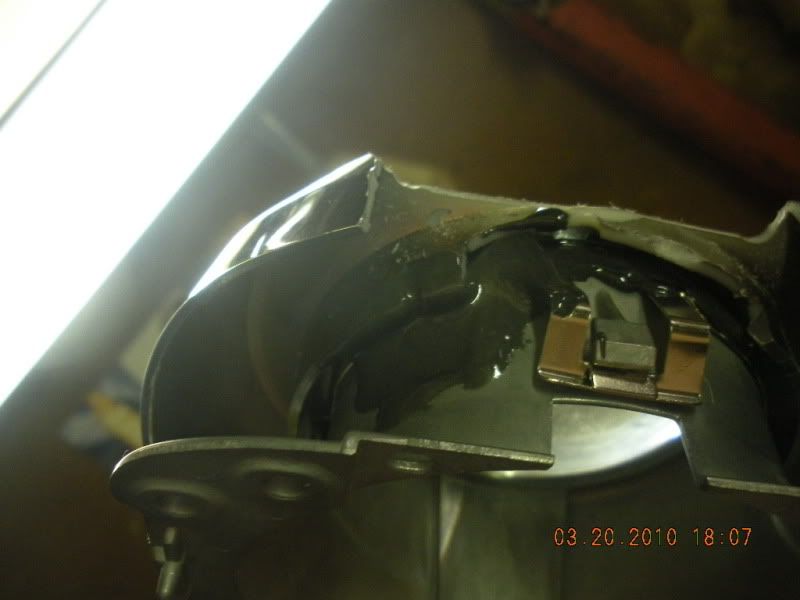
this is the underside of the TSX projector, you can see I cut some stuff off. There are these two little posts that stick down and then a mounting tab and a screw to hold the shield inside, this sits to low and it hits the inside bottom of the headlight housing. I drilled two small holes and used two self tapping screws to hold the shield in place if you look close you can see them. I then JB welded the tips of the screws to prevent them from backing out and JB welded the seam to help it hold together. All that just to create an extra 3/16's worth of clearance.
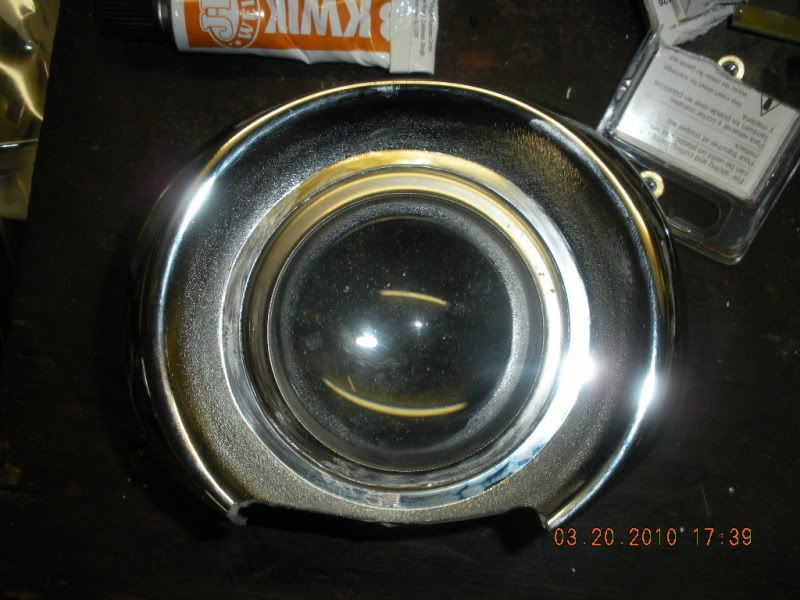
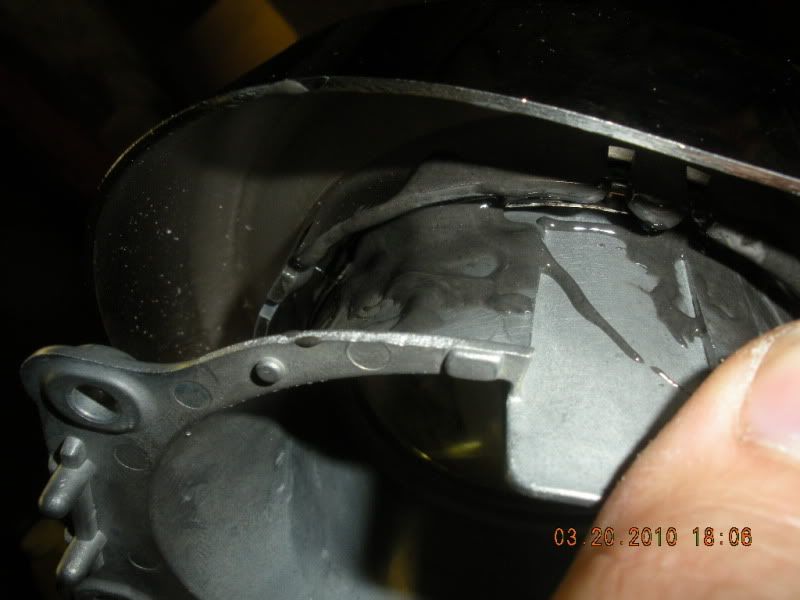
I put a little jb weld around the top and bottom of the lens retaining ring and then sat the shroud on top. The shrouds are from the E55 Mercedes Benz. I had to cut the lower area of the shroud to fit inside the headlight housing. I just eye-balled it and then kept test fitting as I cut.
Once the JB weld set and dried after about 15-20 minutes, I turned it over and applied more JB weld to the backside, this will permanently hold it in place, I turned it over so the lens was downward to let gravity pull the JB weld into all the little crevices so bond it well.
Projector and shroud mounted to the plate and ready to go into the headlight housing..
this is the bezel that bolts to the inside of the headlight lens, this needs to be trimmed to clear the shrouds. It sucks that you cant trim it a nice and smooth curve across, because if you do, you will end up cutting the mounting tab off as you can see here its close!
enough bs, lets put em in the car... dont mind the gaps, the lenses arent sealed on, they are just kinda pressed together...
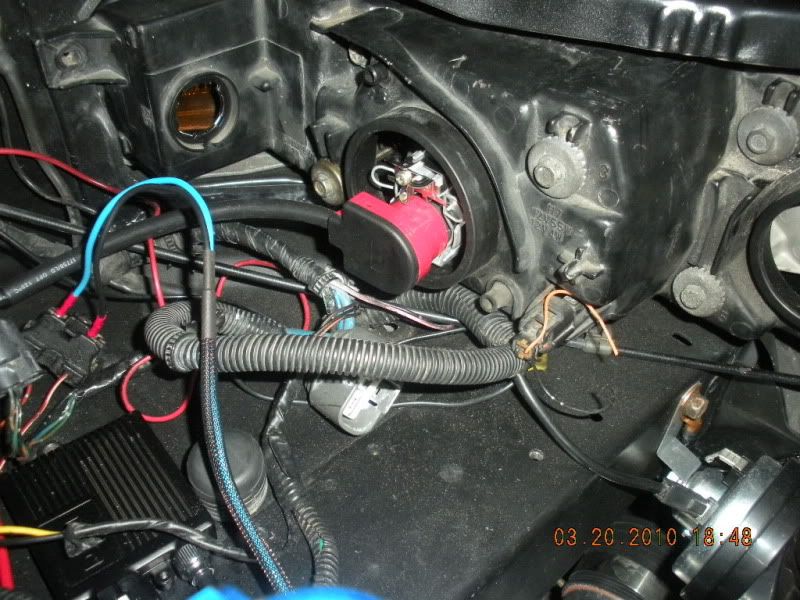
here is a back shot of the driver side housing, dont mind the wiring, I gotta cut and solder that all together and permanently mount the ballasts.
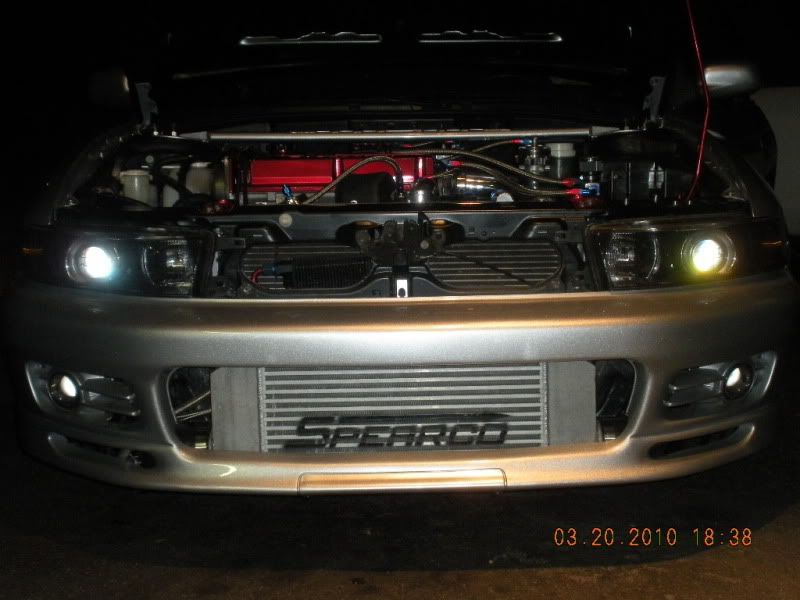
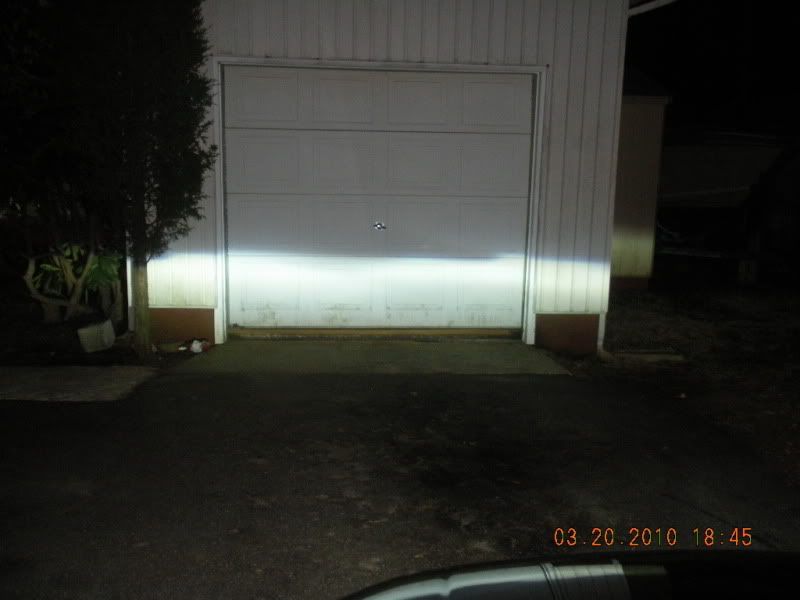
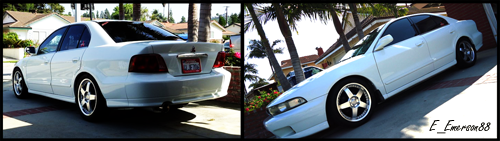
and here it is all hooked up with the DDM slim ballast 35w kit 4500k bulbs...
I am pretty happy with the light output. The only thing I might do is shim the projector and angle it slightly higher since I have a little more room to adjust it down versus adjusting it up using the factory adjusters. This is as simple as sliding a washer or two between the front of the projectors and the mounting plates. Tomorrow I will take it all back apart, clean everything good, shim the projectors, loctite the bolts and then re-seal them up.
At this point I have no plans to make projectors for anyone, but you can bet your ass I made a template and took measurements of that bracket and wrote it down so I can make them again if needed. Once I buy a house (fingers crossed, should be soon) I might make a few sets for people, A few locals have already asked me. But for now, please dont PM me asking for me to make brackets since I dont have time right now.
99' Galant ESOriginally Posted by qnz
4G64/63T
AEM EMS

GJ using the stock adjustment screws Brian looking clean. I cut and rewired my ballasts too yesterday, but my halos have so many wires its insane. You gonna fit a dust cap?
Last edited by 03-Galant-ES; 03-20-2010 at 07:59 PM

looks good bro welcome to the retrofit club! lol..if you ever get time to do those additional brackets I'm down for one thats makes the job a billion times easier and faster..pass on my eb's to someone else lol.....have u thought of getting oem bulbs?

Looks a lot like mine :) :) :) looks nice!!!!
OZ Rally Crew #001, Quaife Club member :D

nice Brian!

You the MAN!

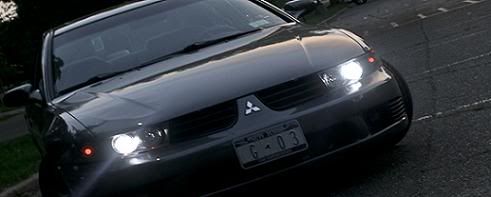
Lights look sick, i like how the flash of the camera reflect off the projector. definetly changes the look of the front fascia.


Hello twin! I gotta stop by one day and check out the new additions.

very very nice !

Great job!

nice brian. i got a new set in the works as well :)

looks great, i was gonna retrofit my eb03's with tsx projectors but never got around to it, next time im out that way, i'll give u a holla


Job well done man. Looks great.
If it ain't broke, i'm still fixin' it.
good job =]


i like it!
________________________________________
-RON

Good job B, came out nice.
2001 5 speed 4g64T


looks great. nice work Brian
Jason - - cofounder of TGCNY
click banner to enter the NY Chapter
2001 Galant ES
2004 Jeep Grand Cherokee Special Edition

Your car is just beautiful...takes me breath away.lol
Evo 8 ECU / 5 Speed Swap / Fully Built Forged Motor
Turbonetics Turbo T31 Stage 3 / RPW Stage 3 Camshaft

X2
Success is achieved through dedication and personal sacrifice. Eye for an Eye_Tooth for Tooth_Blood for Blood.

Nice build, dont think I have the time or expertise/guts to start this yet. Maybe one day...
JDM Zenki Conversion
Lazy hands make for poverty, but diligent hands bring wealth. (Proverbs 10:4 NIV)
 Posting Rules


Bookmarks