 Log in
 Register
 Reply With Quote
Funny thing is, those who complain about noise and get the tracks shut down are the same ones who complain about street racing.


Thats what I dont understand and really annoys me about some people with money. If you know track is there and will bother you then why buy or build a house close to a race track? Like if airports bother you are you gonna buy a house near one? I just dont get some people


Funny thing is, those who complain about noise and get the tracks shut down are the same ones who complain about street racing.
So my season has ended and Im kinda bummed but nobody likes going to the track anyway when its cold. I was only able to run my car 3 out of 6 events this year and I was hoping to do more then 6 all together but it didn't work out. My driving improved and my lap times are getting better and Im finally starting to see where I wanna go with car.
Here's what was done before October event
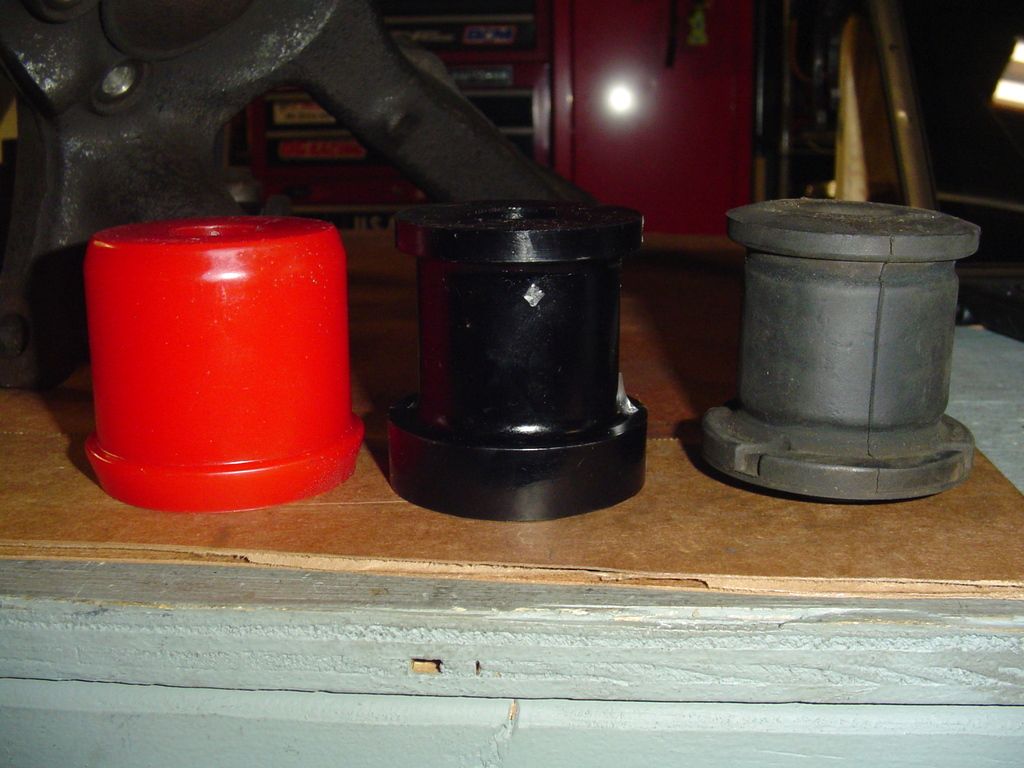
If you remember I had the coolant pipe modified to fit a warning light sensor, a port to feed water to the wastegate and block off two other ports I wasn't using. I used the same shop that did my cage so I knew I was it good hands. Well it cracked at the mounting bracket pretty much right away so I had another one welded up by the same shop. It cracked again in the same spot after one event.
I decided to find someone local to weld since I was tired of driving an hour to the cage shop so I looked on CL's, big mistake. Its a whole other story but in short I found a welder and he did the job but when I got it home and tested it, it had leaks everywhere. Ok so I didn't learn my lesson, I found another guy that did a worse job then the last but atleast was upfront with me and told me it wasn't holding pressure since he tested it himself. He said the material is bad quality and wouldn't stand up to all the heating and contraction this would be put through. That bit of info leads me to believe this is the reason why the two original pipes cracked at the mounting bracket, and also made me appreciate the cage welder because I never had any issues with the welds he made on the pipe,,,,, heres a stock pipe and a pipe from each of the CL welder.
So when all else fails go back to stock and in order to do that I had replace the radiator since my old one was fitted with AN fitting for the rad hoses. After much research I picked up another Mishimoto. I didn't really find any hard data to say one is better then the other except for the CRBD slim radiator, that one is in its own class with a price to match.
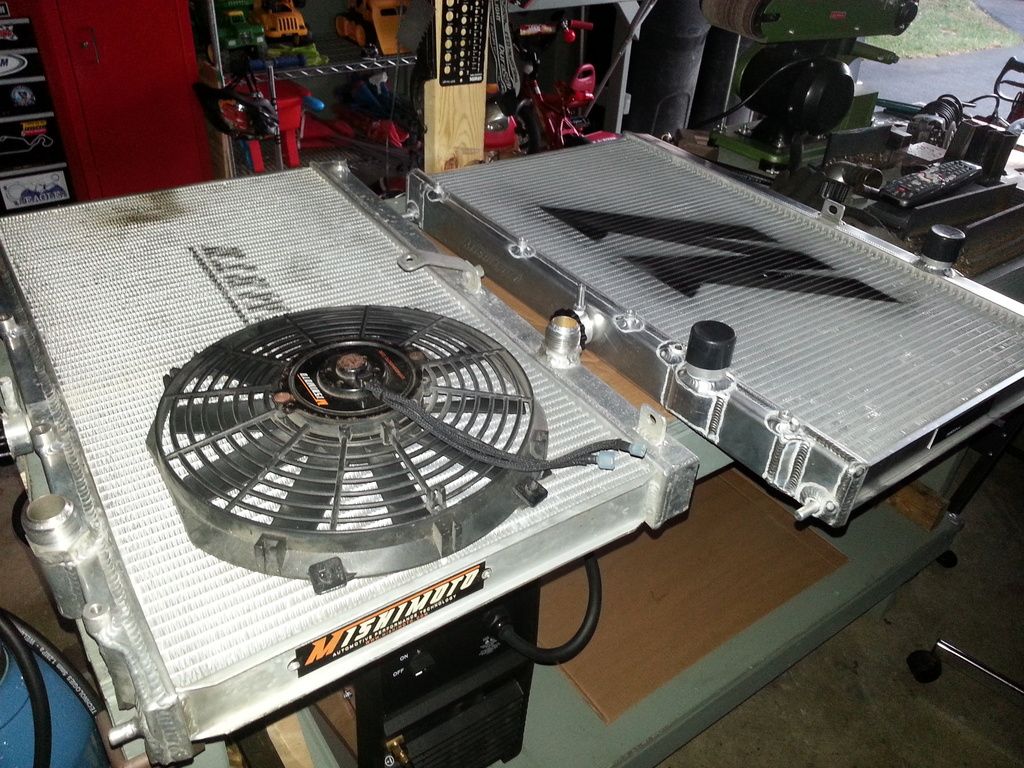
I was very happy when I received it since it was nice and shiny, the welds definitely improved and they changed a few things that I really liked. Instead of the drain being on the side it is now on the bottom, makes draining much less messier.
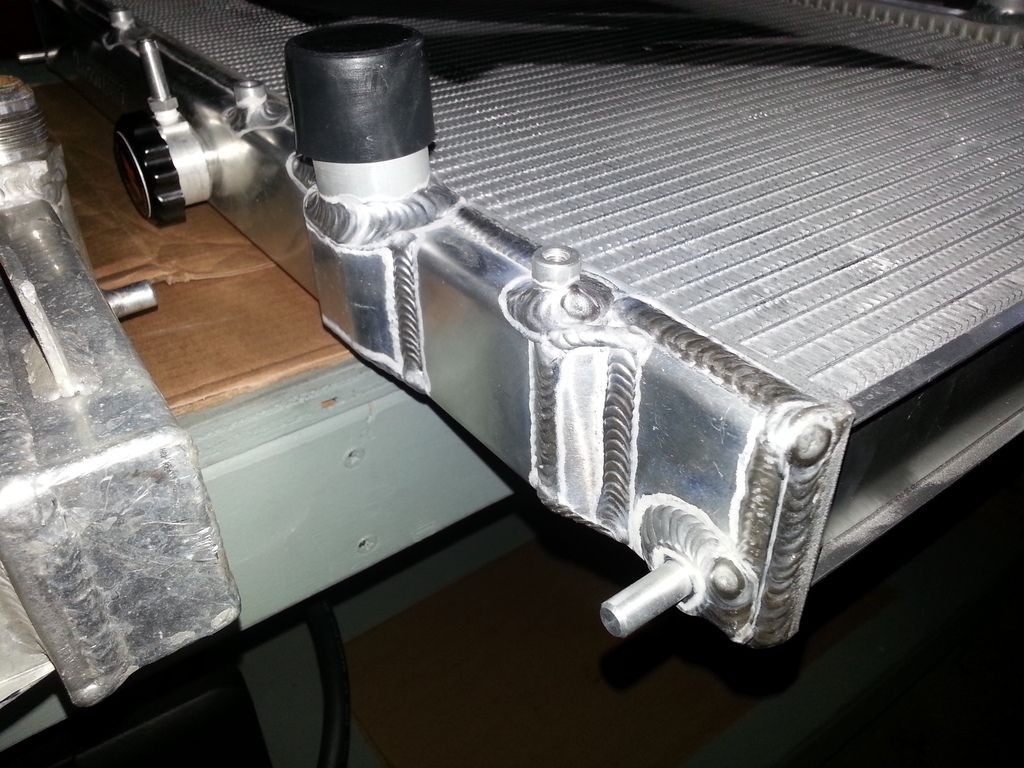
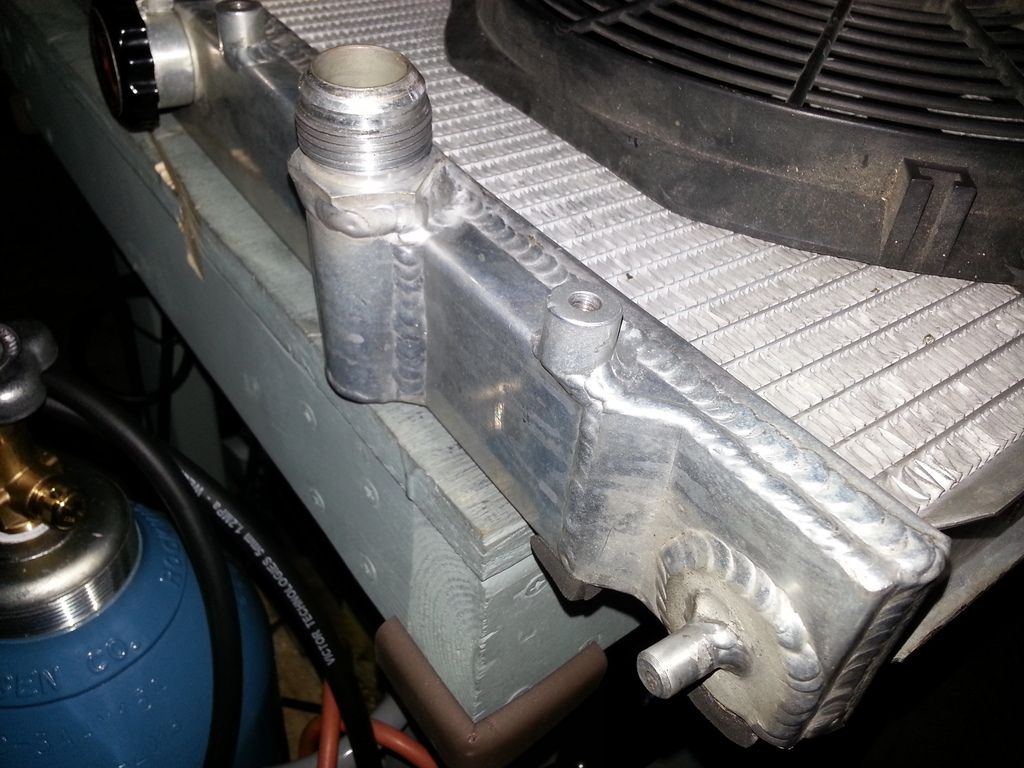
They also changed the design for the upper rad hose port, to me it just looks nicer and they also added a threaded inlet next to it but Im not exactly sure why. Maybe for a sensor but the 1/8 sensor I have seems to be to big, I didn't actually pull the plug out to see but just holding the sensor up to the plug it just seemed bigger. Ill pull it out this week to find out for sure.

I made some new brackets cause the other ones sat kinda crooked, I used the new shop press to put a slight bend in some 1/4 thick aluminum.
After I mounted the fan and did some test fitting I realized I did like how the bottom of the rad contacted the mounts. To much metal to metal contact and with all the vibration Im just worried its gonna rub through so I cut an old silicone coupler in half and made some isolators out them. Not pretty but not visible lol.
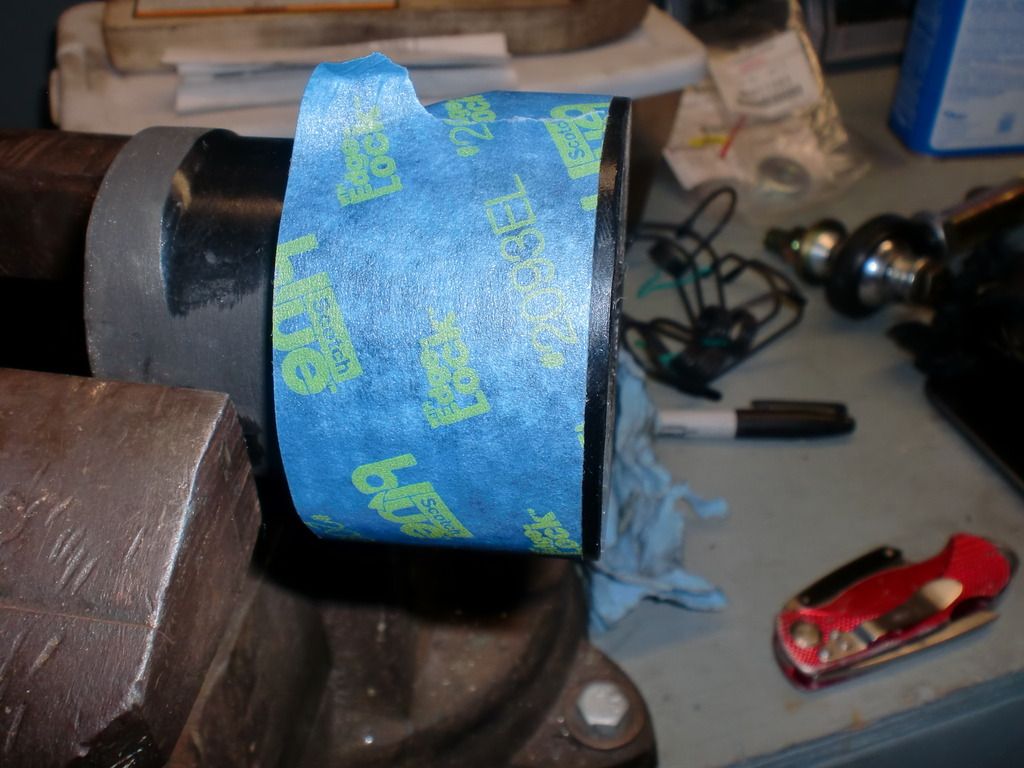
I had to make a plug for the coolant pipe since I had to return stock form. I got some aluminum round bar and welded a bead around it so the hose clamp woundnt slip off.
Back to stock hoses, I had bought some nice Mishimoto hoses to go with this but they were to short. I ordered them for the Evo but I forgot how much shorter the Evo is. I used the lower Evo hose which was still short but usable. So I went to the local part store and the guy was nice enough to let me in the back to pick out a hose that I needed. I found a nice straight one with a kink in it, perfect for what I needed.
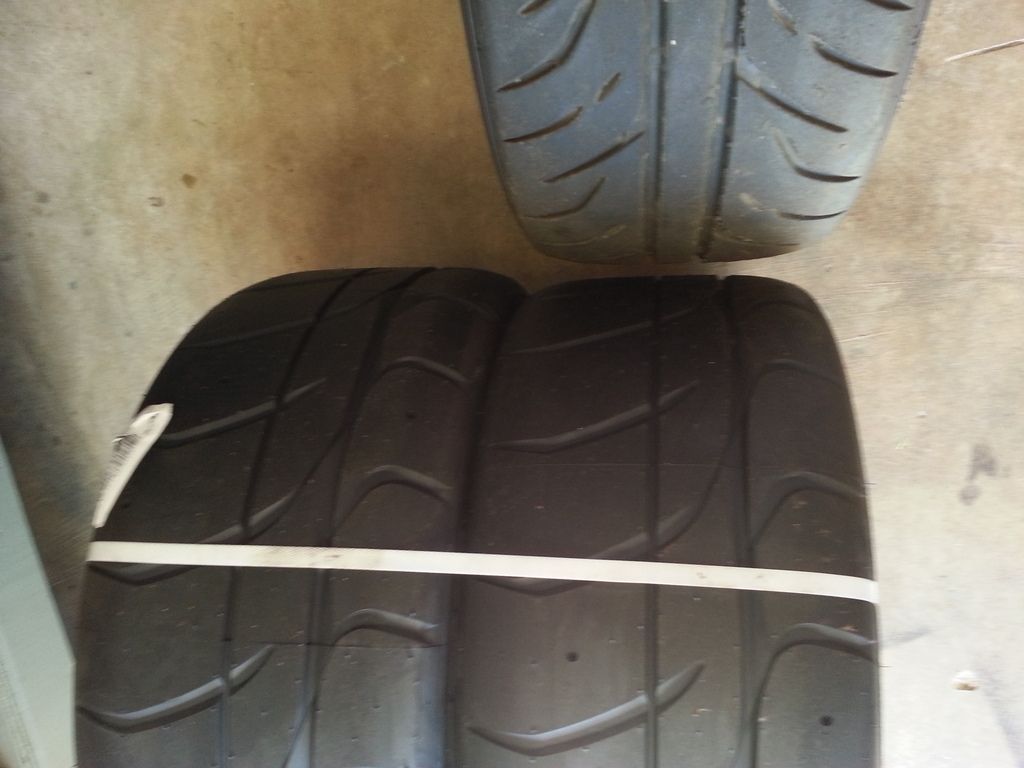
New R-comps
Next I had to re-set the ride height, since I had the coilovers rebuilt. Even though I set them exactly to what they were the new spring rates did throw the height off. I decided to actually do it as professional as possible and with out having scales (yet) this as close to corner weighting as I can get for now. So there's a few things needed to do this and one of them is weight, the weight that the car will carry while on track so that's gonna be driver and fuel. I filled it with 10 gallons of Sunoco 93 and then bought some used free weights from some guy on CL (lol) and put 200lbs in the driver seat (Im really 190 but I figured helmet clothes and want not).

The other thing needed is a level ground, I use 12x12 vct tiles to level the garage floor.
After that I start adjusting the height and when I finished the rocker panel lip sits level which was my goal. The car now actually sits a lil lower now then before.
Also I picked up a new tool Ive been wanting to measure camber. For now I set the camber equal on both sides.
Camber is hard to set correctly to start you need two things a pyrometer probe and a crew member (or my case a willing wife). So how it works is you need to be running a few hot laps to get the tires up to temp, then you pull into pit lane and park and have your crew member stick the probe in 3 locations outside edge, center, and inside edge on all four tires. After you have the temps then you use that data to adjust your camber later on. The probe with memory is like $300.
After all that's done I checked the alignment, bled the brakes, filled the trans with fluid and primed the pump. Good to go.

I signed up for an event at a local track that Ive never been to. Its on the same property as the same track as I usually go to but this one isn't as popular or known to be a fast track and supposedly sucks for high hp cars but I was desperate to shake down the car.
This was the most twisty, blind elevation track Ive ever been to that I literally made my self nauseous to the point where I had to pull into the pits, twice. I thought I lost my mojo but you know what I hate rollercoasters and this was exactly like a rollercoaster. Its not a fast track but definitely the hardest Ive been to. I said I would never go back but now I wanna go back just to conquer that bad feeling I was getting.
Two weeks later I hit my favorite track for the last event of the year. This one is on the same property as the other one I almost made myself sick at. I was able to knock off 2 seconds off my best time from last year and I know theres potential for more.
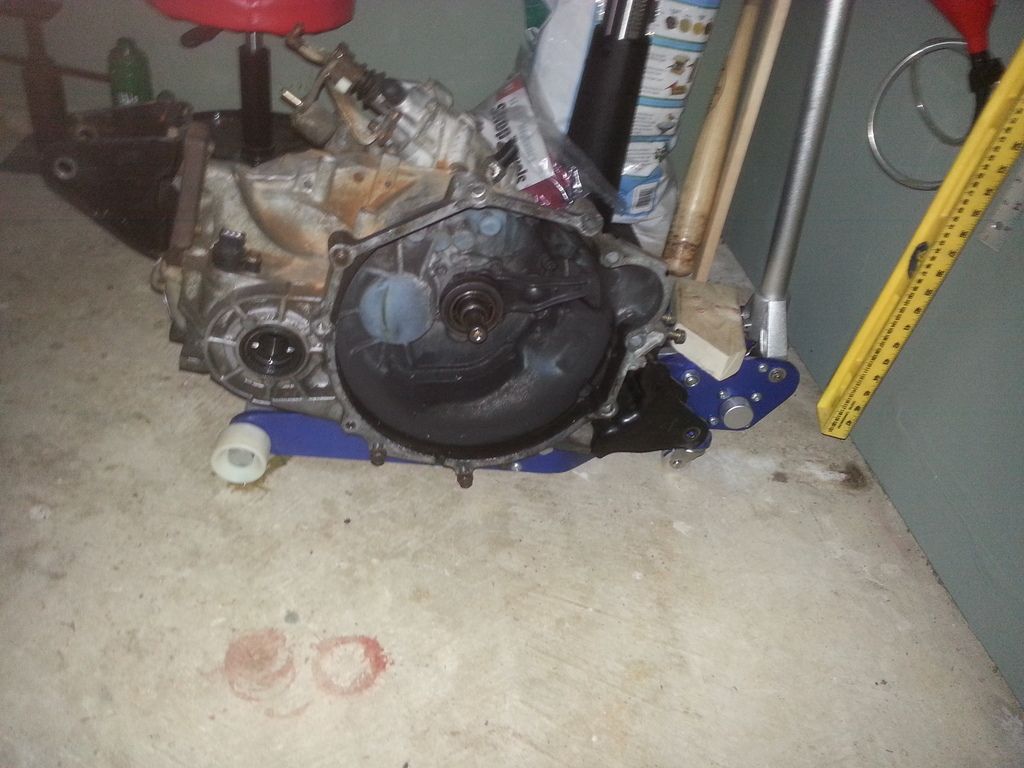
The car handled great, felt great with the new spring rates, the r- comps were awesome and then by the 2nd day of the weekend I was able to brake something again. The turbo bolts vibrated loose and then I wasn't able to get the car in gear which is probably the release bearing no big deal. Got the car home and started to pull the tranny to bring the shop.
Heres that coolant drain plug in action.

After draining the gear oil there were some silky metal shavings that had collected on the shop towel, normal to a point but there were some big pieces in there too.

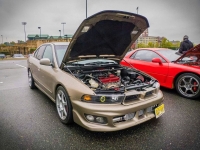
This thing spends more time outside the car then inside.
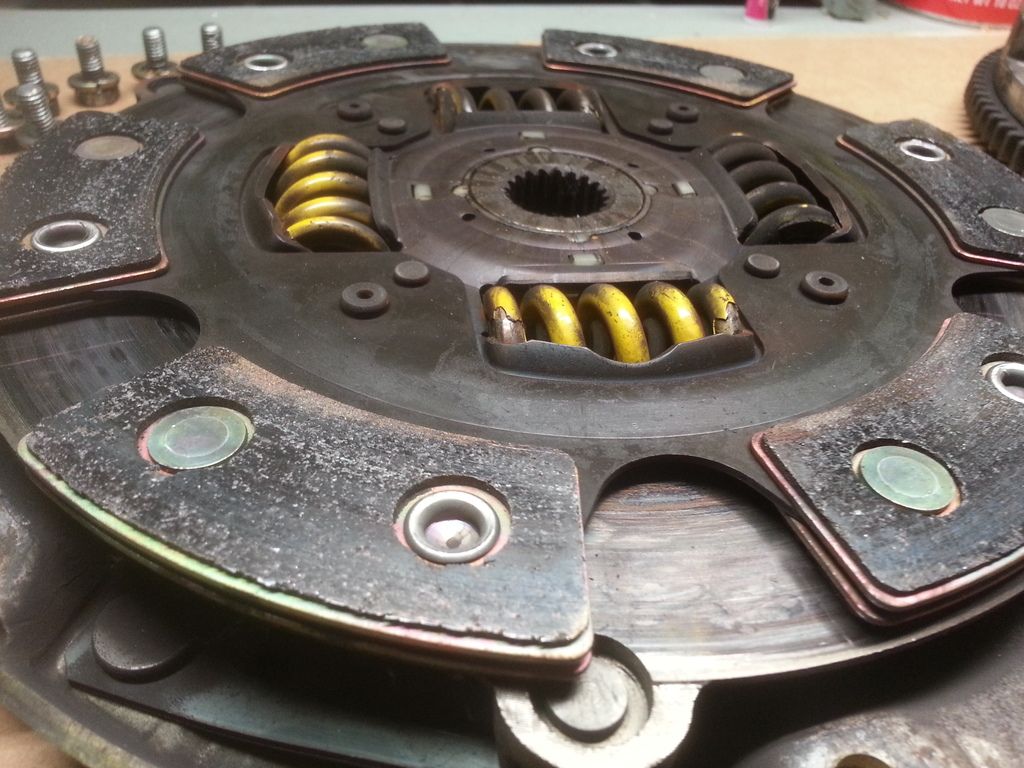
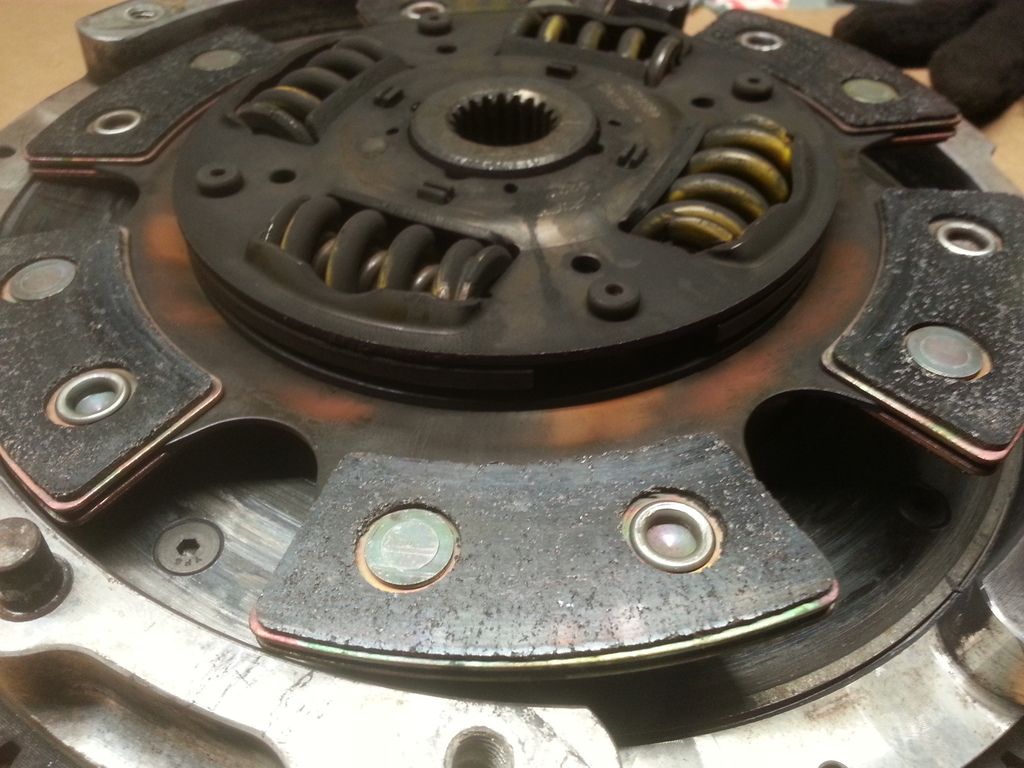
Clutch and flywheel look ok for 2k track miles although the friction plate on the flywheel seems real low the flushed bolts.
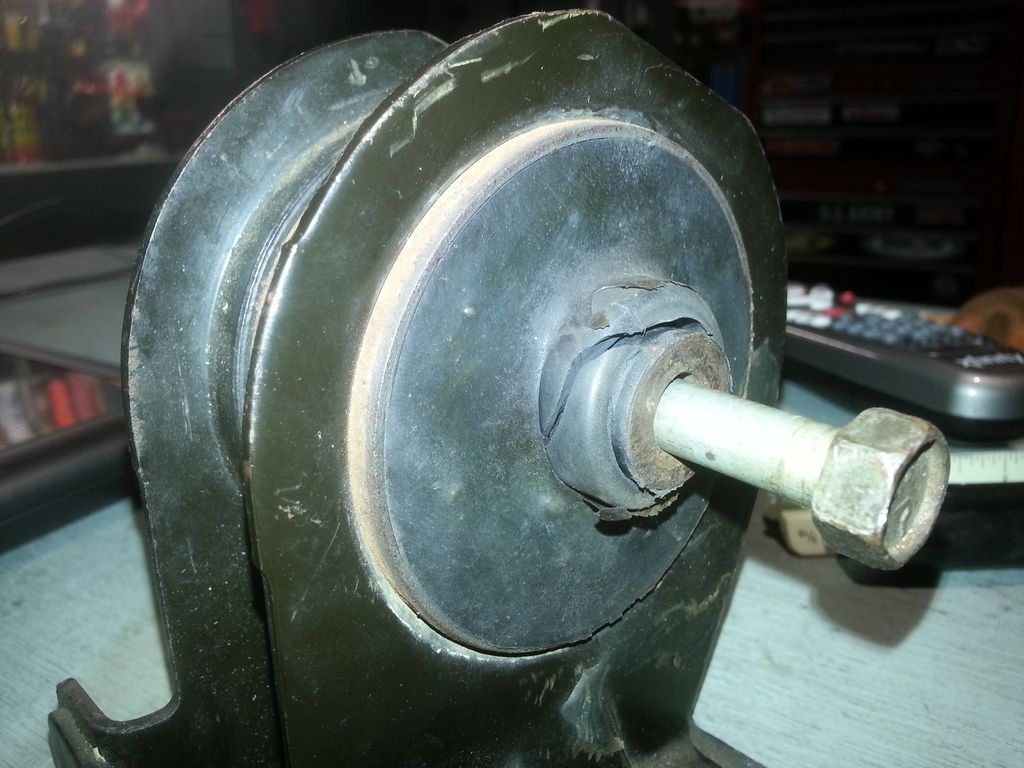
Rear motor mount is tearing up, this will have to be replaced.
I remember in a different thread there was a discussion about the bolt for the front motor mount being to small in diameter for the sleeve of the urethane bushing. Seems I have the same problem but never really paid much attention to it but now Ill address it.

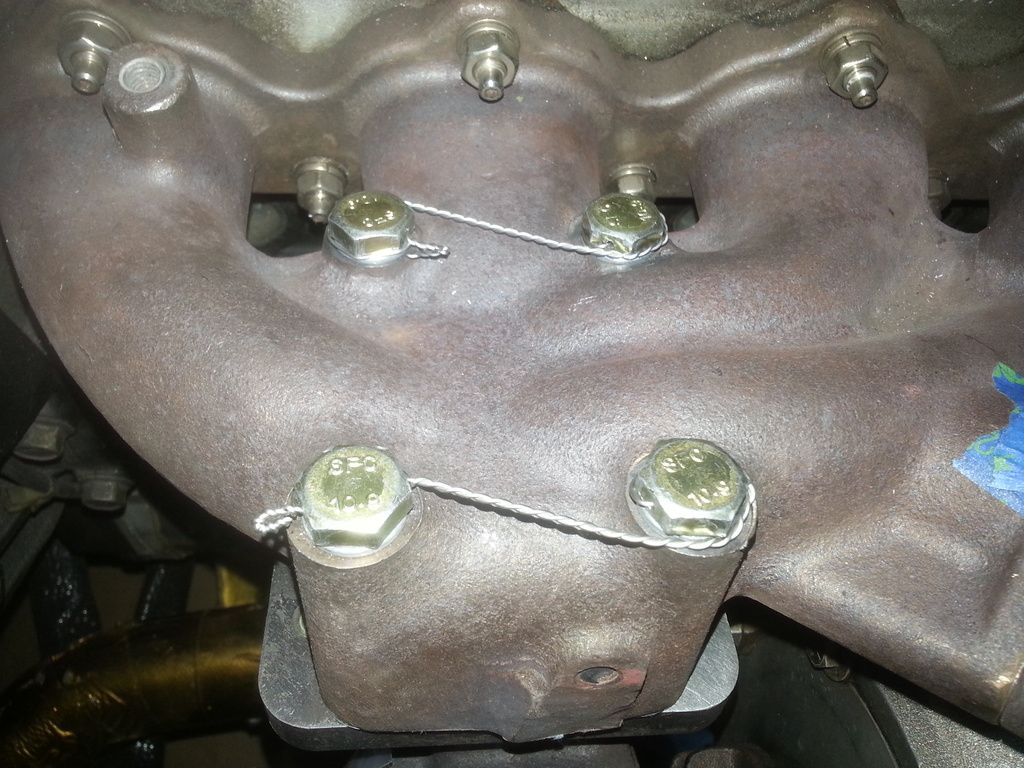
And heres a shot of the turbo out, it didn't take long for the car and the turbo to vibrate loose the bolts which in turn blew the gasket to pieces. You can see whats left of the gasket on the lower left of the card board. Im gonna have to safety wire these bolts now.
I know its a long post but that's it for now.
Last edited by xd_01; 12-01-2015 at 11:31 PM

I'm super jealous of what you do with your Galant B. I've been wanting to do track events with my Galant for as long as ever but I think Im gonna jump into it next summer for sure now that I've had the car running for a whole year. Plus, I just bought an EVO so I can dedicate the Galant to just pure enjoyment.
I get excited everytime you post an update. Keep doing what you do man, its really inspiring!
Jigz-TGCIL Sosick Motorsports
R.I.P. Christopher "CRAZY CHRIS" Beckmann
"you dont appreciate friendship until you lose your bestfriend...."
I'd rather have the knowledge and ability to do it than the money to buy it already done.
Appreciate the compliment and congrats on the Evo. If you if ever need any tips when you hit the track next year let me know Ill be happy to help.
Thanks bro I appreciate that!
Jigz-TGCIL Sosick Motorsports
R.I.P. Christopher "CRAZY CHRIS" Beckmann
"you dont appreciate friendship until you lose your bestfriend...."
I'd rather have the knowledge and ability to do it than the money to buy it already done.
Hi all, Im just chillin here on X-mas eve while the kids watch x-mas shows before we go to mass so I uploaded some current pics while we relax.
The trans is at the shop being looked at they said at first glance the clutch, flywheel and release bearing appear to be in good condition so it may or may not be a problem with trans. Im still looking into another solution to the weak drive gear its a never ending search but I think the last resort will be the modified evo trans. I don't want want to go that route since it weighs a lot more and adding more weight to the nose isn't ideal for me.
Im currently finishing up the solution to my turbo bolt loosening problem, I bought some lock-wire and entry level lock-wire pliers and a jig to drill the bolt heads.

t3 side of the adapter
Also replacing some cheap designed t-bolt clamps, notice the kink that sets in once its tightened up.

Different design, I believe this a Vibrant.
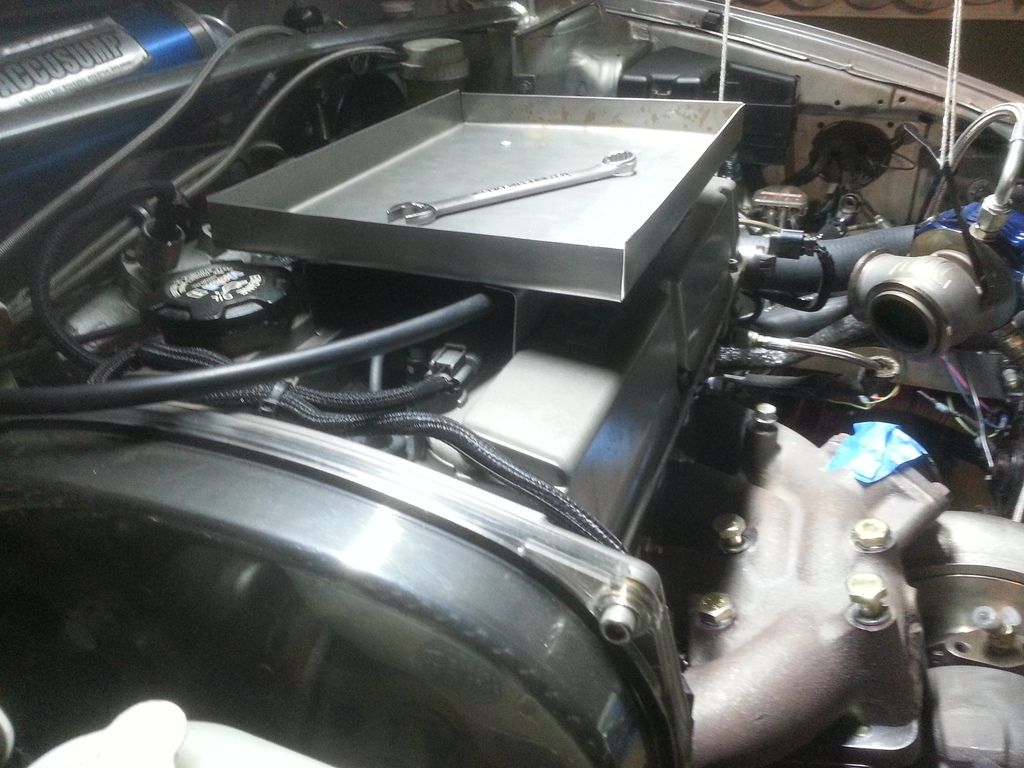
I fabbed up this tray because I was sick of tools and bolts floating around the engine bay while I work.
Heres something that came in last week for a future project, aluminum crash beam. Im starting my quest to lighten the chassis especially since Im planning on turning down the power.

That's it,, Merry X-mas all !

Like wise. Merry christmas to u and ur fam. Be safe.Originally Posted by xd_01

Sent from my SM-N920T using Tapatalk
Hi all I have some updates but Ill post in several short posts since I have a bunch I wanna share but don't have a lot of patients when it come to this. I got my trans back finally and its ready to go in this weekend but I decided the long term goal is to go with an Evo trans w/ a modified t-case for fwd, in the end theres no comparison when it comes to support, performance, and most importantly mph.
Lately Ive been working on installing poly bushings all around its such a pain in the ass job even with a shop press,, actually scarier.
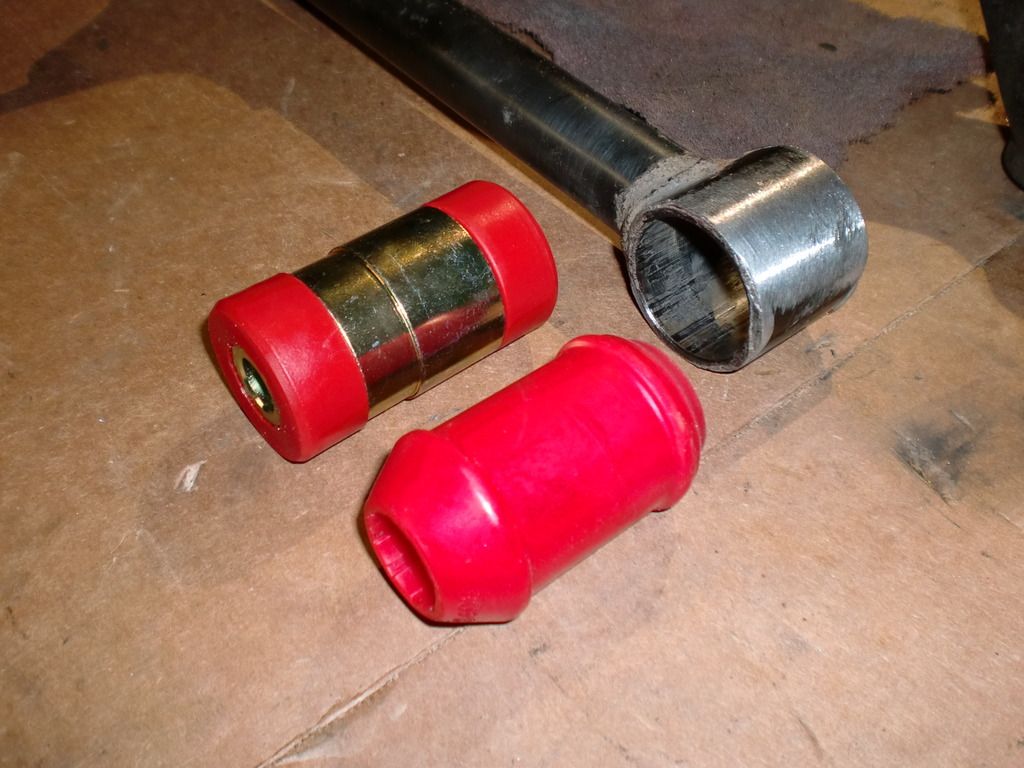
So I bought a set of ES bushings and heres my first problem... rear of the front LCA.
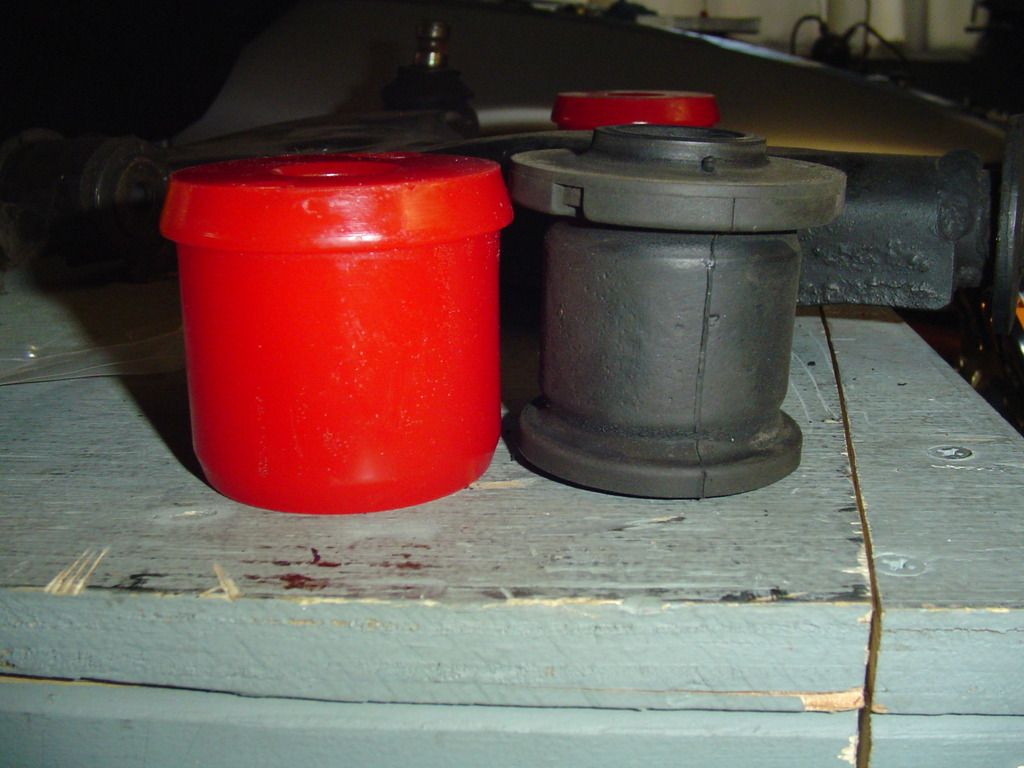
The poly is 13mm too wide in diameter when compared to the stock one,, the whole arm looks like this.
Luckily the smaller one up front fits like a glove. After some research I discover there is not only two versions (which already knew) but three vesions of this rear part of the arm. I knew there was a difference between the 2000 and mid-year 2001 LCA's but I soon discovered there are two different styles pre- 2001 and that version isn't supported by either Prothane or ES. I fall in the pre- 2001 category by the way.
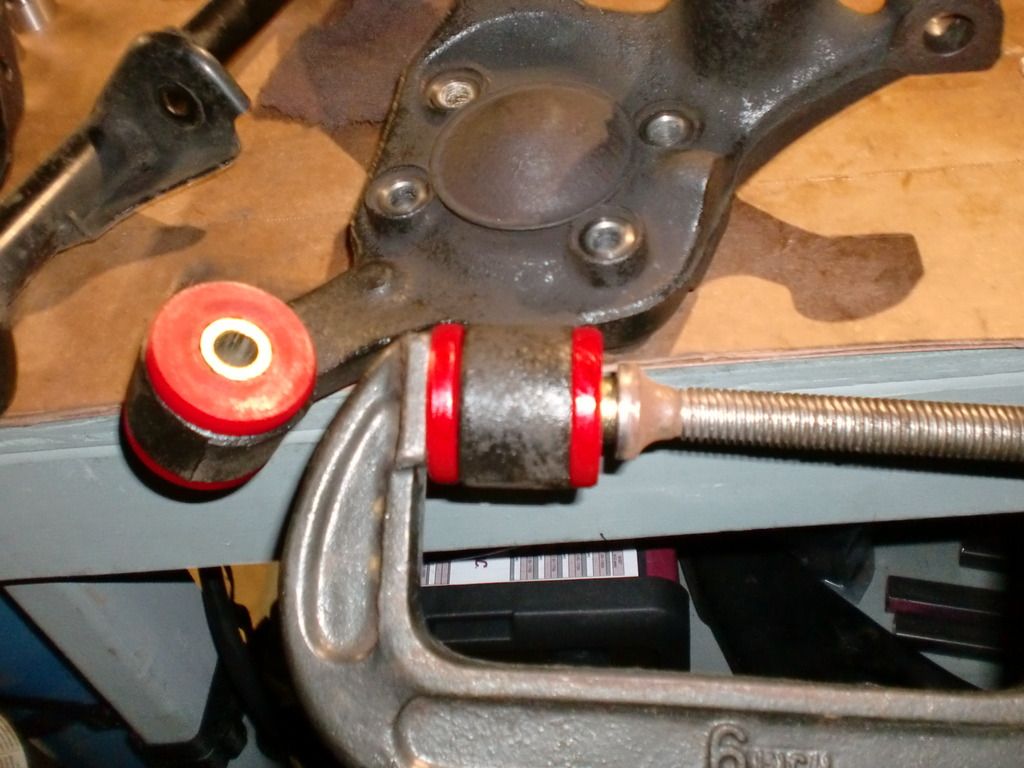
So by dumb luck I was looking through a thread on DSM tuners of a 92 G-VR4 where the guy was pretty much restoring the car down to sub-frames cause the car was in such bad shape. I took a look at his LCA's and thought those looked just like mines except it has an attachment for the sway bar which is awesome too but Ill tell you why later. Well Whiteline just happens to sell a poly bushing set for the rear part of this LCA as a pair, so $27 later.....
^^^^ The one in the middle is the Whiteline bushing, same diameter, same flanged ends perfect but not quite. The very minor flanged side (faces towards the rear of the car) made the space too narrow for the support bracket to fit on so I just cut it off and cleaned it up on the belt sander.
After a test fit the bolt holes weren't lining up on the bracket so I trim 3mm off the other side.
Before
After
Once that's done I fitted the front bushings which was the easiest part and finished installing.

Heres the Whiteline bushing trimmed to fit.
and not to leave you hanging why I thought the G-vr4 LCA having a sway bar connection is a good thing. For a long time Ive been searching for high end coilovers and the closest set that looks like the 8g's that's in the Mitsu family is the Evo X. Ive never actually had a set in my hands only been able to study pictures and I found two major differences, the rears look much longer then the 8g's and the fronts have no sway bar connection. So if by some slim chance the rears aren't too tall and the front G-vr4 LCA's fit perfectly on the 8g,,,, theres a chance the we could have a more performance geared suspension set up. Used stock Evo X suspension can be found cheap so maybe that's where Ill start experimenting.
Heres my next installment,,
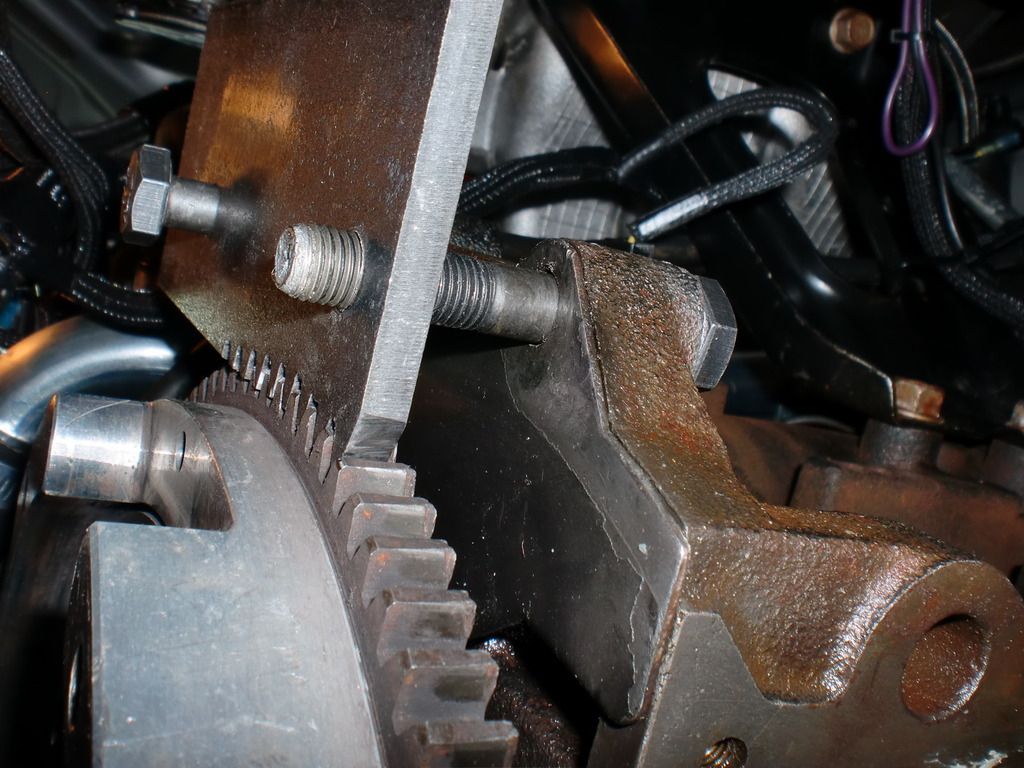
So starting on the rear of the car is where it starts to get tricky, two bolts were really seized but I managed to get one out after lots of patience (top of the knuckle) and the other which was the eccentric bolt of the toe link. I had to cut that bolt out of both left and right sides of the car cause the more I tried to smack it out with a hammer the more I discovered just how flimsy the rear subframe is. In the end I ordered new eccentric bolts from Mitsubishiparts.net
After its been cut..
Here's the elongated bolt hole that moves the eccentric washer from side to adjust the toe incase anyone has never seen it before.
New one installed set to the original position.
The hard part,, pressing out the old bushing.

The inboard bushing on the trailing arm I had to cut out with a air saw since I didn't have any tooling wide enough to press it out.
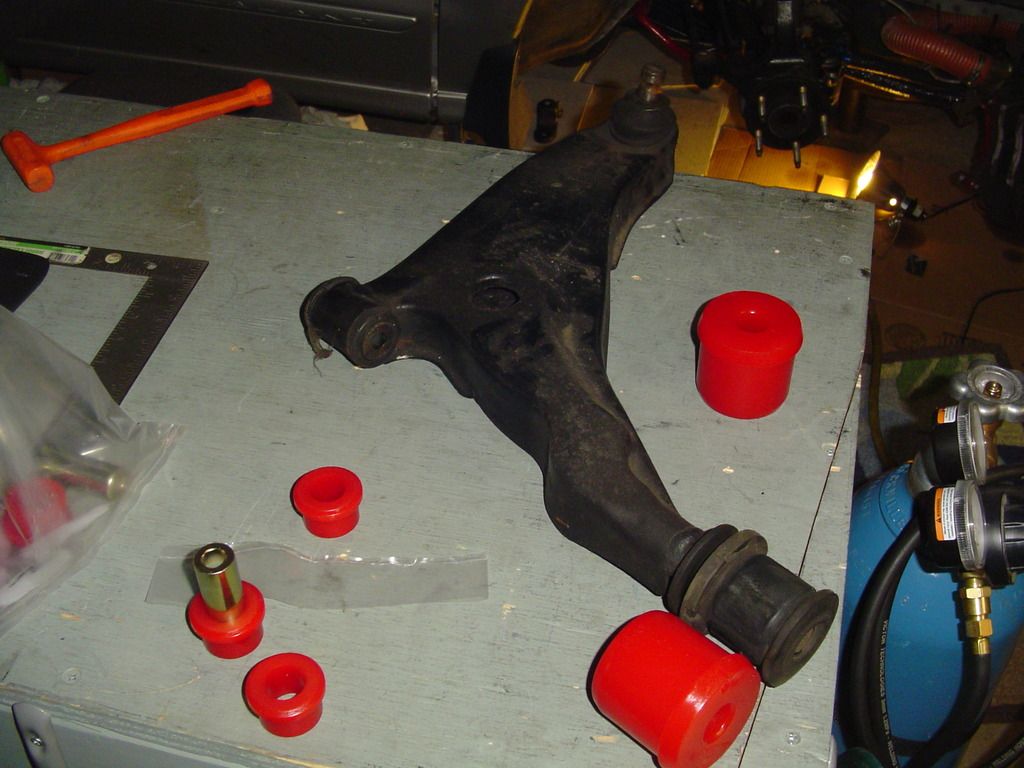
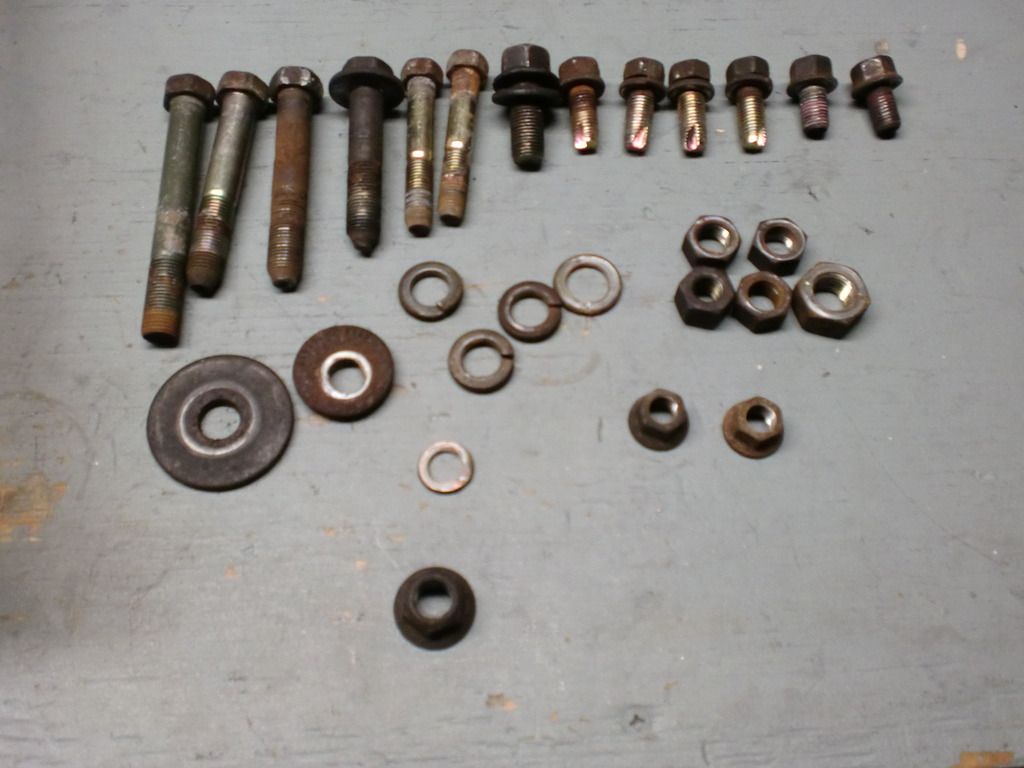
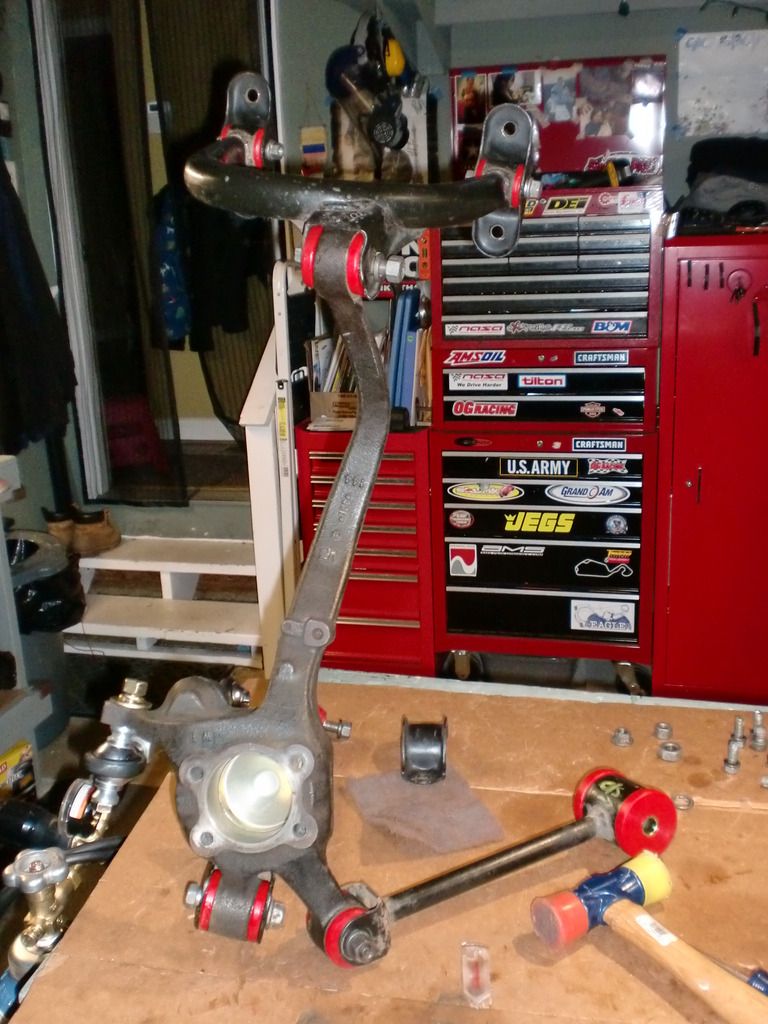
Here's all the suspension parts layed out.
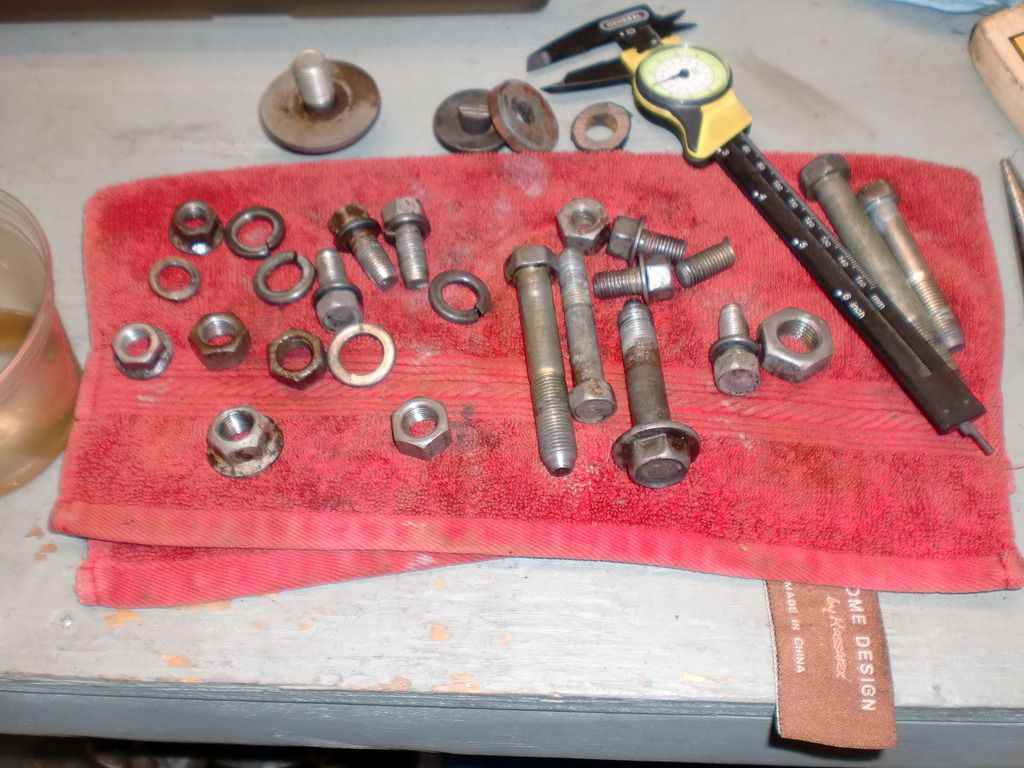
I usually try to salvage any bolts by letting them sit in Evaporust, its a eco friendly liquid that lifts the rust of anything metal.

Before..
After.. its more noticeable in person.
So here's the most important part, the poly bushings themselves. ES bushing DONT come with the 3 inserts for the knuckle or is it available, the 2nd Eclipse kit from Prothane on the other hand does. It also comes with two extra ones that are in a stepped metal sleeve which I have no clue what there for.
ES on left on cardboard and Prothane on right
Also the Prothane kit comes with the bushings cut in half with makes installation much easier. I decided to go with all Prothane except for one. The inboard of the lower link had a stepped metal sleeve which I had mentioned before and was about 1.5mm to wide in diameter so I used the ES bushing which didn't have any sleeve and was the correct diameter.
After all the old bushings are out the rest is easy, the new bushings install by hand and a couple of the large ones simply take a C-clamp or vise to press in although the inner sleeves do take a C-clamp or vise to press in.
Once everything was pressed in I pieced all the parts together for test fit before I started the re-install, no issues so I went ahead with it.
I had these toe arms from a Cali group buy a long time ago and this will be my first time using them. There really top notch and well make adjusting the toe a breeze, I definitely recommend jumping on these if they ever come up for sale. Before I installed them I measured the old ones from center to center and transferred that over to the new ones. Not perfect but it will get me close when I check the alignment.
In preparation of re-installing my trans I decided to fab up a flywheel holder so I don't have struggle when torqueing the bolts. Made of 1/4 mild steel flat bar, Im planning on trimming it down.

Im pretty proud of this one, I texted Stewi this pic and he was like "All that just to torque the bolts???" my response was " Im getting old". Theres and old saying we use to use at work all the time "work smarter not harder".
Anyway, unfortunately for my flywheel I was using a cheap torque wrench to torque the pressure plate bolts on at 20ft lbs (only 2lbs over the FSM recommended 14ft lbs +/- 3) I managed to strip one bolt hole. So I ordered new oem pressure plate bolts and ARP flywheel bolts from extremepsi.com and I also ordered some longer 8mm bolts plus a set of 10mm bolts to upsize the one I stripped from a strictly nut & bolt web store called belmetric.com. The idea is to test fit the longer ones since the oem bolts still leave about 10mm of open space between the bottom of the hole and bottom of the bolt. Ill decide which to use once I test fit everything, I just don't know why it has so much of the a gap even the flywheel bolts have a nice size gap. The other thing I should probably do is invest in a quality torque wrench.
I always enjoy your updates
Jigz-TGCIL Sosick Motorsports
R.I.P. Christopher "CRAZY CHRIS" Beckmann
"you dont appreciate friendship until you lose your bestfriend...."
I'd rather have the knowledge and ability to do it than the money to buy it already done.
Thanks Jigz I enjoy sharing this stuff, hopefully it helps someone. Hopefully Ill have some more next week, Im really excited about a set of scales I finally ordered that will be here next Tuesday so hopefully Ill have some chassis adjustment updates.

Did u ever find out what is wrong with the transmission since u had all those metal shavings??
I'm also slightly confused on why u ordered longer 8mm bolts.
What is your plan with the old mishimoto radiator?? And where did u order the new one from??
Koyo radiator has a bung on the bottom and that is used for a coolant sending unit. Maybe mishimoto did the same thing with theirs but u said it seems that it is bigger than 1/8"
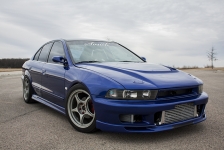
'00 Mitsubishi Galant ES 4g64T (Samantha)
'01 Mitsubishi Galant ES 4g64 (Daily)
'02 Mitsubishi Galant ES 4g64 (SCRAPPED)
'00 Mitsubishi Galant ES 4g64 (SCRAPPED)
'91 Volvo 740 Turbo B230FT (SOLD)
'88 Mitsubishi Mighty Max (SOLD)
'91 Kawasaki ZX7 (SOLD)
'95 Kawasaki ZX9R
5th gear and some shims failed so those were replaced.
I ordered bolts that are longer by 5mm because I figured since there was space available I would use longer bolts to grab more threads and less of a chance of stripping another one, but today I discovered the reason why it stripped.
There are 6 bolt holes 25mm deep or at least there supposed to be, the one I stripped was only 15mm deep. Not only was it to shallow the threads didn't even go down the whole 15mm it stopped halfway where there was a step and the holes diameter actually got smaller. I don't know if you can visualize what Im saying but basically the bolt bottomed out and ripped the threads out. I don't know how I got lucky the two prior times this clutch has been fastened to this thing, it must have been on the threshold of stripping. Any way I drilled it deeper and tapped it for the next size up and got it back in the car. In the end I stuck with the new oem pressure plate bolts after I discovered the reason for the stripped hole.
I got the rad from extremepsi.com, really good store I get the majority of my parts from there and Im saving it for a rainy day.
I haven't pulled the plug on the rad yet to see what size it is but it does look smaller then my 1/8 temp sender. Tomorrow Ill pull it out to see what size it is.
I love extreme psi. They will price match anyone. They are close by so shipping to me take a a day.
So one one of the holes was abnormally shaped and didn't go all the way as deep as the others?? I'd have to check my flywheel and make sure they are all the same.
'00 Mitsubishi Galant ES 4g64T (Samantha)
'01 Mitsubishi Galant ES 4g64 (Daily)
'02 Mitsubishi Galant ES 4g64 (SCRAPPED)
'00 Mitsubishi Galant ES 4g64 (SCRAPPED)
'91 Volvo 740 Turbo B230FT (SOLD)
'88 Mitsubishi Mighty Max (SOLD)
'91 Kawasaki ZX7 (SOLD)
'95 Kawasaki ZX9R
Yea definetly check all bolt holes before install its worth the trouble. Get yourself a cheap MM caliper from Home depot if you dont have one already, I use it so often for everything such a valuable tool.
I have a cheap digital caliper here I'll make sure I use it.
'00 Mitsubishi Galant ES 4g64T (Samantha)
'01 Mitsubishi Galant ES 4g64 (Daily)
'02 Mitsubishi Galant ES 4g64 (SCRAPPED)
'00 Mitsubishi Galant ES 4g64 (SCRAPPED)
'91 Volvo 740 Turbo B230FT (SOLD)
'88 Mitsubishi Mighty Max (SOLD)
'91 Kawasaki ZX7 (SOLD)
'95 Kawasaki ZX9R
I don't remember if u mentioned it before. But have you looked into get the stage 2 TRE transmission rebuild??
'00 Mitsubishi Galant ES 4g64T (Samantha)
'01 Mitsubishi Galant ES 4g64 (Daily)
'02 Mitsubishi Galant ES 4g64 (SCRAPPED)
'00 Mitsubishi Galant ES 4g64 (SCRAPPED)
'91 Volvo 740 Turbo B230FT (SOLD)
'88 Mitsubishi Mighty Max (SOLD)
'91 Kawasaki ZX7 (SOLD)
'95 Kawasaki ZX9R
What does it consist of?
 Posting Rules


 2000 Mitsubishi Galant ES


 2000 Mitsubishi Galant ES
Bookmarks