 Log in
 Register
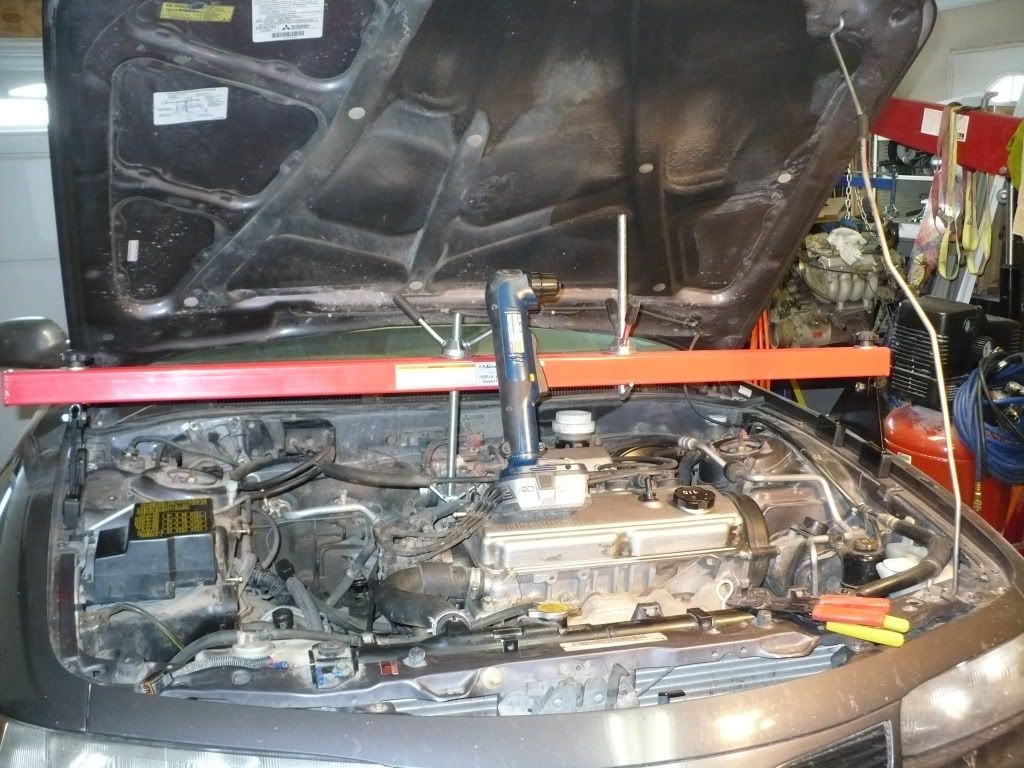

 Reply With Quote
Good info! Did you have fun getting the spacer off the crank?
In a pinch you can simply cut a portion of the brake pedal and it clears just fine.


Just sharing a few things I learned from the 5 spd I am doing on my 98 ES. The donor car was a 95 S.
1. The brake pedal housing from the auto trans is wider and heavier than the one from the 5 spd car. This is because the auto trans brake pedal connects to the trans interlock cable that prevents you from shifting into gear unless the brake pedal is engaged. As the auto trans brake pedal is too wide to use when going to a 5 spd you have to use the brake pedal assembly (pedal and housing) from the 5 spd car. As I wanted to keep the cruise control and eliminate any wire splicing, I tried swapping the 5 spd brake pedal into the auto trans brake pedal housing. It worked even though the auto trans brake housing is wider than the 5 spd housing and the best part is the brake light/cruise control wiring just plugs right in.
2. I used a top engine support (Harbour Freight). It stands on the edge of the fender and has two adjustable hooks that hang down that you can hook to the engine using the lifting points that are already on the engine. The big advantage is you no longer need a jack under the oil pan to to support the engine from below once you start removing the trans mounts. It was much easier to move about under the car and to get the trans in place without a jack under the oil pan. Additionally there is no risk of denting the oil pan or causing a leak with the jack. remember to remove/disconnect everything from the engine/trans (air box, wiring connectors, ect.) that you need to get out of the way to drop the trans before hooking up the top engine support. Another advantage of the top support is you can raise and lower the engine as needed to facilitae aligning the the trans to the engine. The Harbour Freight top engine support adjusts up and down by turning a handle.
3. The 5 spd donor car had cruise control so the donor clutch assembly has a switch and connector to disengage the cruise control when the clutch is pressed. Unfortunately I could not find a connector in the 98 ES wiring harness to hook up to the clutch pedal assembly so I am going to just see what happens. I'll edit this post to update once I know .
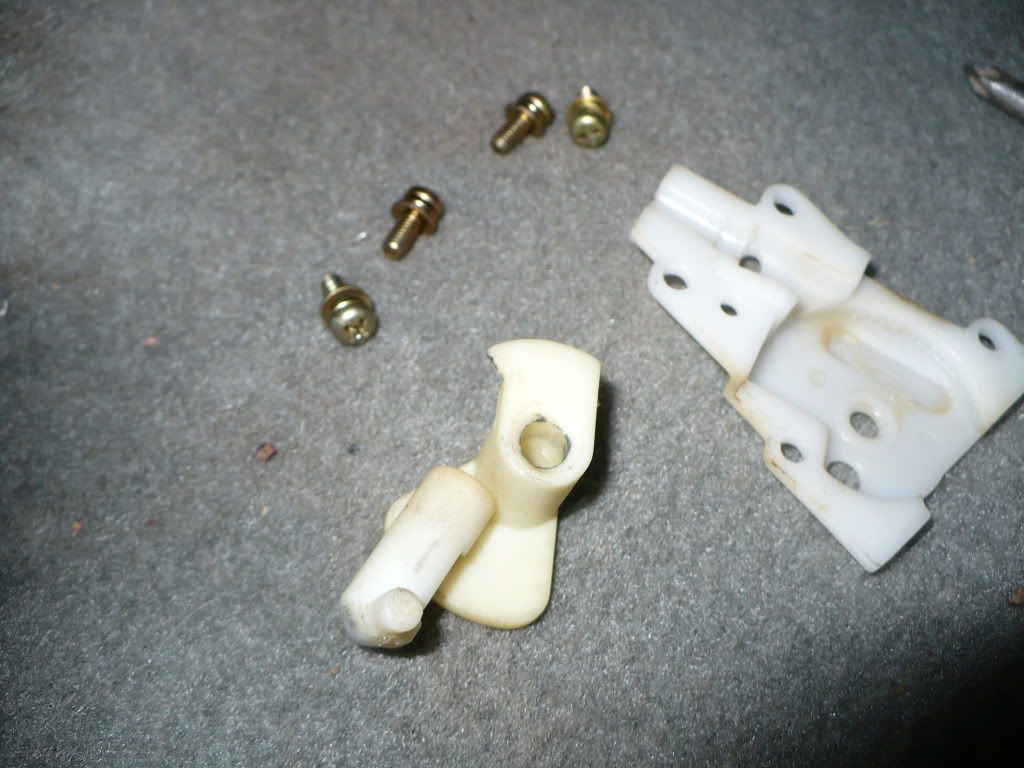
4. I left the ignition-auto trans and the brake-auto trans shifter interlock cables in place (not that I'd ever swap back to an auto). I undid the four screws under the ignition switch and removed the two plastic piece under the cover that prevents you from turning the key unless the car is in park. I then reinstalled the cover and cable. Now I can turn the key anytime without worrying about the ignition-trans interlock cable. The brake-auto trans shifter interlock cables can be ignored once the auto trans shifter is removed. I folded back under the ash tray to get them out of the way. This picture shows the two plastci pieces I removed and the cover and four screws that hold it in place.
5. I was able to remove the auto shift cables and install the manual shift cables without too much trouble by unplugging the ECU connector plugs. That gave me enough room to slide the shift cables by.
6. With the car's front end jacked up so you can remove/install the trans and the engine sits without the various engine/trans mounts in place, the engine tends so shift towards the firewall. This makes it hard to align/install the trans. Try slipping a jack between the engine and the cross member (that protects the rack and pinion) and pushing the engine towards the radiator. This made a huge difference in getting the trans back in place.
7. When drilling out the openings for the clutch master cylinder through the fire wall I was able to use an angle drill and make the holes (picture of angle drill in item 2 above). I drilled several smaller hole for the large middle hole and then used a dremel to finish it off. The lower of the three holes for the clutch master cylinder is the approximate size of the indent on the fire wall. This is true for the middle indent too (indent same size as the hole needs to be). The indent for the highest hole is much bigger than what is needed. I used the gasket as a template to mark where the hole needs to be and its size.
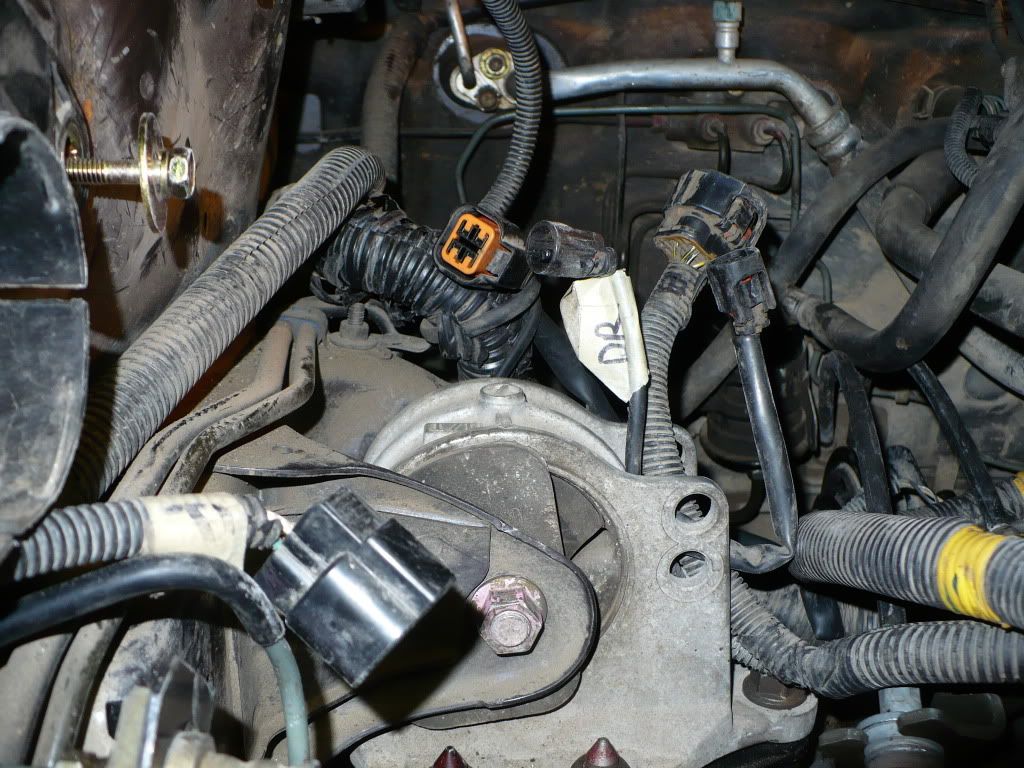
8. I am still hooking things up but it looks like I will have 5 electric connectors from the auto trans that now go nowhere. Here's a picture of them. I still need to run a jumper wire between the wires of one of them so the car will start.
9. I used an OEM clutch fluid line. It was a pain getting it installed. Here is a link for a clutch fluid line between the clutch master cylinder and the clutch slave cylinder which would be much easier to install: http://www.extremepsi.com/store/prod...cat=612&page=1
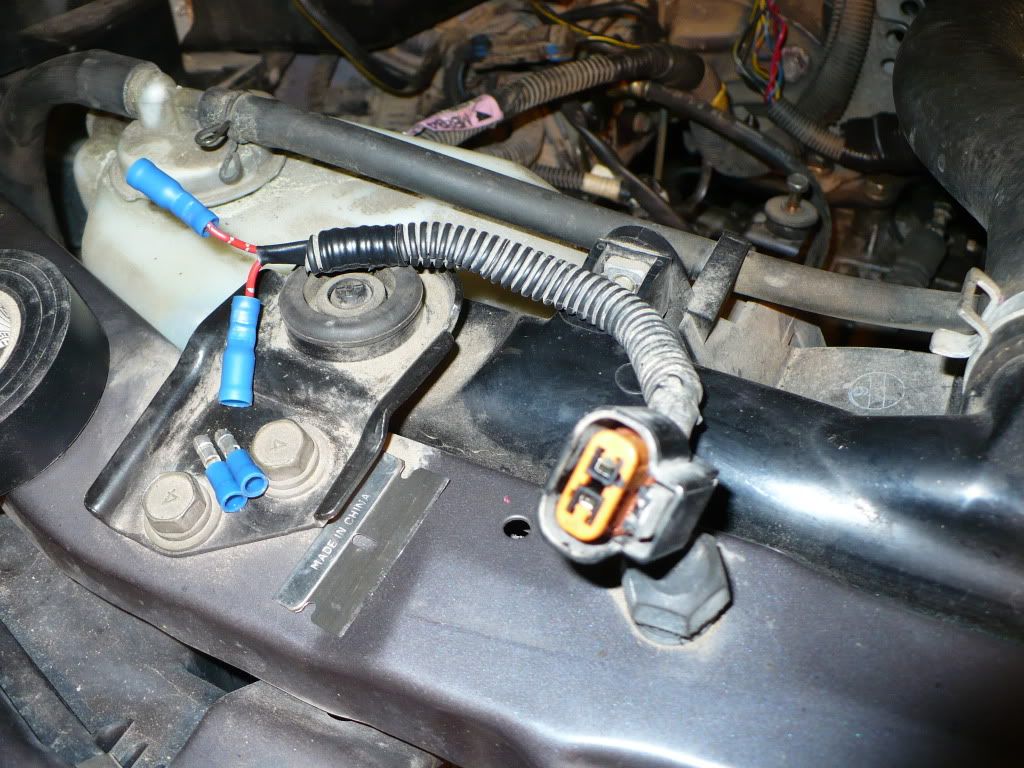
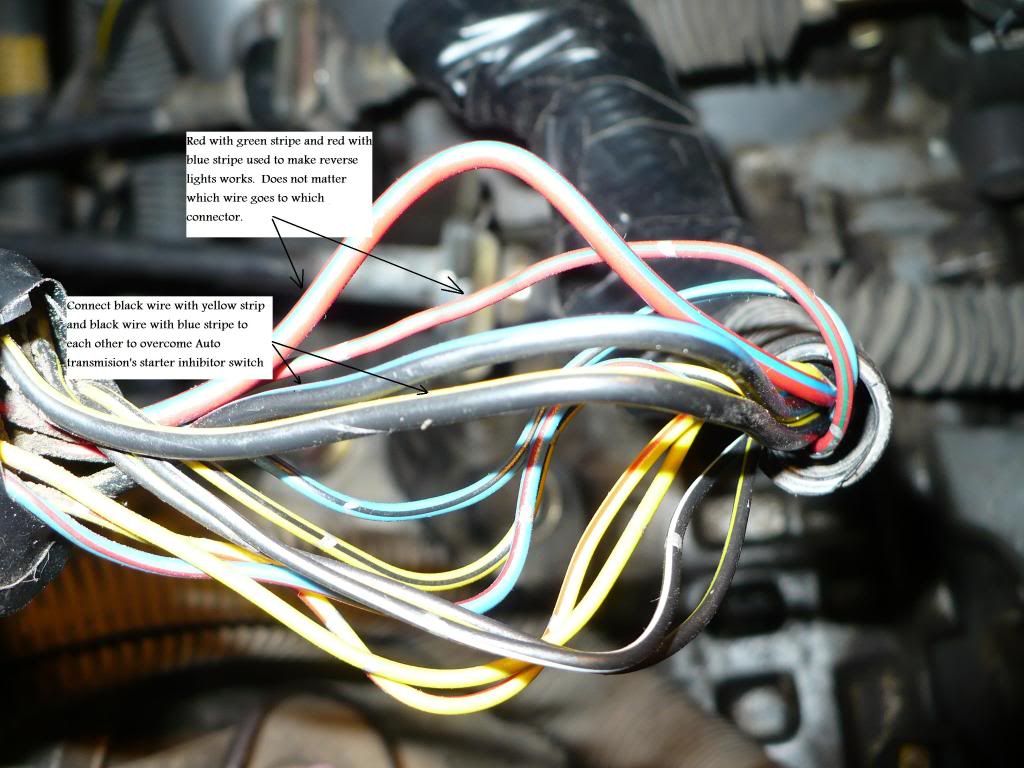
10. To make the reverse lights work I cut the plug from the old wiring harness and stuck a couple of connectors on the end of it. The wires on the manual transmission plug were red with silver bands and red with blue strip and silver bands
I then cut the red with blue strip and red with green stripe wires from the largest of the auto trans connector plugs. The two largest black wires are joined together to overcome the transmission inhibitor switch (keeps you from starting the car in anything but park). One black wire had a yellow stripe on it and the other had a blue stripe on it.
12. The motor-manual transmission backing plate has the number 962 imprinted on it. The motor-auto trans backing plate has 356 G1-561 imprinted on it.
13. The rear manual transmission mount has the number 780 imprinted on it. The rear auto transmission mount has the number 772 imprinted on it.
14. Familiarize yourself with how to adjust the clutch master cylinder rod and be sure to loosen the lock nut on the clutch master cylinder rod before installing it as the odds are you will have to adjust it once everything is in place. There is not a lot of room to see and move wrenches once the clutch master cylinder is installed so if you loosen the rod adjustment nut before installing it, you will be ahead of the game when it comes time to actually adjust it.
15. One axle hung up on me and after a couple of days (yes days) of trying everything I could think of, I took two flat bladed screw drivers and slid them (one on each side of the axle) in until they would not go in any more, I then tapped the ends of the screw drivers evenly to increase the prying pressure on the axle until it finally popped out. Once the axle is able to slide free of the trans grasp the thick part of the axle by the trans and slide it out. You don't want to just pull on the axle shaft as the CV joint can come apart. One caution: doing this could tear the seal on the transmission output seal (opening for the axle) or in a worse case even damage the transmission case. I got lucky and it appears I did no damage of any kind. It was one of those "I am so fed up right now I don't care what happens, I just got to get that damn axle out of there" moments.
16. There is a youtube video MKO mentioned in the past (http://www.youtube.com/watch?v=vYJxQyjIhUw) that discusses adjusting the clutch. You won't believe the difference that just a few turns of the clutch master cylinder rod makes. With 6 turns of the clutch rod I went from having a slipping clutch/no clutch situation to having a fully working clutch.
I'll add more as I review my notes and pictures from the swap.
Last edited by eksz; 07-24-2011 at 12:17 AM
jjj
98 ES (5 spd), 94 GS (5 spd), 94 ES (rebuilt auto), 92 Toyota 4X4, 81 KZ550 A2, 67 Mercedes 250S, 58 Mercedes 190SL


Good info! Did you have fun getting the spacer off the crank?
In a pinch you can simply cut a portion of the brake pedal and it clears just fine.
I was dreading removing the spacer from the crank but it almost fell out in my hand once I had the trans out of the way. I was planning on using the wet paper trick to remove it (alternating packing the center hole with wet paper and them pounding on it to force the paper aginst the bearing and pop the bearing out of the crank.
I considered cutting the brake pedal but being I had the all the parts, decided to use the real thing rather than modifying the auto trans stuff.
Last edited by eksz; 07-23-2011 at 10:21 AM
jjj
98 ES (5 spd), 94 GS (5 spd), 94 ES (rebuilt auto), 92 Toyota 4X4, 81 KZ550 A2, 67 Mercedes 250S, 58 Mercedes 190SL
Well I think I have summed up all the lessons learned from the 5 Spd swap for now. BTW, 5 Spd swap complete, car up and running (I still need to adjust the clutch). Locknut on clutch master cylinder adjustment rod is giving me fits which explains suggestion 14. Without Peanotions tutorial and assistance from members of the forum I don't think I'd have tried doing this. Thanks for the assist, could not have done it without your help.
jjj
98 ES (5 spd), 94 GS (5 spd), 94 ES (rebuilt auto), 92 Toyota 4X4, 81 KZ550 A2, 67 Mercedes 250S, 58 Mercedes 190SL
 Posting Rules
Bookmarks