The Galant Center - Powered by vBulletin

Thread: HOW TO: Custom Double DIN Bezel (PICTURE GUIDE)

Page 1 of 2 12 LastLast
Showing results 1 to 20 of 25
  1. #1

    HOW TO: Custom Double DIN Bezel (PICTURE GUIDE)

    Ok, since the server i had the pictures on, crashed, burned, and will never come back, i dug up some pictures i had left.

    Here it goes,

    First off cut the middle part that separates top and bottom slot.


    I used the plumbers putty to mold the screen, cause it's easier to work with rather than fiberglass,


    Take apart your touchscreen, in this case i used 8" ordered it here http://www.chinavasion.com/product_i...-hdmi-car-kit/

    Then take the face trim from the screen and then by shaving the bezel little by little test fit the faceplate make sure it sits tight, and start molding the putty to make it hold.

    the putty hardens really hard. the easiest way to do it, is to cut is by small piece, mix it, apply and then with wet hands shape it to the best of your ability before it becomes rock hard. (dont worry how it looks now, you'll sand the excess off later)

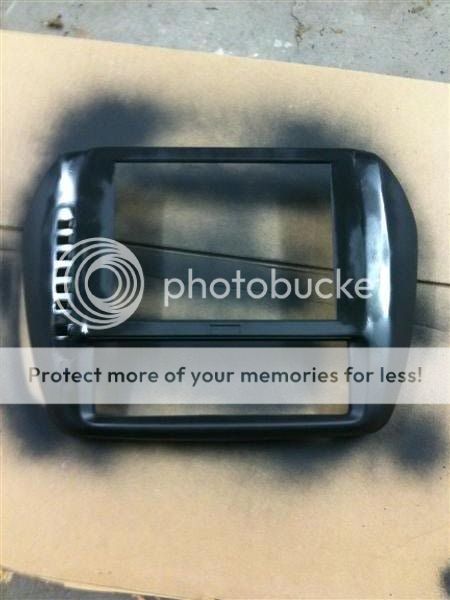
    this is what you'll end up with


    When you completely secure he faceplate to the bezel, sand, sand and sand. start off with the roughest grid, and work your way to polishing.

    once you have it all smooth the way you want it. clean it off, don't be afraid to use water, that plumbers putty is waterproof.

    prime and paint, i also molded the screen buttons


    if you have any questions pm me or post them here

    Thanks all.
    Last edited by djakay; 01-17-2011 at 02:37 PM


    - If you've got nothing nice to say, what the hell is wrong with you!?!

  2. #2
    Experienced TGC Member rez887's Avatar
    Join Date
    06-10-2005
    Location
    Dallas
    Posts
    1,236
    Nice tutorial, but I don't like to have double din in 8g, because the screen is located at the very low height and is hard to watch it, I like those folding screen for several reasons:
    Easier to watch (both map and DVD)
    Safer (removeable face plate)
    Looks much cleaner and better (radio bezel does not look clean in most double din project)
    Last edited by rez887; 12-12-2008 at 01:31 AM

  3. #3
    You are here entirely tooo much!! Jeffylou87's Avatar
    Join Date
    01-19-2007
    Location
    Lyndhurst, NJ
    Posts
    3,473
    Very nice tutorial.. When did you do this?

  4. #4
    Quote Originally Posted by Jeffylou87 View Post
    Very nice tutorial.. When did you do this?
    Thanks, I did this today.


    - If you've got nothing nice to say, what the hell is wrong with you!?!

  5. #5
    nice work but if your double din comes with a bezel then you should mold that to the radio bezel so you wont have any empty space around it
    '00 Mitsubishi Galant ES 4g64T (Samantha)
    '01 Mitsubishi Galant ES 4g64 (Daily)
    '02 Mitsubishi Galant ES 4g64 (SCRAPPED)
    '00 Mitsubishi Galant ES 4g64 (SCRAPPED)
    '91 Volvo 740 Turbo B230FT (SOLD)
    '88 Mitsubishi Mighty Max (SOLD)
    '91 Kawasaki ZX7 (SOLD)
    '95 Kawasaki ZX9R

  6. #6
    Senior TGC Member ricky_db's Avatar
    Join Date
    03-12-2007
    Location
    Dallas TEXAS
    Posts
    2,041
    looks good and i agree w/ ^

  7. #7


    i hope that you didn't hack up that cf twist factory bezel cuz if you did, you screwed up royally.

    with the ones with the factory cf twist, step1 would be trade factory bezel for a woodgrain/black one + cash here on tgc.

    Webhosting for less than $3 a month? put "pinoyesv6" as a promo code.

  8. #8
    You are here entirely tooo much!! 99 galant's Avatar
    Join Date
    07-19-2007
    Location
    Connecticut
    Posts
    3,994
    x2 i was just too lazy to say it before lol

  9. #9
    Quote Originally Posted by pinoyesv6 View Post


    i hope that you didn't hack up that cf twist factory bezel cuz if you did, you screwed up royally.

    with the ones with the factory cf twist, step1 would be trade factory bezel for a woodgrain/black one + cash here on tgc.
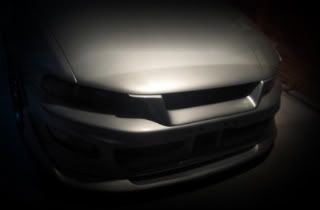
    just a random picture.


    - If you've got nothing nice to say, what the hell is wrong with you!?!

  10. #10
    You are here entirely tooo much!! 99 galant's Avatar
    Join Date
    07-19-2007
    Location
    Connecticut
    Posts
    3,994
    good because many members would be pissed at you who were looking for that piece. really nice work tho man. I havnt worked with FG but i do like CF

  11. #11
    I have the CF trim, what is the big deal? Lol

    Djakay, great tutorial, something to look forward too. Looks pretty good, but (and no offense) looks like it could use a little more finishing work on the part around the radio. More sanding and smoothing, and maybe even a nice trim ring around the radio also. Otherwise like I said, great tutorial.

  12. #12
    Quote Originally Posted by RedGalant2k1 View Post
    Djakay, great tutorial, something to look forward too. Looks pretty good, but (and no offense) looks like it could use a little more finishing work on the part around the radio. More sanding and smoothing, and maybe even a nice trim ring around the radio also. Otherwise like I said, great tutorial.

    Thanks, Yes you're right about the finishing work, i actually will be adding the trim piece around to make it flush. will update once i have it on.


    - If you've got nothing nice to say, what the hell is wrong with you!?!

  13. #13
    Quote Originally Posted by djakay View Post
    Thanks, Yes you're right about the finishing work, i actually will be adding the trim piece around to make it flush. will update once i have it on.
    I figured you planned it...lol. Can't wait to see it all finished up and working!

  14. #14
    Looks good for a day project. I know you will go back and get it perfect but it looks damn good to have just done it in a day.

  15. #15
    You are here entirely tooo much!! SkylineG1's Avatar
    Join Date
    02-28-2005
    Location
    Metropolis
    Posts
    3,540
    Good tutorial. Will be trying this soon.

  16. #16
    TGC Regular Boosted's Avatar
    Join Date
    12-03-2008
    Location
    Fayetteville, NC
    Posts
    575
    Nice tutorial. Good work too. Want to do something with CF with my bezel. Just don't want it to look tacky.

  17. #17
    Experienced TGC Member Galante's Avatar
    Join Date
    05-01-2008
    Location
    Manitoba
    Posts
    1,589
    Nice work!
    "Mitsubishi Galant(e) for Life"

    Tuned 2013 Evolution X GSR PB

    -> Follow me on IG @blackblurr_x | 5-Speed | Check out my Build Here

  18. #18
    good job looks good
    Quote Originally Posted by jubeiaire View Post
    i know a guy that saw a guy that knew a guy that once passed by a car that had been painted. Ill ask him tomorrow after consulting my magic ball to determine WHERE YOU LIVE in proximity to a paint shop NEAR WHERE YOU LIVE..................

  19. #19
    Experienced TGC Member
    Join Date
    07-13-2005
    Location
    * Upstate NY *
    Posts
    1,289
    Noiiiice tutorial! I shouldve looked for this earlier!

  20. #20
    You are here entirely tooo much!! IVORY_G's Avatar
    Join Date
    07-12-2007
    Location
    SoCal
    Posts
    4,632
    Great Tutorial, very detailed and well thought out. Ive seen others that skip alot of steps with minimal pix in there tutorial, or the whole layout looks like an essay.
    This is what a tutorial should look like, Good job :)
    JDM Zenki Conversion

    Lazy hands make for poverty, but diligent hands bring wealth. (Proverbs 10:4 NIV)

Page 1 of 2 12 LastLast

Tags for this Thread

Posting Rules

  • You may not post new threads
  • You may not post replies
  • You may not post attachments
  • You may not edit your posts
  •