 Log in
 Register

 Reply With Quote
Nice go see someone else.getting some track time! Curious where do you have your water temp sender installed?


Man that's awesome! All that racing and a torn axle boot? Sounds like a good strong build to me bro!
-Greg
"I smashed up the grey one, bought me a red;
Every time we hit the parking lot we turn heads!"
-Pimp C, "International Players Anthem"

Nice go see someone else.getting some track time! Curious where do you have your water temp sender installed?
OZ Rally Crew #001, Quaife Club member :D


This thing looks killer on the track. Gotta love purpose built cars being driven hard!
'99 5-Speed GTZ: Forged 3.6L 6G74T 6764 E85
2017: 552whp/562wtq SBE on 19psi'02 Eclipse GT: 6G72 M/T-swapped Daily Driver'10 Endeavor: 6G75 AWD Family-mobile

thanks everybody, I replaced the axle today and boy is it a tight fit. I tried to pop it out to see if I can and I gave up after 10-15 minutes lol. hope I don't have to pull it foreal anytime soon.
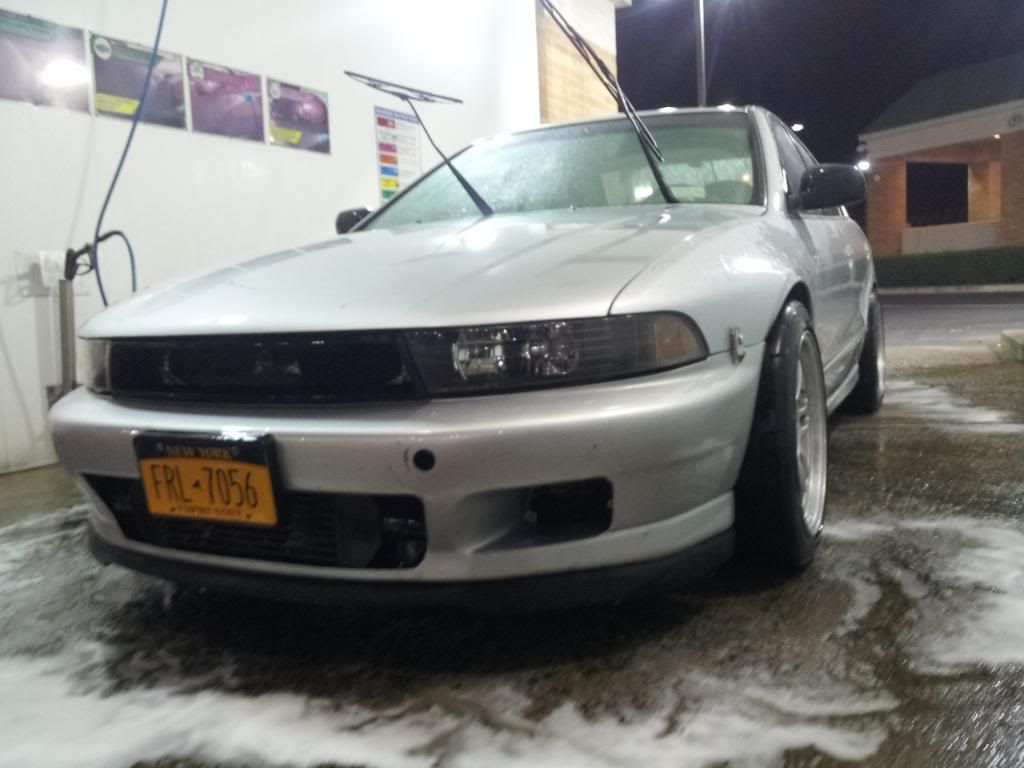
for the water temp sender I had a bung welded on the thermostat housing. you probably see it in the pics on the first couple of pages of the thread.
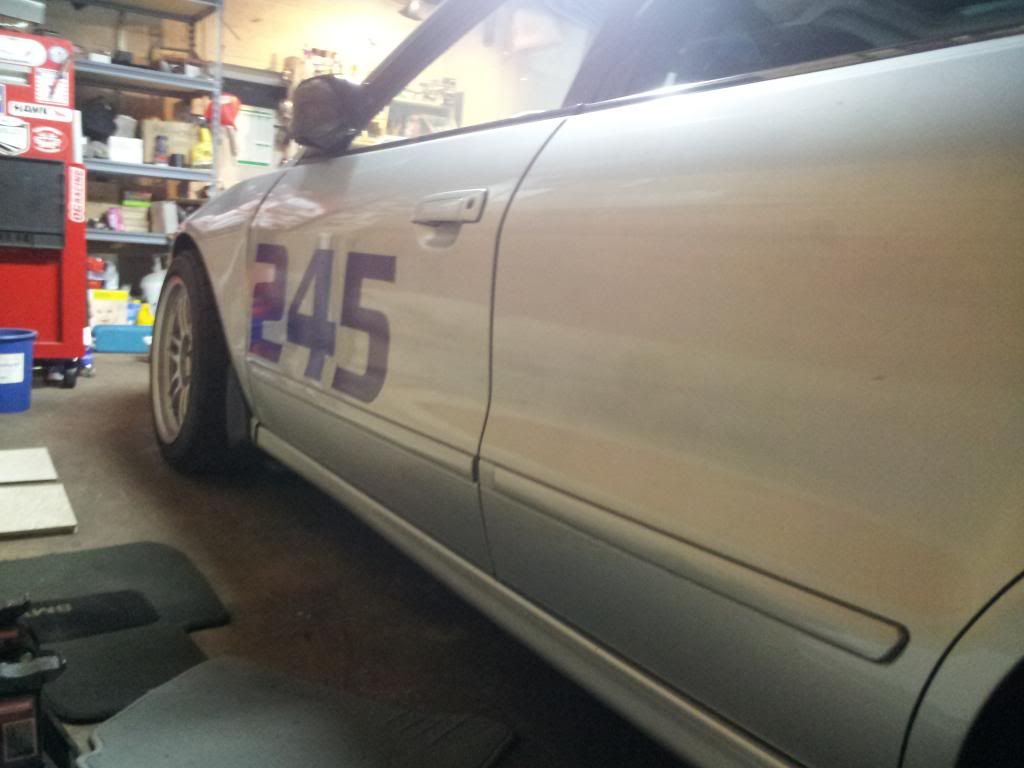
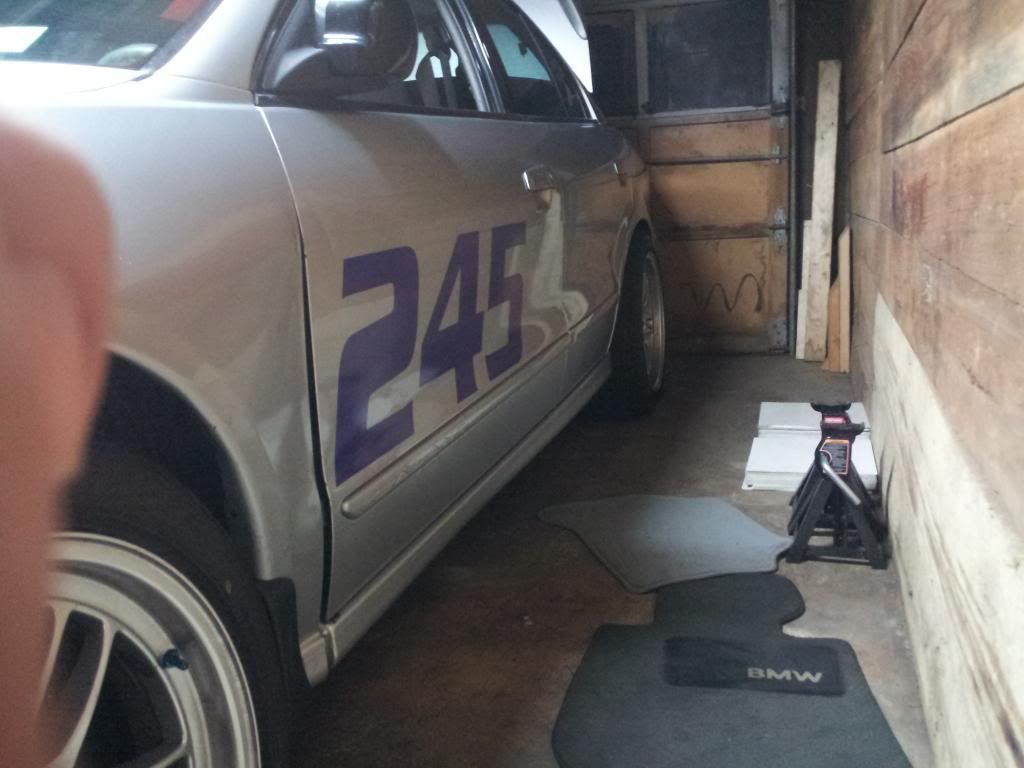
A few new things starting with an Accord lip that ive been wanting for so long, raised the car a 1/2'' to see if it would stop rubbing before I start cutting fenders. Washed it finally so I can put on some permanent vinyl numbers and found out real quick I suck at putting on vinyl. Luckily you cant see it from far but theres some wrinkles and bubbles. I had to poke super tiny holes to release the air.
Summit Point in two weekends,, I cant wait!!!
Last edited by xd_01; 08-06-2013 at 11:32 PM
I've always wanted that lip, where did you get it? What's years?
Originally Posted by IVORY_G


I'll let him answer for sure but if you wanna take a look on your own in the mean time, I think its 94-95..iirc 96-97 had a slimmer lip
Last edited by 8thLS6; 08-07-2013 at 02:58 AM
yea its a 94' Accord LX model, got it from here #10
http://www.hondapartsonline.net/part...iagram=4424010
Last edited by xd_01; 08-07-2013 at 07:40 AM
Car looks terrific get some in car footage. May I suggest getting a seat and steering wheel. Makes driving 10x better. Also what is your current cooling system setup if you don't mind me asking.
OZ Rally Crew #001, Quaife Club member :D
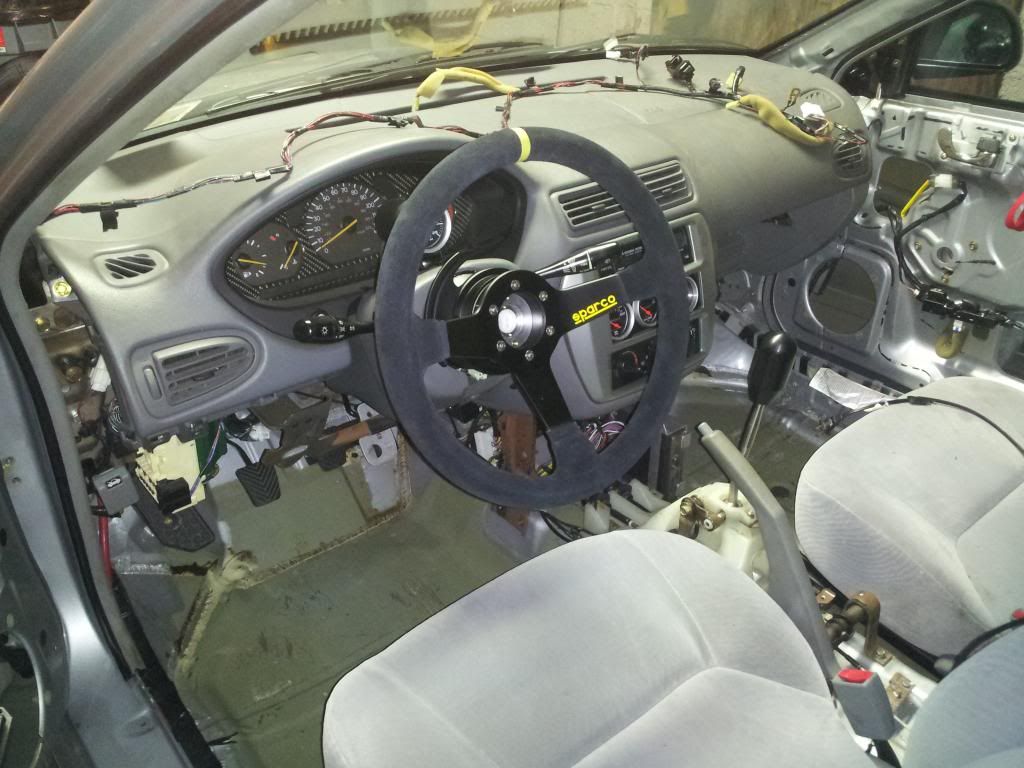
for the cooling systems I have an evo 5 Mishimoto radiator with one 12'' slim fan on the driver side on the engine bay side. I also got a Sparco wheel that's been sitting around for a year that Im gonna install this month and a pair of brand new but expired Sparco Evo's that have been sitting around for over a year also that Im gonna have installed with the cage this winter.
No ducting of any sort? I'm assuming you don't have an ac condensor
OZ Rally Crew #001, Quaife Club member :D
na no ducting yet and definetly no ac condenser. Im also running anti-freeze because I was to busy to switch over to de-stilled water this spring so Im sure that makes a difference. So far my temps have been ok but Im sure as I get faster Ill have some issues. Ducting is definitely on my mind for the future, also im working on the video.
here's a vid from Pocono South/East course. running behind a g35 coupe but eventually he gets tired of me and points me by https://vimeo.com/home/myvideos
Link doesn't work?
-Greg
"I smashed up the grey one, bought me a red;
Every time we hit the parking lot we turn heads!"
-Pimp C, "International Players Anthem"
try this one
how would show the actual image in the post

looks like fun!
Nice warms my heart to see people using their cars :D kudos sir
OZ Rally Crew #001, Quaife Club member :D
Thanks hopefully ill have more after next weekend
So I had a lot of fun this past weekend at Summit Point, the car did good with the new axle but the grease inside the boot is squeezing out past the clamp a little and theres what looks like gear oil coating the driver side of the tranny. I don't see any cracks or possible leaks from where the two halfs mate so Im hoping its just an axle seal. The water temps stayed under 220 so Im happy about that, locked up the wheels in a brake zone so now I got a nice flat spot on my front right that I rotated to the rear and that's pretty much it.
Saturdays weather was sunny and warm but sundays was raining on and off and this was also my first time driving in the rain so I was pretty nervous especialy after seeing a few cars come back on flat beds after going off track into tire walls. After my first wet session I realized how helpful the rain really is, it really lets you see just exactly what your grip limits. My instructor was having me do a couple of exercises like sawing the wheel back and forth while in a tight turn basically breaking grip then correcting and repeating through whole turn, same with throttle. Doing those exercises really builds your self confindence in wet or dry driving.
Saturdays video:
Sundays video:
So in other news I finally went ahead and made my appointment for the cage install in mid November after the last track weekend for the 2013 season. I was waiting to see if I was really gonna stick with this platform after this season but Im really happy with it. Its fast, handles well and random people in the paddock give me complements on it. They just don't expect it to do what it does lol. Besides if I start another project my wife will kill me! That and no ones gonna want this gutted out car if try to sell it anyway.
Last edited by xd_01; 10-30-2013 at 02:44 PM
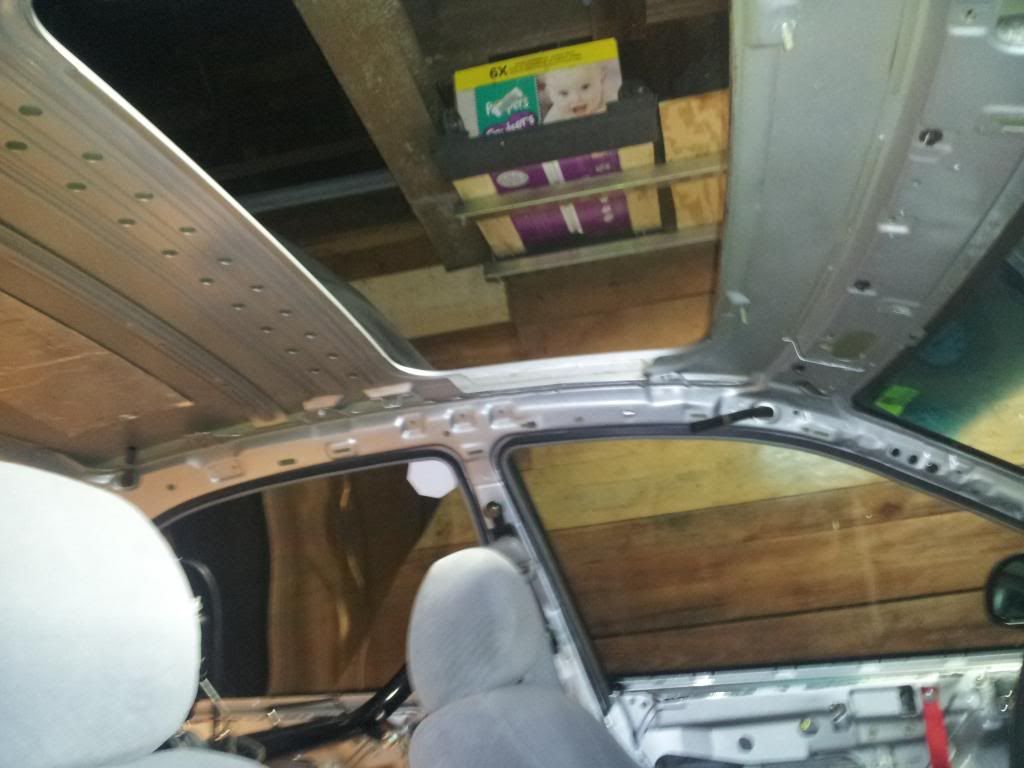
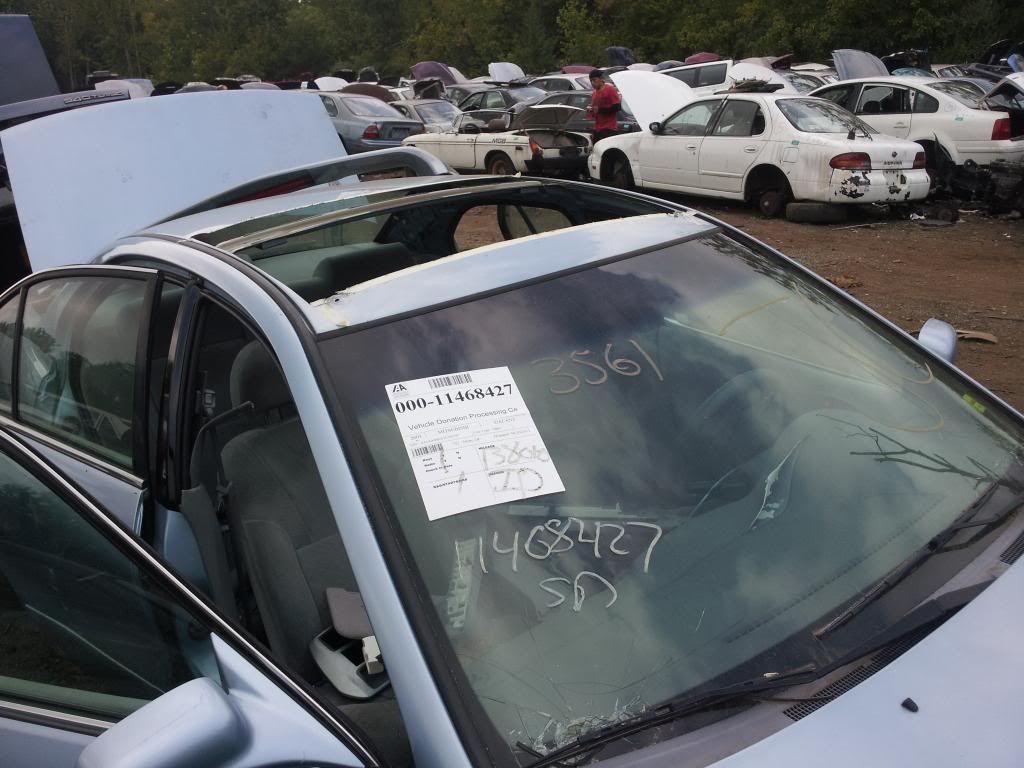
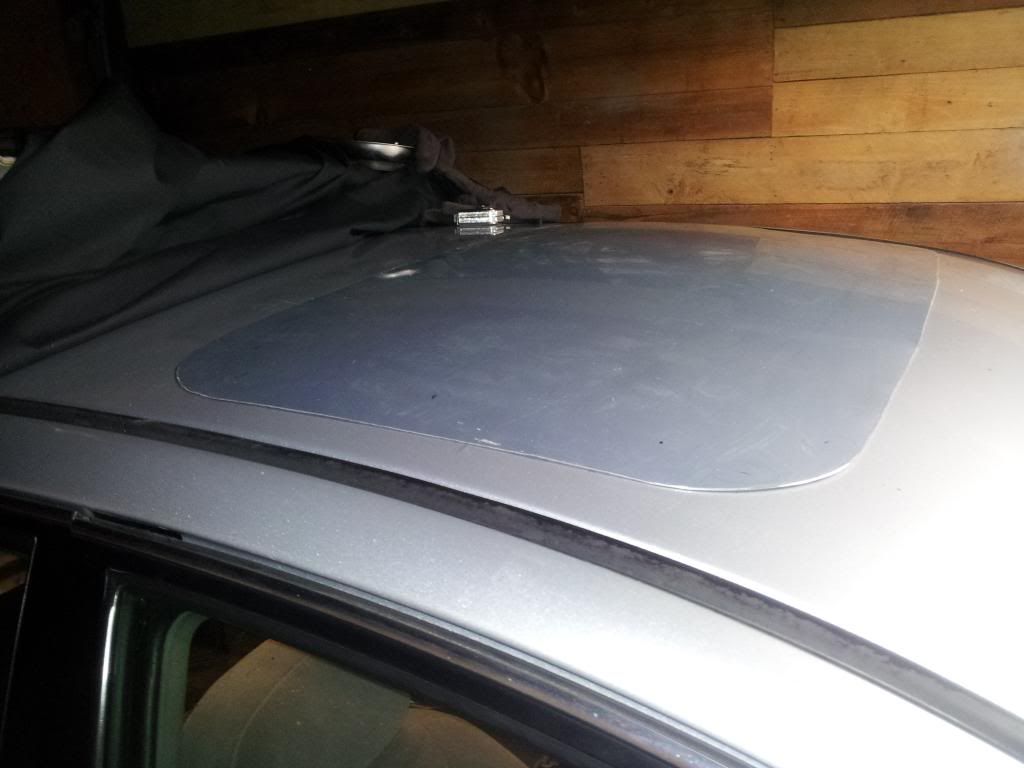
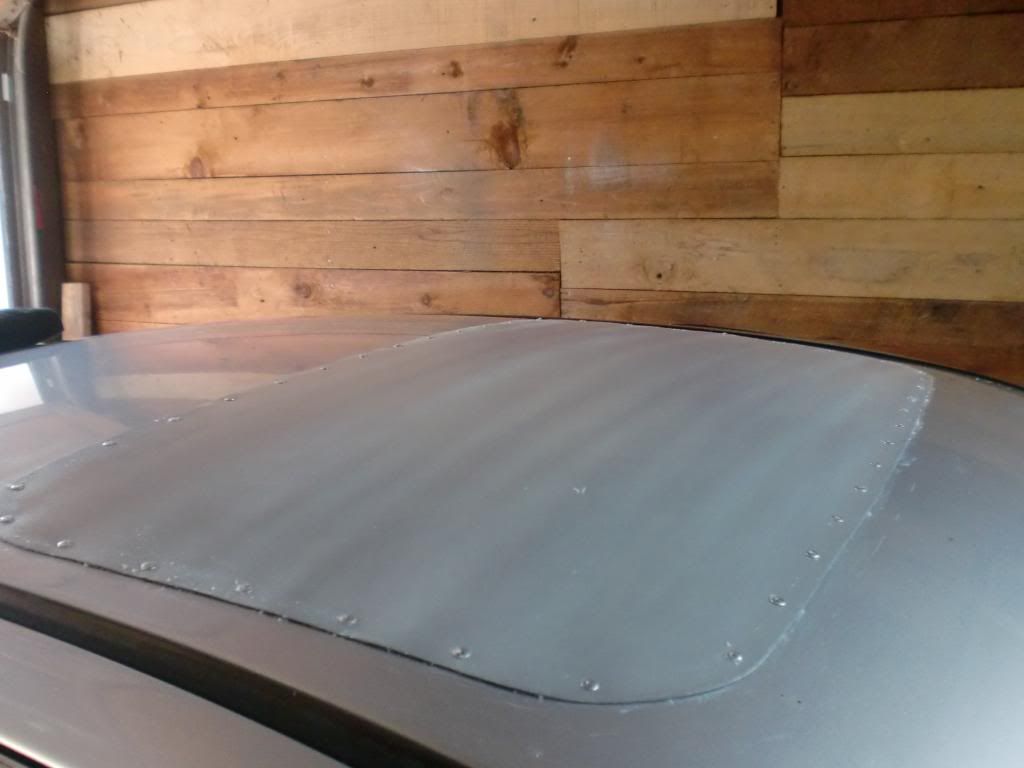
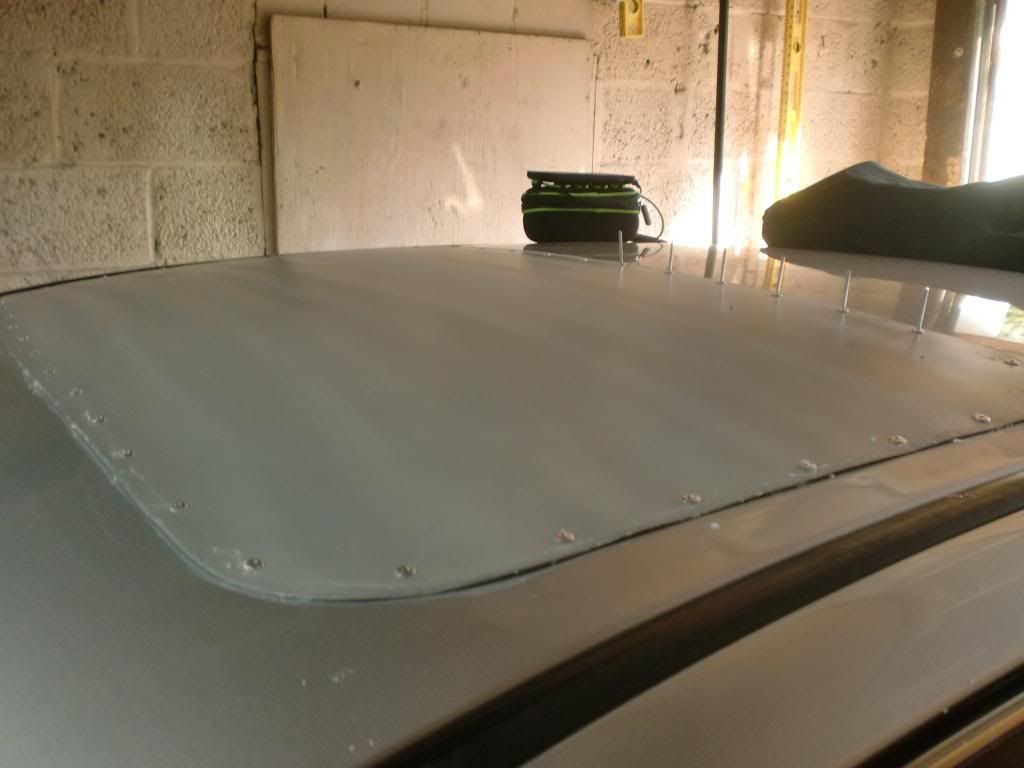
So its been over a month since the last update and its been pretty busy around here but I managed to get some work done on the Galant. I was able to delete the sunroof,
HVAC, airbags, and install a Sparco wheel Ive had sitting around for almost 2 yrs. I also started taking note of how many hours each job takes hoping I would be faster on the turn arounds for a couple of reasons, 1. I don't have much time to spare away from home and 2. Im curious to see how much money Im saving by doing it myself. Although some things Im slow on because Im learning as I go like the sunroof delete but atleast I get an idea.
Spaco wheel installed. Had a chance to try it out this past weekend at VIR and wow what a difference!
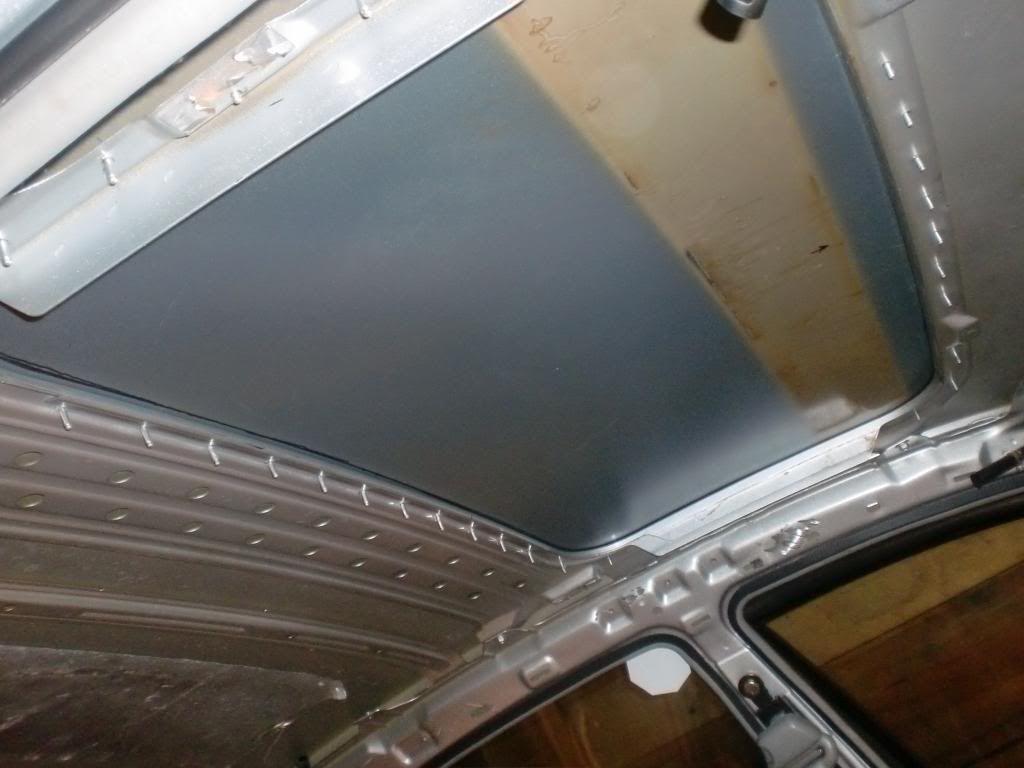
sunroof removed
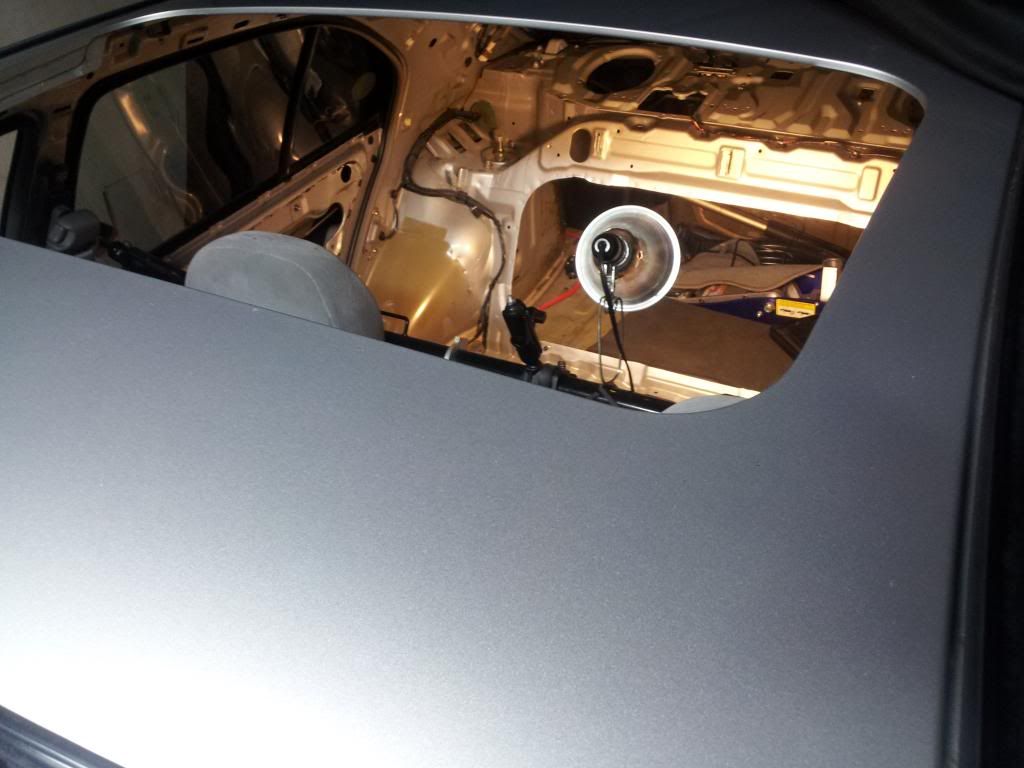

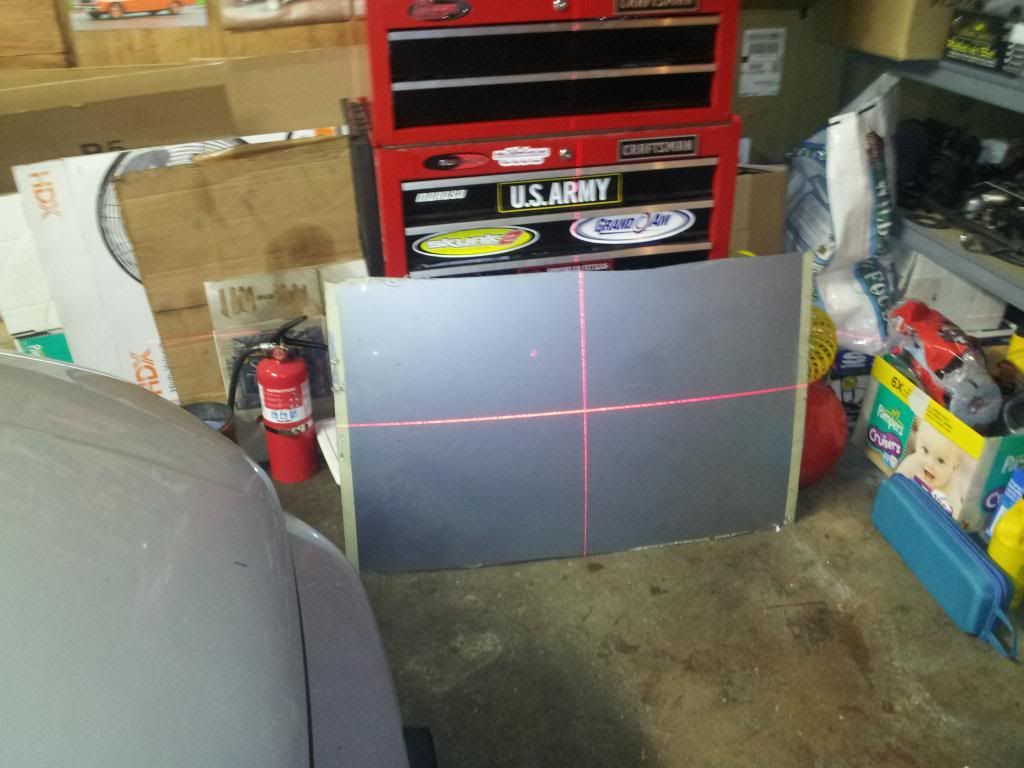
So here Im at the local pick and pull "Crazy Rays" and brought my cordless drill and sawzall with me and found a nice donor car for me to cut the roof out of. Basically I drilled 4 small holes in each corner with a holesaw so I can fit my sawzall blade in and cut a panel out.
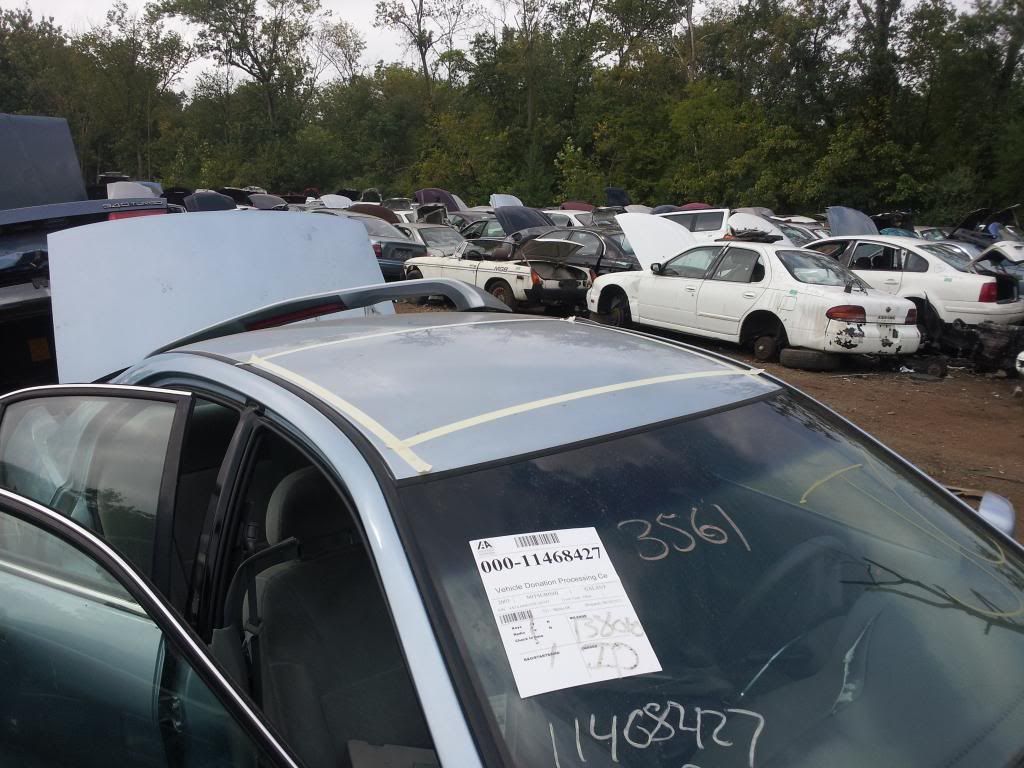
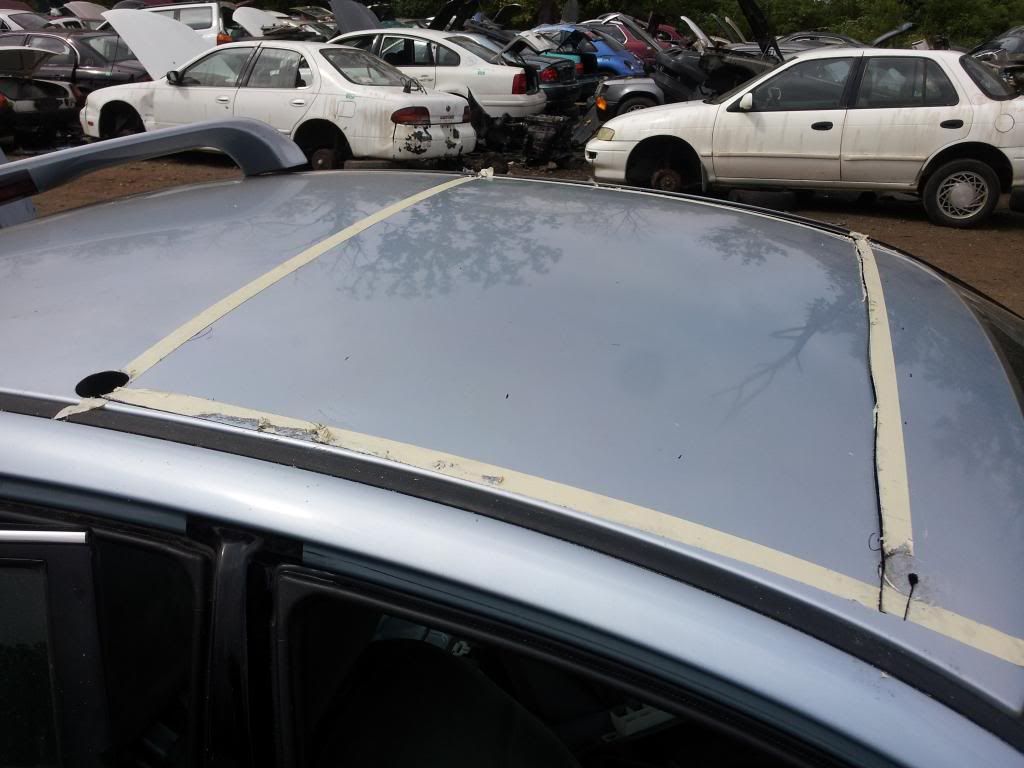
I paid $40 for this.
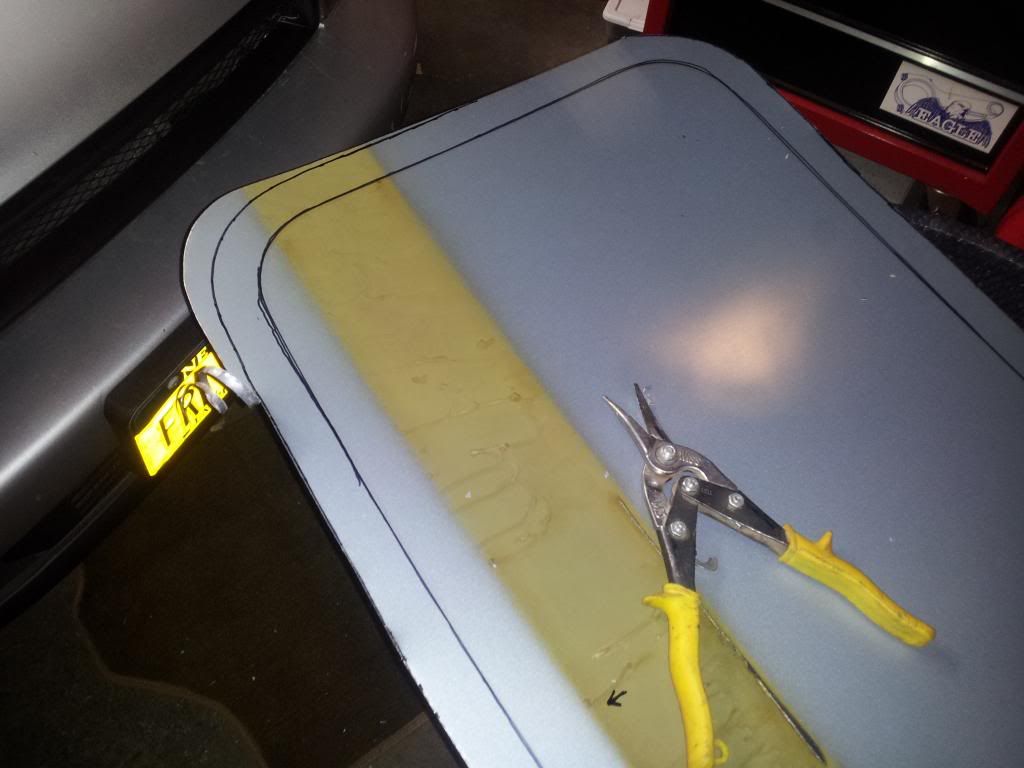
I cut out a much bigger piece then I needed so when I used the cross line laser to get a center of the panel there was plenty of room for error on the ends. The sunroof is an odd shape, its not square or even equal on the front when compared to the rear of the opening. So I took some ruff measurements and again cut out more then I needed knowing Im gonna have to trim.
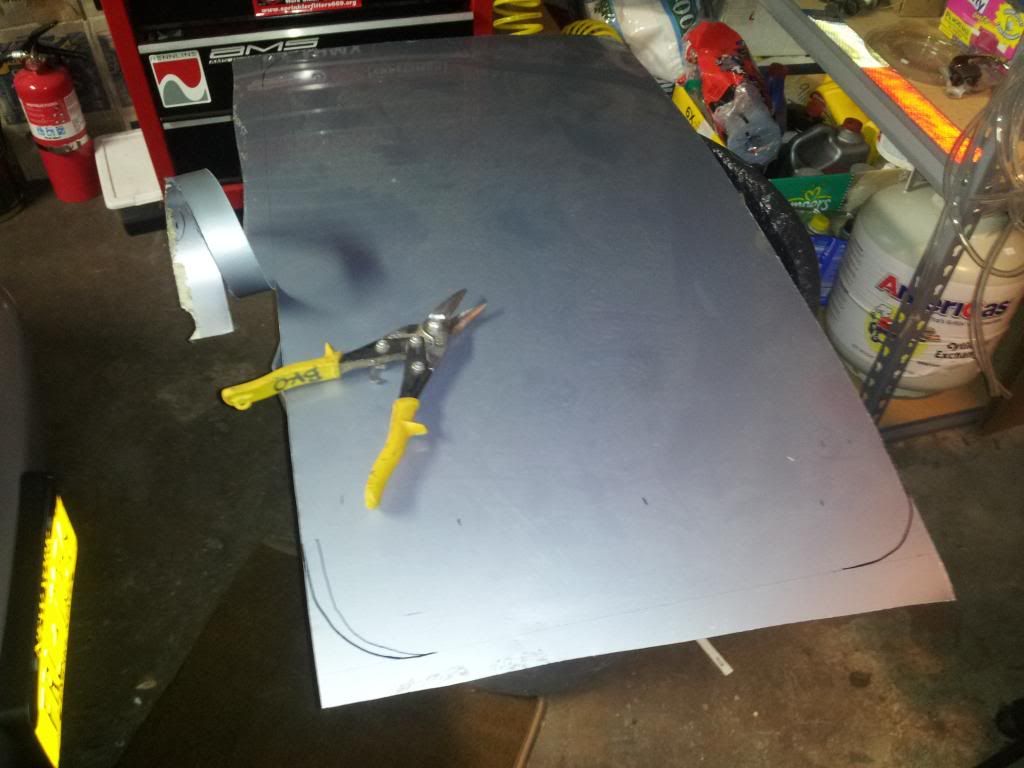
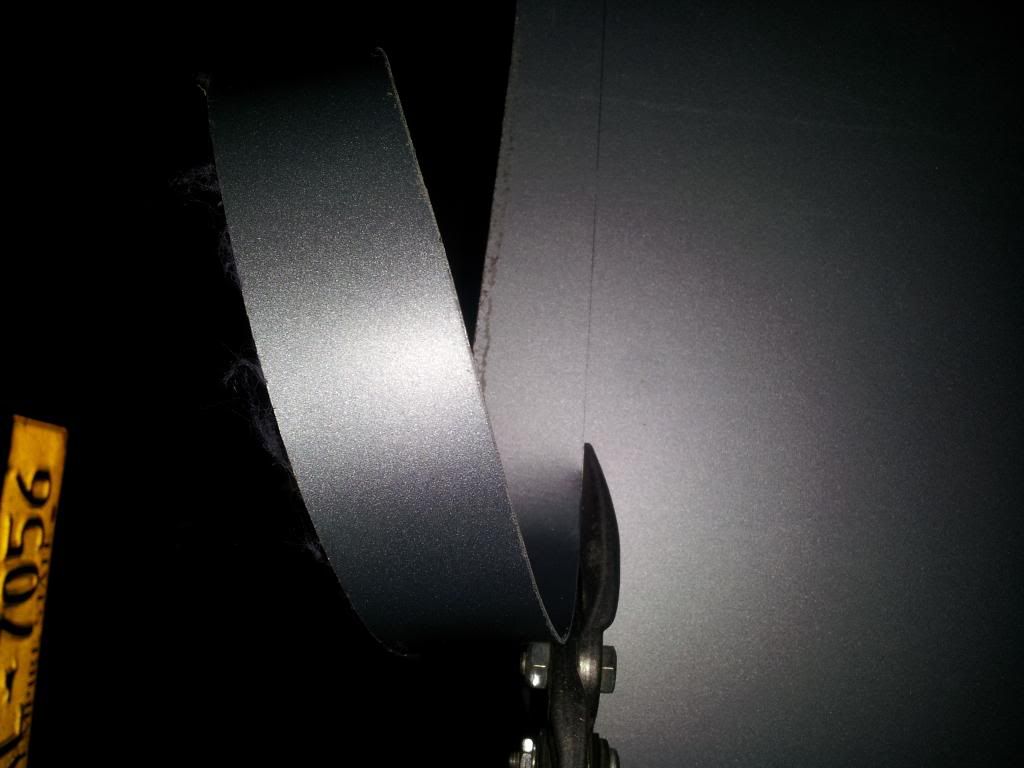
I layed it on top of the roof and traced out the opening on the bottom side of the sheet metal from inside the car. After that I measured out 1 1/4" for the overlap and began doing the final trimming.
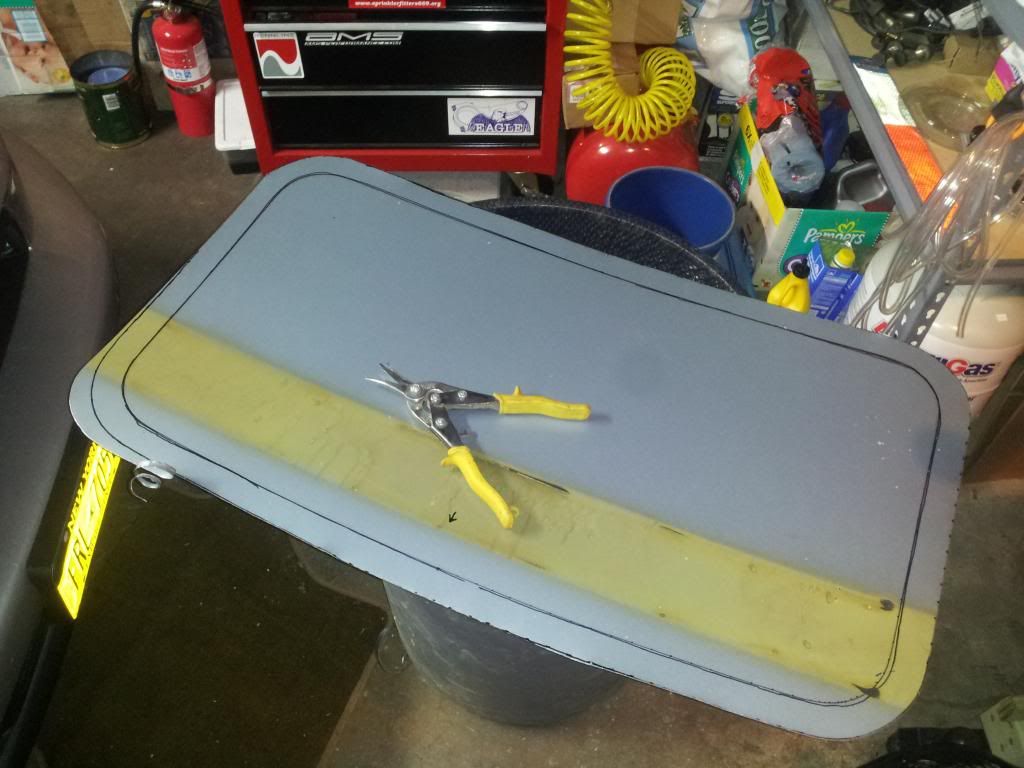
Final fit before riveting
Holes drilled.
So last step was painting, I tried to do it on the cheap with spray cans and that's were things went wrong. I got some Rusto automotive silver and some primer and cleaned the surface and came out way to bright and blotchy, so before I cleared it I took some scotchbrite to it and it looked so much better. Not perfect but I can live with it. I don't have a pic of it with the bright silver just the final product.
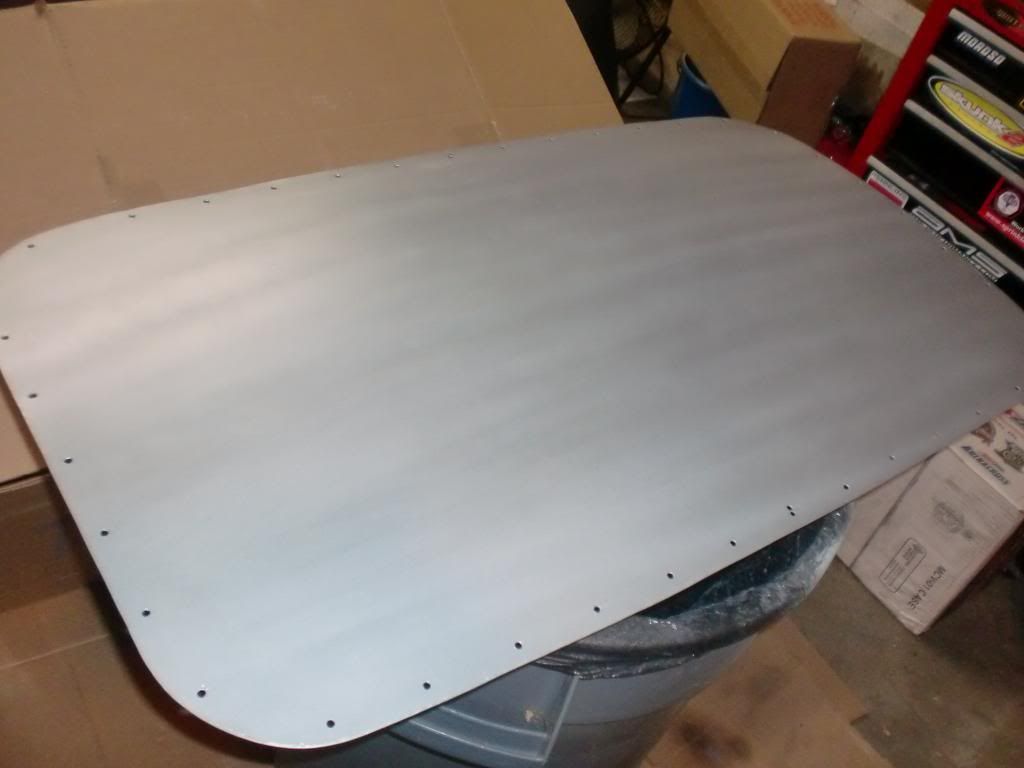
And done! I couldn't believe it but when about 80% done popping the rivets the gun gets a pin stuck in it. Now the silicone I used to seal it was starting to dry up and by the time I decided to stop trying to fix the gun the silicone was almost dry so I had a hard time cleaning up the excess. I had use a razor to scrape the rest off, as if I didn't have enough scratches on the roof already. So the silicone job looks crappy but it doesn't leak and eventually I fixed the gun and finished riveting the panel.
 Posting Rules

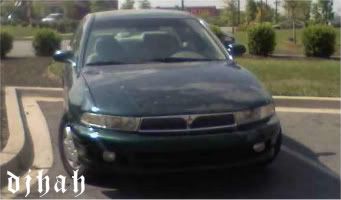
 1999 Mitsubishi Galant GTZ
 2002 Mitsubishi Eclipse GT


Bookmarks