I see what you mean, I think the 3g bar would be a tough act to follow. I was suprised at the difference it made on my car.
Driving conditions were very different today, so can't really tell yet. The 3G STB was already a good one so I don't expect a huge difference if any. (Other than from the MCS.)

I see what you mean, I think the 3g bar would be a tough act to follow. I was suprised at the difference it made on my car.
Very happy to see an 8g restored =) She is coming out very nice! I really like the wiring block you have, thanks for the idea!
I really like these sway bar links, what brand are they? I'd love to get a set =)
Lancer/EvolutionX Rotor Glow Paint
6g74 Forged Engine w/ hx40 turbo
Eclipse GT 5 spd swapped
Rotor Glow Galant
Daily Galant
OZ Edition Eclipse
A good friend of mine once put some links together similar to those, they're just custom made, lengths with swivel hardware. Where he go the stuff I have mo idea... he even uses the joints when fabbing traction braces/bars.
Sorry for the delayed reply, 4th quarter, the Holidays, and the cold pretty much stopped me doing anything to the G. The endlinks I put together myself. You can source the spherical parts and such from www.midwestcontrol.com, and I like to get my ss bolts from boltdepot.com. It's fairly easy, if you need help, I have my shopping list somewhere.
Thanks! It will not be a 72 forever however, I've been sitting on this thing enough already :) But one thing at a time.
Happy New Year to everyone!
If I find it and have a little time, I might just post a how to.


Midwest control has some fantastic joints and hardware, another one I use frequently is McMaster-Carr, they can be found at www.mcmaster.com
Looks like the biggest metric standoff thread sizes they have is M5 though. They do have them in aluminum or stainless steel.
I've been eying a very similar design for swaybar links, as I'll be making lower front control arms and upper rear arms here shortly.
RIP: Colin McRae, you will be missed.
"I shall go before thee and make the crooked places straight."
2001 ES V6 M/T under construction
1991 Volvo 244ti 300 whp daily driver
www.gooichimotorsports.com
It's nice to see someone is thinking about these kind of parts, would love to see them once they are done! I have an idea on mind for the front LCA, but it's just not on the top of the list right now.
I wrote up a how to for the endlinks, just to find out I can not post in the tutorial section. Is that for patrons only?
Last edited by gtx; 01-17-2015 at 10:10 AM
Still not having the time to pull my old engine leaves me with shopping for parts in the meantime.
Scored two more things recently.
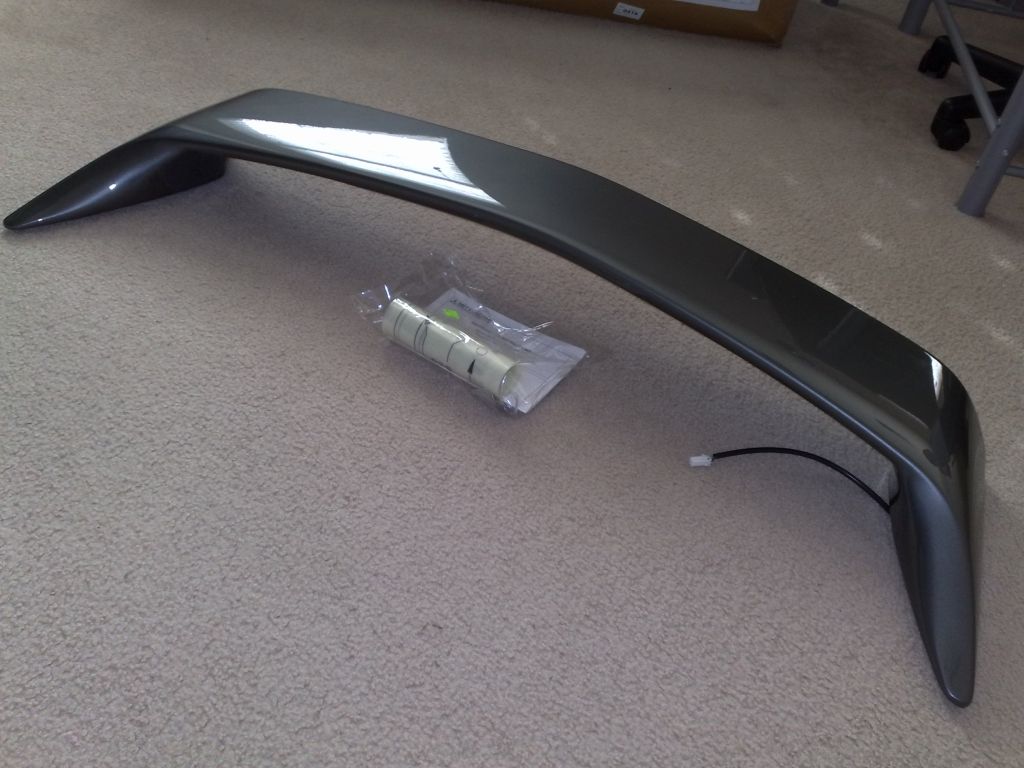
Factory spoiler: This might not seem too exciting, and I would love to have a SVR4 wing for a change, but this was too good of a find to pass it up. Brand spanking new from Mitsu with all hardware, painted to my color from the factory. It's that one option I was missing from '02, it was meant to be.

Also pulled the trigger on a pair of JDM heads in really good condition. This is how one fellow enthusiast should pack parts for an other, if you are on this board, Thank You!
Need tires next. Turns out the car sitting for a year without moving was not good for them...

That was pretty good packing. I know how you feel about finding a deal on brand new oem parts. Like how I felt when I scored a deal on a new oem lip for my old s14. The first time I scraped it, it definitely hurt on the inside. At least in your deal you don't have to paint.
One of the the Yokos started to develop a bubble and one night on the way home it finally gave in. Luckily I was one block away from home. Discont Tire Direct to the rescue - in the meantime I remembered again why I carry a fullsize spare.
Now onto the fun part. Sun's out guns out. It begins!
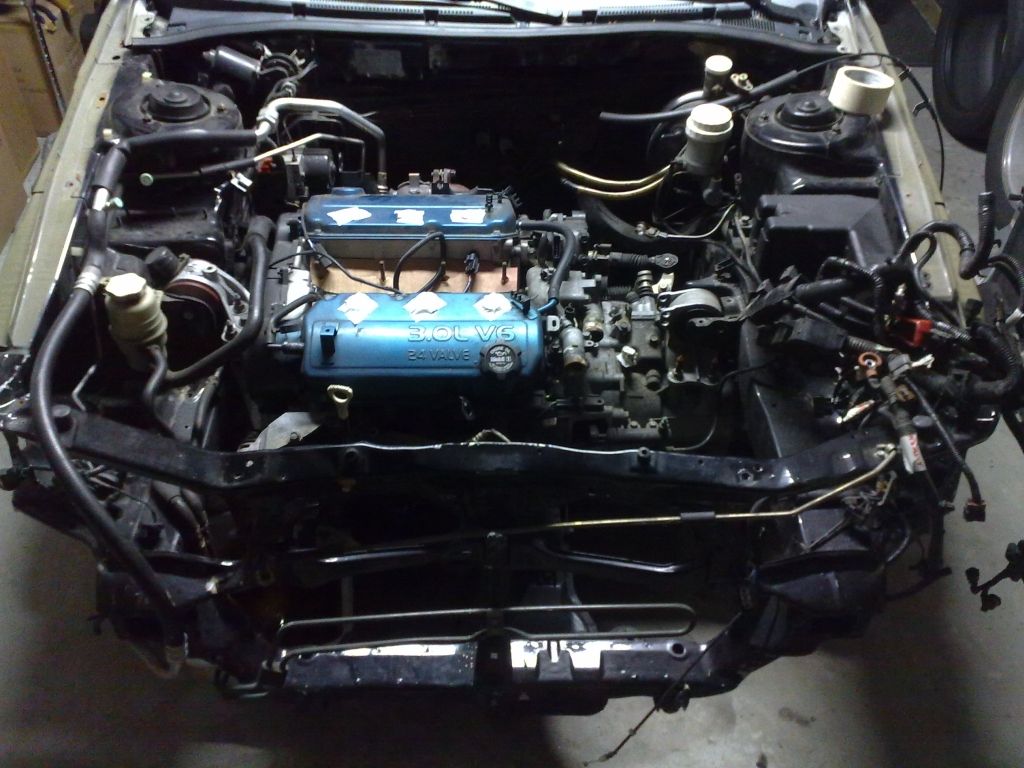
I had a short timeframe, so the goal today was to strip the engine from all wires, manifolds and fuel setup etc. I'm doing this in a one car garage, so everything begins with moving stuff around.
Good bye PWR rad, bent and cracked a weld. This was for an EVO V, so it places the upper coolant to the driver side. The lower tabs on the radsupport have been rewelded. With some adapters I fabbed up the factory driver side fan was retained but the pass side had no chance. (Heavy metal clunker anyways.) I was going to use a slim pusher, but the temp was fine so I never ended up doing it. Small detail, but the rad also clears the JDM heads perfectly. I think I'll do an EVO V setup next as well.
Diamante upper intake mani, Diamante throttle body, Accel wires pulled. The fuel setup was 440cc Bosch injectors, machined down to fit into the VR4 rails. Too bad the 3SX loop will have to go. Lower intake mani was from a 6g73 Cirrus, with this setup the injector height came out perfect, no extra spacers needed.
Just to give an idea to those still on the AT - this is how much more compact the MT is:
Disconnected the cats and muffler, than wrapped it up for today. I will need to drop the rest of the exhaust (really looking forward to it on jackstands), drain the trans and pull the axles, than it's party time.


^x2
looks like our vavle covers are close in color, mine are Jamaican Teal
15 F150 3.5 ecoboost 4x4 - daily driver
01 Galant ES V6 MT (sold)
00 Eclipse RS MT
Yeah, the first time I saw your engine bay, I was like wait a minute... :D Mine is called "Bright Aqua Metallic". I'm thinking of doing the new ones the same color. Poor guys have seen better days.

Subed! This is an amazing build thread, can't wait to see more!
2002 Mitsubishi Galant ES (SCRAPPED)
1991 Jeep Comanche (SOLD)
2002 Honda Accord EX (DAILY)
1998 Eclipse GST (PROJECT)
Bookmarks