 Log in
 Register


 Reply With Quote
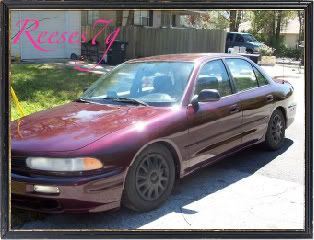
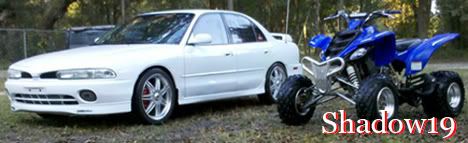
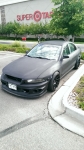 2001 Mitsubishi Galant ES
holy crap dont think my g was that high stock 0_o


Modifications:
[x] = installed
[p] = in the process of being installed
[$] = purchased, but collecting dust
[ ] = future part
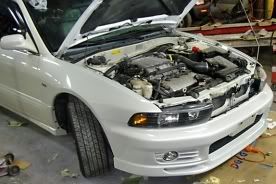
Engine: total spent: $1000+ (replaced timing belt, water pump, pulleys, etc.)
[x] 3.5L 6G74 Swap <$450 + 80 gas/tax = $530>
[x] Diamante Intake Manifold and Throttle Body
[x] 6G74 injectors
[x] Modified stock intake piping w/ K&N <$80>
[x] Braille 11.5 lb Battery <$155>
[x] Prothane Motor Mounts <$80>
Transmission: total spent $1300 +
[x] F5M51 5-speed manual transmission <$600>
[x] OEM Resurfaced Flywheel <$86>
[x] shifter assembly
[x] used shifter cables
[x] Aluminum shift knob <$23>
[x] shift boot (doesn't fit too well)
[x] SPEC stage 1 clutch kit <$327>
[x] slave cylinder (also have an extra one)
[x] master cylinder <$27>
[x] transmission mount
[x] hydraulic lines <$90>
[x] Manual Starter Locator Plate
[x] intermediate shaft <$150>
[x] clutch pedal
[x] Pennzoil Synchromesh
Exhaust: total spent $187
[x] MagnaFlow Universal Muffler - 14827 Street Series <$127 + $60 labor = $187>
Handling/Suspension: total spent $825 +
[x] Progress lowering springs <$70> (great deal from BGR)
[x] KYB-AGX shocks/struts <$400>
[x] RMR 24mm Rear Stabilizer Bar <$185>
[x] Do-it-Center rear camber "kit" (grade 10.9 bolts) <$20>
[$] COMPLX rear tie bar <$150>
[$] COMPLX front adjustable end links
[$] OEM 3G Eclipse GT Strut Tower Bar (doesn't fit with my 6G74 TB. will fit after 5 speed swap) <$50>
[x] Power Steering delete
Wheels and Tires: total spent ~$1000
[x] Candy Purple Enkei RPF1's, 17x8 +45
[x] OEM Eclipse GT wheels painted bronze <$225 + $30 in paint = $255> old
[x] Yokohama Avid W4S - 215/50/R17 <$725>
Exterior
[x] SEIBON EVO style Carbon Fiber hood <$150>
[x] 98-01 Integra Spoon Lip <$60>
[x] DDM Tuning Slim Ballast 4500K H4 hi/low kit <$50>
[$] Erebuni 384 (I think) style sideskirts <$60>
[ ] Cyber Legnum rear lip
Audio: total spent $200
[x] Kenwood Headunit and Infinity Reference speakers <$200>
All work, besides welding, has been done by me, with the help of my dad and some friends as an extra set of hands
__________________________________________________ _______________________________________
Well I finally feel like posting some pics up of my car. Its basically stock but whatever. Today I was finally able to take out the lower dash (thanks 99galant) and I got some paintin done and I think I'll be up all night finishing :D
Well here you go:
World's biggest wheel gap
Here's what my interior is like right now:
two completely different screws?? I think they ran out of the same kind when they were puttin in the glove box latch:
and I'll post more pics later!
Last edited by beam514; 06-17-2011 at 10:51 PM

holy crap dont think my g was that high stock 0_o
The "Tumbler" Is HereStock Longblock/Stock PCM | Custom Garrett 50-1 | 17 Psi | Weighing 2xxxLbs3xxWHP/3xxWTQ [Current]
yea that wheel gap really kills me :(


..... I'm hoping your working on the inside cause damn.. Its all torn up! :D Looking nice on the outside though.. Nice and clean.

Very clean,man. Lets get that dash back in. What are you doing to it by the way?
paintin it black :D

that's a big first project man. But if you have help, it shouldn't be too desasterous have fun and good luck. Bring on the new pics, i wanna see!
-Pedro
well I'm pretty much done:
I know the clear coat looks really cloudy and looks like it sucks, but it's really not that bad in person
I still have quite a ways to go on my learning curve of clearcoating though :(
The little cubby thing is back in now too
just in case anyone was curious, i used Krylon Fusion gloss black first (the store didn't carry the flat black), then some coats of normal Krylon "ultra-flat" black, then regular-gloss Krylon acrylic clear coat, and no I didn't wet sand the clear coat
I might end up removing it all again someday and respraying and reclearing. Next time I'll be able to remove everything faster too. This only took like a day for me to do I just didn't have time to post pics
now time to find something else work on 8-)

wow that looks great!! paint the vents and such too while your at it...
I think I'm trying to avoid paintin the vents cause that middle one is a pain in the ass to get out

Not really... pop out your radio and there's two clips at the bottom of the vent.Originally Posted by beam514

1997 Volvo 850 T5
hmm i may try that tomorrow thanks

the vents you just pry out, looks like it is foggy. if you use regular acrylic clear on the fusion paint it will either make it crack or not adhere to it hence that glazed look i suggest you redo it and either use no clear at all or make sure to buy the fusion clear
really?
what if theres a layer of normal Krylon paint on top of the fusion?
Also the glovebox is the thing that looks most glazed cause I tried to use satin clear on it and i messed up.. although i used that on the door armrests and those came out perfect. But with the glove box, radio bezel, and shifter bezel I didn't use Fusion cause though I actually sanded and prepped
You need to go to walmart. Get some rubbing compound in a green tub made by turtle wax and rub the shit out of all of what you just painted. The overspray isnt to appealing BUT good job!

damn that wheel gap reminds me of my ex 99 galant! hope u lower it soon!! and nice picz by the way!
actually in that pic the wheel gap is kind of exaggerated cause I parked on a slope with that fender facing uphill and its slanting diagonally across the car. I dunno about lowering anytime soon as I don't feel like droppin $500 right now (possibly saving for a 5 speed swap ;-))
just washed a couple days ago and a couple birds decided they wanted to bomb my car so :(
but here's a pic after the wash:
and here's a some-what teaser of my plans for the G this summer:

You dont have to take the vents out to paint them, I just spray painted them in the car. Did the same for the upper dash also.
oh yea forgot to say,
a 6g72 isn't going on that stand :twisted:
 Posting Rules


Bookmarks