How To Swap a 6G74 into an 8th Generation Mitsubishi Galant
By: Adrian Doan
COMPLETE (except axle section)
For a more legible tutorial, please visit the original source of the tutorial: Galant Tuners
http://galanttuners.com/kb.php?a=41
Sources:
Club3G's How To: http://www.club3g.com/forum/performa...74-engine.html
General Info: http://www.socal3g.com/forums/showthread.php?t=11494
Kevin's Swap: http://www.socal3g.com/forums/showthread.php?t=11548
My Swap Threads: https://www.thegalantcenter.org/showthread.php?t=28559, http://www.socal3g.com/forums/showthread.php?t=15001
Also thanks to: Boostzealot, WarmandSCSI, M-Rod, SPD_FRK, and anyone else that helped me w/ any questions I had
First things first, parts you will need:
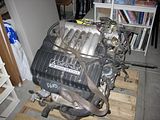
Complete 6G74 from a Mitsubishi Diamante (1997-2004)
- entire long block
- Intake manifolds (the 6G72 plenum will be much more restrictive)
- 6G74 exhaust manifolds (will bolt right up to the Galant's Y-pipe)
- corresponding belts for the 6G74
- Diamante OR Galant I4 (4g64) oil filter
- Power steering bracket (not too sure on this.. I deleted power steering so I don't know which needs to be used)
- 6G74 Alternator bracket
New gaskets for whatever you remove - ie if you remove a part and are planning to put it back on, plan on getting a new gasket for it
Washers (I think M14 - for the axle bracket)
Tools:
Sockets: 10mm - 18mm, 24mm socket, 32 mm socket
Wratchets
Wratchet Extensions
Breaker Bar
Car Jack
Jack Stands
Engine Hoist
Rubber Mallet
Oil Pan(s)
Lock-Tite
Lots of Rags
Masking tape for labels
Some random information:
The 6G74 swap is a DIRECT swap. I HIGHLY recommend buying a Haynes Repair Manual for the Galant (if you're not really a pro). It gives you a full step-by-step procedure for removing the engine from the car. Since this is a direct swap, you just follow the reverse steps with the new 6G74. All electrical components match up, with the exception of the IAC if using the 6G74 throttle body (in that instance, the 6G72 IAC pigtail needs to be cut off, and the 6G74 pigtail needs to be attached). If you are not planning on tuning the car, you MUST use the 6G72 injectors. If you use the 6G74 injectors, you will run super rich which is no good. You do NOT need to discharge the AC!!!! you can leave all the hoses attached. Just detach the AC condenser from the engine block. Since the engine is out of the car, might as well change the timing belt, water pump, tensioner and idler pulleys. When changing the timing belt, replace everything that you normally would during a routine timing belt change (hydraulic tensioner, pulley, etc.)
NOTE: On the V6 trim of the Galant, the intermediated shaft (passenger side inner shaft that connects to the transmission, does not have any CV joints) mounts to the engine block view two screws. The 6G74 also has means to attach the bracket to the engine, HOWEVER, the mounting surface is stepped instead of being flat. In order for the axles to fit correctly and prevent oil from leaking from the output shaft seals on the transaxle, you need to grind down the surface to make it level. This is important because there is an alignment pin pressed into the block that aligns the axle bracket into the correct position. FAIL TO DO THIS AND YOU WILL SHEAR OFF THE SCREWS THAT HOLD THE BRACKET TO THE ENGINE. Trust me, it happened to me and luckily I was able to get back home and fix it.
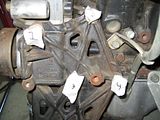
Keep all your bolts and parts organized!!! Ziploc bags help a lot. Make sure to label the Ziploc bag according to what part it goes to, then throw all the necessary bolts in that bag. In cases where certain bolt lengths go in certain places, try putting a piece of masking tape on the head of the bolt, numbering the bolts, taking a picture or taking note of placement, then throwing them in the Ziploc bag with the numbers still on the heads.
For the alternator, you need to use the 6G74 alternator bracket, but you have to shave down a little bit of the alternator in order for it to slide onto the bracket.
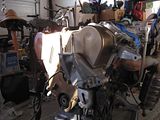
This is the 6G74, and the silver/grey thing near the dipstick tube is the upper alternator bracket. The bottom alternator mount hole is on part of the engine mount. I had to shave down the part of the alternator that would slide over this section as it was too tight (it was only thousands of thousands of millimeters though. The alternator was just too snug before)
Either the 6G74 OR the 6G72 AC bracket will work. Club3G states that the AC does not mount to the 74's AC bracket, but this is incorrect (at least on my 2002 6G74). Obviously, don't go throwing away the 6G72 bracket just in case the 6G74's bracket doesn't fit with the compressor. I, however, just used the 6G74 bracket as it was less covered in gunk. UPDATE 7/26/10: The 6G74 has different AC brackets for different years. It looks like the 97-98 Diamante has a different AC Compressor, so you will need the 6G72's AC bracket to fit the Galant compressor. For the 99+, the compressor should be the same. Thank you Jmath for this update
In order to use the stock 6G72 air intake piping on the 6G74 throttle body, you have to remove a lot of material on the inside of the piping that slides over the TB. I found that a Dremel and sanding bit helped me achieve this pretty quickly. The stock piping also has a resonator box that will hit the brake fluid reservoir. You will need to cut off this box and seal up the gaping hole some how. I would recommend just buying an aftermarket intake that is CARB certified if you are worried about passing SMOG. They can be found for cheap here: http://www.nopi.com/dsp_partsvencar....pc=948&vv=3150
Okay now lets get started:
I like to break down the removal process into the key steps. I may not go into extreme detail for every main step, but things should be pretty self explanatory once you get down and dirty and actually take a look at what you're working on. Bolt sizes and bolts that need to be removed are pretty obvious.
1) Easy Schmeazy
Pull your 8G Galant or 3G eclipse into your area that you're going to work. Open your hood, and find the fuse for the fuel pump. Pull that out, and then relieve the fuel pressure in the lines by attempting to start the car several times. Keep in mind that not all the fuel will have been relieved from the lines - only the pressure - so when dealing with the fuel lines, wear some protective gloves. Remove the hood. You're probably going to need two people. There are two 12mm bolts on each side of the hood. While you're removing the bolts on your side of the hood, keep the hood supported. Make sure your parking break is engaged, and put wheel chocks behind the rear wheels. Lift up the front end of the car and support it with jacks. Remove the wheels.
2) Drain Fluids
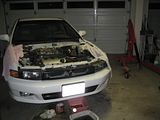
Drain the engine, radiator and transmission. The radiator drain plug is near the passenger side of the radiator, and the transmission drain plug is on the driver's side, behind the plastic inner fender liner. I would suggest removing the plastic liners for more room. They're held in by 12mm bolts that are bolted to the underside of the frame rails.
3) Label, Label, and Label Some More
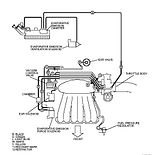
Remove your battery, then intake, then battery tray. Start labeling EVERYTHING. Although most electrical connectors are different and have different color plugs, some are similar, but must be connected to the right plug. I would label things by main section. For example, if I were working with the pigtails on the throttle body, I would label the first set of connects TB-1, then the next TB-2, and so forth. Label both sides of the connectors, so that when you pull the 6G72 out, you can compare the connectors to those on the 6G74 in similar locations. Label all necessary coolant lines, fuel lines, etc. Label the vacuum lines, both on the 6G72 AND on the car. You will need to know which vacuum line goes to what part of the car. Here is a 6G72 vacuum diagram. Do the 6G74 vacuum lines exactly the same. When reattaching all the vacuum lines later, if you have an extra vacuum nipple anywhere on the 6G74 plenum, plug it (not permanently).
4) Removal - Nervous System, Veins, and Lungs
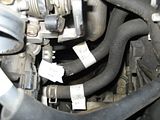
Detach your upper and lower radiator hoses, and the transmission cooler hoses. Remove the radiator by removing the two radiator brackets (2 x 12mm bolts for each), disconnect the pigtail for the fan, then lift the radiator up and out. Make sure not to lose the rubber/plastic bottom cushions/mounts. Remove the coolant overflow resevoir.Remove the coolant hoses that lead to the heater core in the firewall. Be careful as coolant WILL spill out of these. (Small step, but the hoses were extremely hard to remove for me and took 20x as long as I expected)
Loosen the tension in the power steering belt and the AC + Alternator belt. Remove the belts.
Double check that EVERYTHING is labeled, then start unplugging EVERYTHING that is attached to both the car an the engine +transmission and would prevent the entire assembly from being removed. Some are electrical sensors, coolant hoses, vacuum lines, etc. are hard to reach, but too bad, no pain = no gain.
This is includes:
Remove the shfit cables from the transmission. Disconnect the fuel lines from the fuel rails. Unplug ALL electrical wiring that will go back to the ECU; push them out of the way. Remove power steering pump. Remove the alternator. Disconnect the AC condenser from the mount bracket, then remove the AC bracket for more room. Disconnect the throttle cable from the Throttle Body and set aside. Remove the upper intake manifold with the throttle body.
5) Axles
Remove axles from the transmission. The passenger side intermediate axle shaft is held to the engine block by a bracket. Unbolt this bracket. I will elaborate on removing the axles later, but watch out as transmission fluid will flow out after you remove the axles.
6) Time to get a Workout
Unbolt the two downpipes from the bottom exhaust pipe, and drop the bottom down and out of the way. Don't let it drop too far, as you don't want to ruin the flex pipe, but just far enough away so it doesn't get in the way. I had mine sitting on top of a box of snow chains.
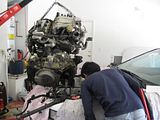
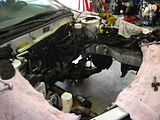
And now the only thing holding in your engine and transmission are the mounts. Support the engine with the engine hoist, and unbolt the mounts from the chassis in this order: Rear, Front, Driver Side, Passenger side. For the removal of the whole assembly, I would recommend using an engine load stabilizer to tilt the engine. Personally, I didn't use one and got the whole thing out with some good maneuvering, but it was hard to put back in without the load stabilizer. Just suck it up and buy one. I believe that have it at the Home Depot for $25. The Tutorial on Club3G says to tilt the assembly at a 60-75 degree angle. Mine was only tilted about 30 degrees and it made it out fine, but barely. The more you tilt, the more room you have. The crank pulley is going to want to hit the frame rail on the passenger side, and the transmission mount on the driver side isn't very friendly either (without the load stabilizer).
 ->
->  ->
-> 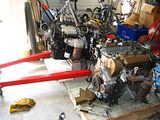
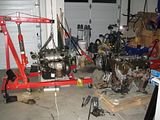
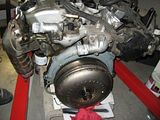
When removing the bolt from the front engine mount, remove the bolt first, then remove the lower subframe from the chassis. There are 4 bolts total holding it to the car: 2 in front, and 2 just behind the firewall. Now remove the entire assembly. GO SLOW and make sure that nothing is snagging and that there is nothing still attached. Set the assembly down on a stable surface, like the ground, but make sure not to dent anything or break anything. Pad the surface if you want. I set my entire assembly down on a set of bricks so that I could reach the flex plate-to-torque converter bolts. It also made it easier to remove the lower transmission bolts.
 ->
->  ->
->  ->
-> 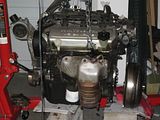
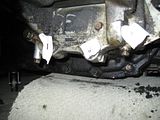
Remove the starter. Unbolt the transmission bolts, and remember where each one goes because they are different lengths. Pull the transmission away from the engine. Underneath the engine, remove the little plate that covers the bolts to the torque converter (you can see it in the first picture above. It is held in by two 10mm bolts and is above between bolt #1 and 2). Now rotate the crank clockwise looking at the engine from the passenger side (never rotate counter clockwise) until you see a torque converter bolt. Remove the bolt. Rotate the crank clockwise until you see the next bolt, and remove. There are 4 bolts total.
And congratulations, you are officially done with the disassemble section.
Oh no, I have to put everything back??
7) Engine + Transmission
Move your old 6g72 out of the way, and put the 6G74 where the old engine sat. Make sure the Starter Locator plate is on the 6G74. If yours didn't come with one, use the one off the 6G72, they're exactly the same. IF YOU ARE 5-SPEED THEN YOU MUST USE THE MANUAL SLP. Now attach the torque converter in the opposite manner that you removed it, but like I said earlier.. ONLY ROTATE THE CRANK CLOCKWISE. Reattach the little cover plate. Now attach the transmission. This can be a little tough. Don't use the bolts as a means of forcing the engine and transmission together. Make sure the torque converter slides properly onto the input shaft of the transmission, and once everything is lined up, bolt the two together. Now reattach your starter. Also, switch over anything that will be necessary to put the 6G74 into the car (for example: motor mounts)
8) Beauty Meets the Beast
Now go ahead and attach your 6G74 to the engine hoist chains, and make sure everything is secure. Leave off the upper intake manifold, and put towels on your valve cover near the chains if you don't want them getting scratched. Bring the entire assembly over to the car and lower them back in at the same angle that you took out the 6G72 + transmission. Like I said earlier, the larger the angle, the better. I had a lot of problems with the transmission mount. Truth be told I should have unbolt the mount from the transmission, lowered in the entire assembly low enough for me to bolt the transmission mount onto the transmission underneath the frame rails, and then raised the entire assembly back up. It will take some finesse, but all the mounts will line up perfectly.
Bolt the entire assembly back onto the chassis. Do not remove the support from the engine hoist until all motor mounts are securely bolted and torqued to spec.
9) I Can Smell the Finish...
Start reattaching EVERYTHING that you detached in reverse order. Other tutorials tell you that you need to extend the wiring for the sensor on the top of the intake manifold. If you want a clean look, go ahead and extend the wires. If you don't mind having a wire run blatantly across the manifold, then you can just snip away some of the wiring loom to allow for more distance. One wire you DO need to extend is the wiring for the oil pressure sensor. No biggie.
You can use the 6G74 valve covers or the 6G72 valve covers, whichever you like better. They are identical in bolt pattern/overall shape.
If you are a CALI spec Galant and you use the 6G74 manifolds+cats, then they will bolt up directly to the Galant's exhaust. If you are a FED spec Galant, then they won't match up (according to Club3G).
When putting the axles back on, look at the axle bracket on the 6G74. The bracket mounting points are not level. To fix this you can either: Use washers to make the surface "level" or grind down the side of the mounting point that is too high. I think washers would be 100x easier than grinding.
UPDATE 7/26/10: I have been told that the washer method leads to transmission fluid leaking from the passenger side output. The safest bet is to grind down the block while it's out of the car. Personally, I have not had a problem with my M/T leaking, but its better to be safe than sorry.
Make sure the 6G74 is drained of any leftover oil, and then refill all fluids in the car.
10) Wake Up the Beast
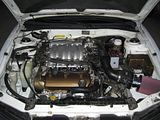
Once you've put EVERYTHING back (double, triple, quadruple check everything) and you've filled it with all your fluids, start her up and listen to her purrrr (well not so much.. It'll be really loud and obnoxious for a little bit while the oil starts lubricating the engine again)
->
->
->
->
->

Bookmarks